

Making the most of a small shop – PART 4
I’d assume, by now, anyone reading this would be aware of my efforts to maximize the efficiency of my small 3x6m(10x20ft) workshop by building my version of the ultimate All-In-One Woodworking Station. One workstation for all my most used equipment.
By the end of PART 3, I had my Table saw and Miter saw, the two most important pieces of equipment in my shop, installed to the workstation.
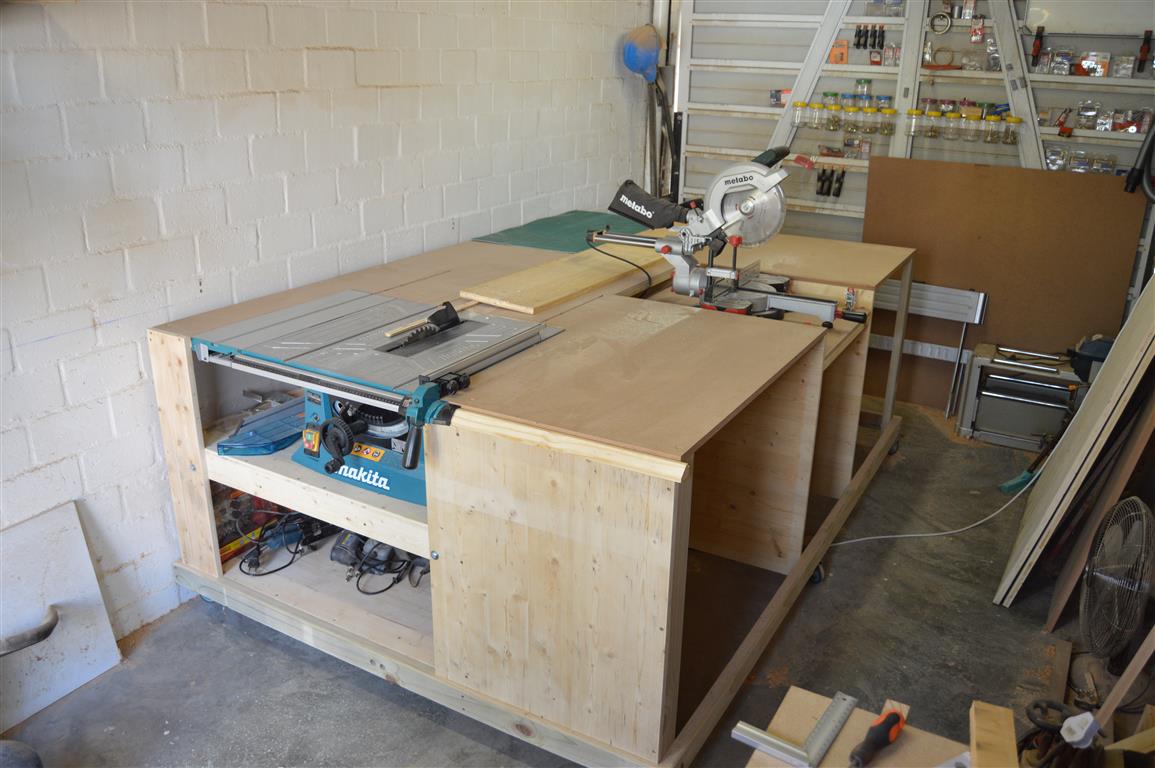
Completed bench:
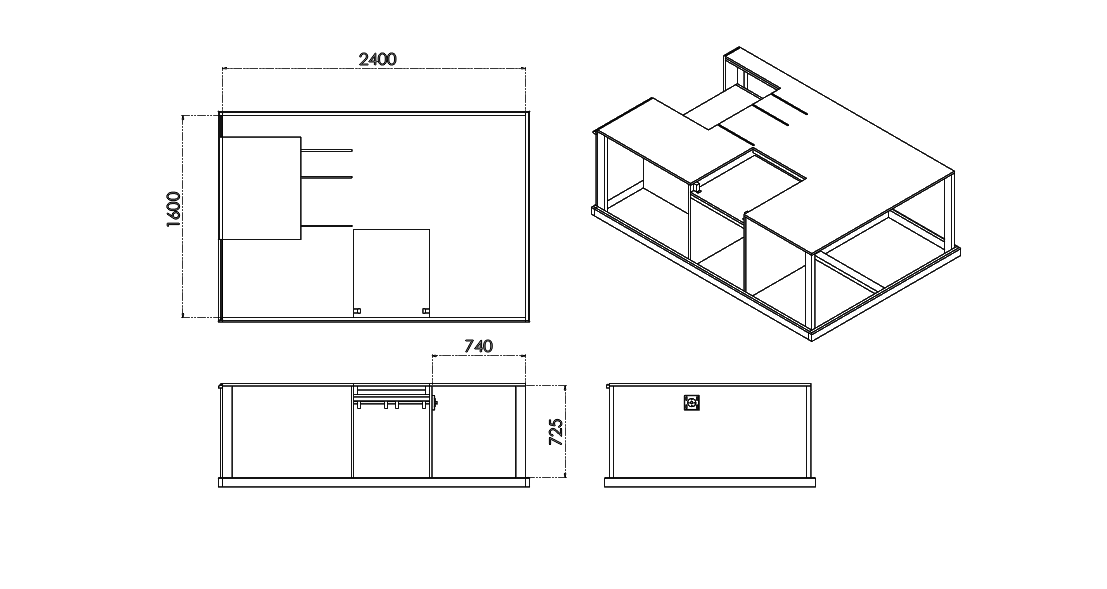
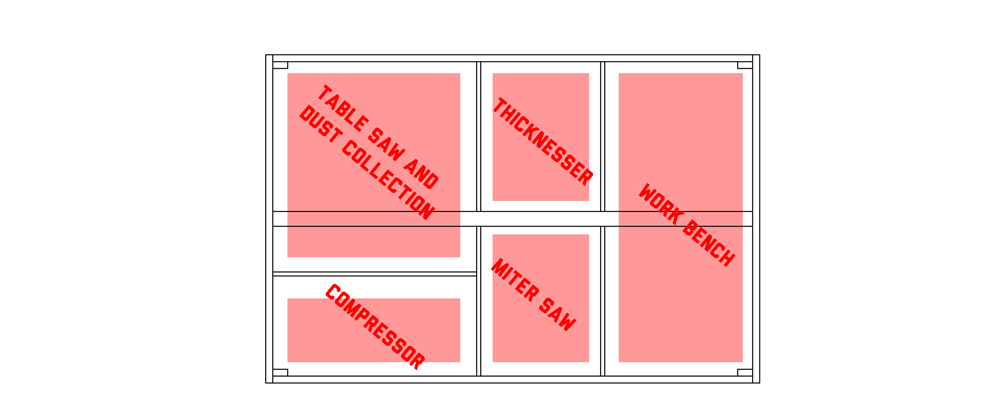
- PART 1 – Frame and top
- PART 2 – Table saw
- PART 3 – Miter saw
- PART 4 – Workbench area
- PART 5 – Compressor
- PART 6 – Thickness planer
- PART 7 – Dust collection
- PART 8 – Router table
>>>GET FULL PLAN<<<
With the bench taking up pretty much all the space in my shop all my other hand tools and power tools were spread out over the floor with no place to store them.
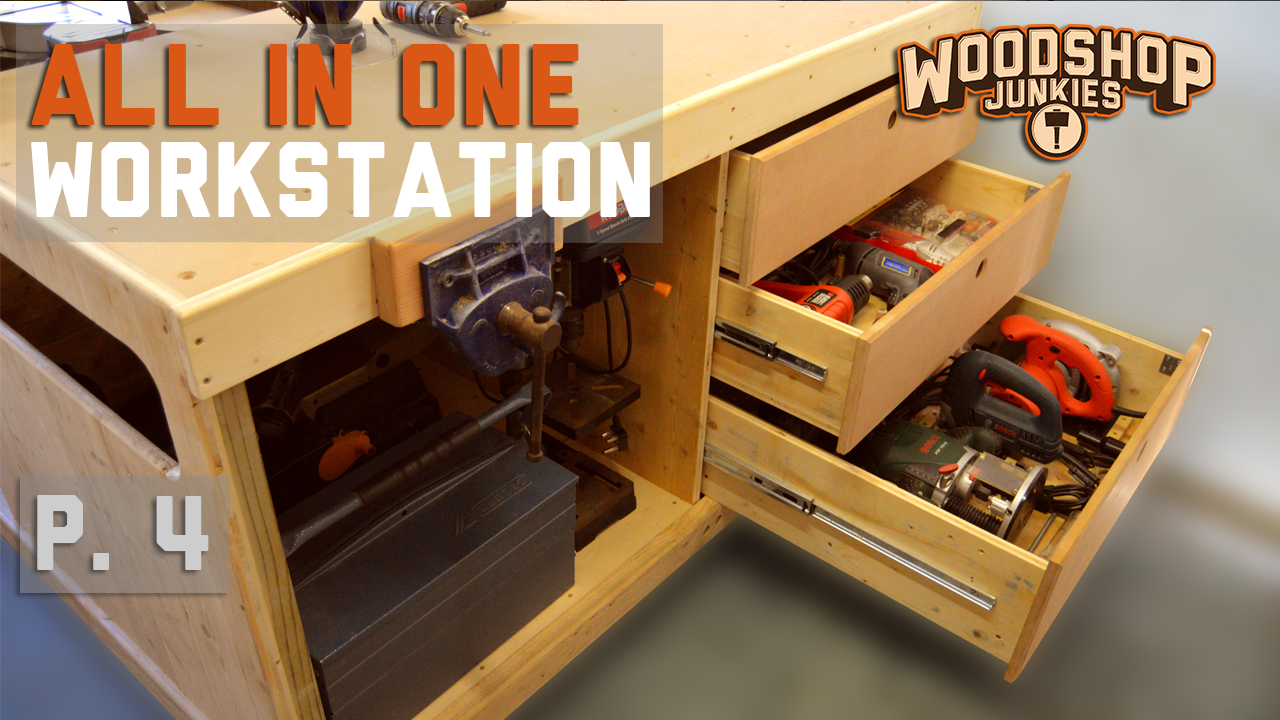
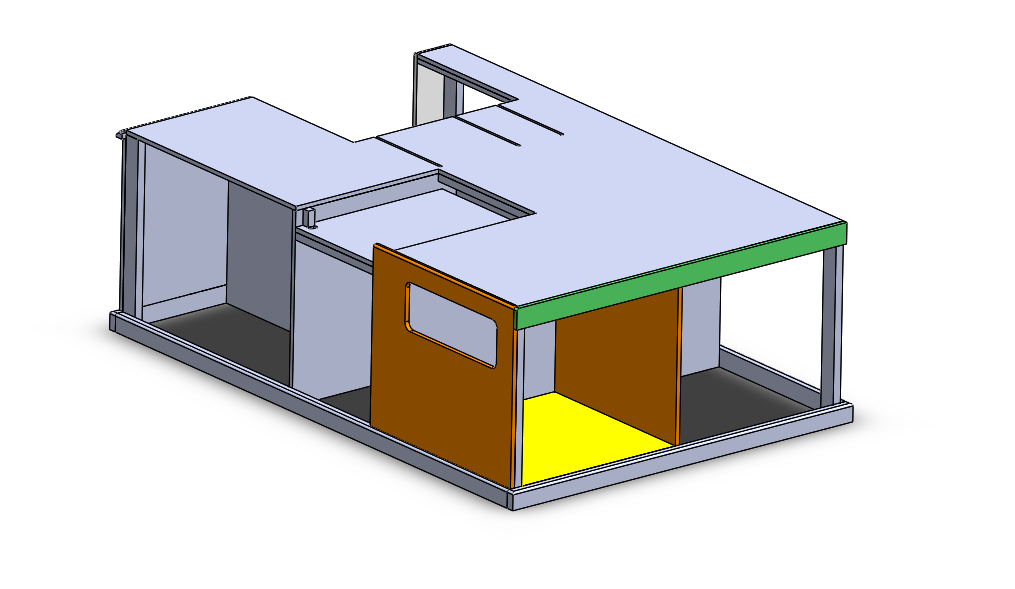
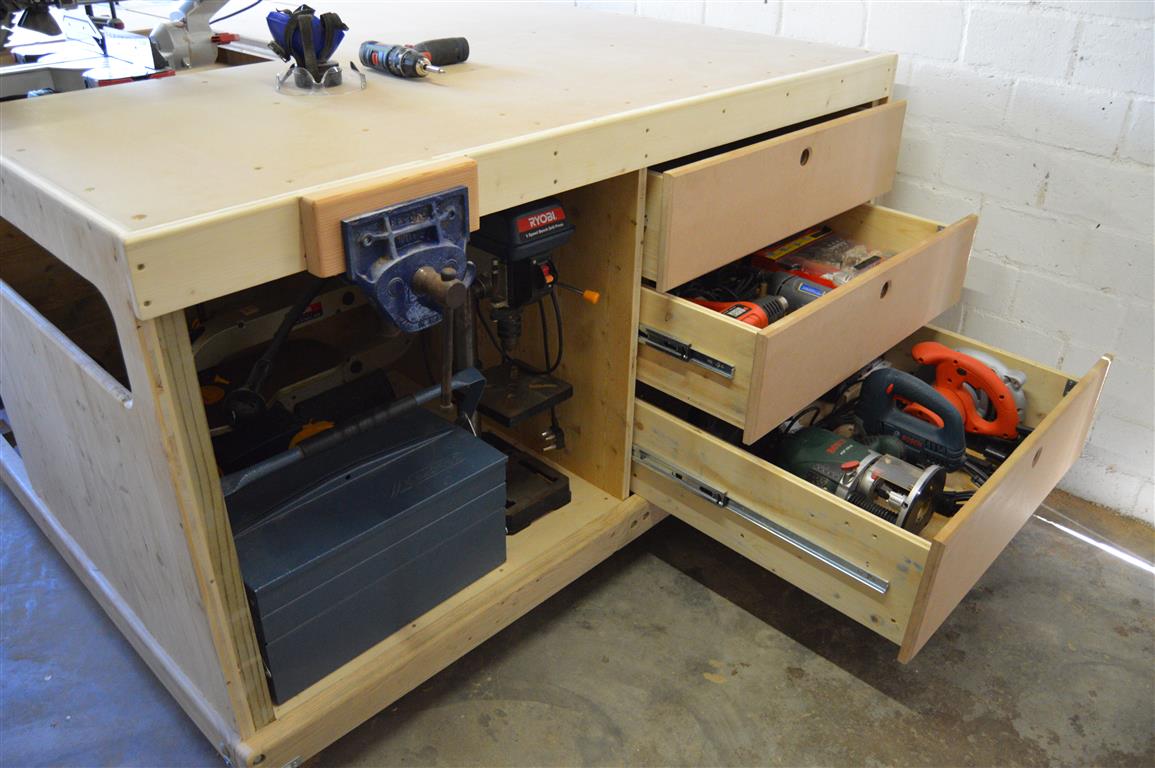
Workbench with power tools storage
I figured, before I add more equipment to the workstation, I would build a workbench extension with some power tool storage.
I wanted the power tools sorted and stored in easy access drawers, with each tool housed in its own designated spot.
I also wanted a larger open storage area to keep larger items like my bench drill and my scroll saw.
In the case of the workbench, I wanted to stiffen up the bench top with some bracing and add a vice for increased functionality.
PART 4: Workbench with tools storage
The instructions that follow are intended to be considered along with the visual instruction provided by the video above.
Step 1: Top Bracing
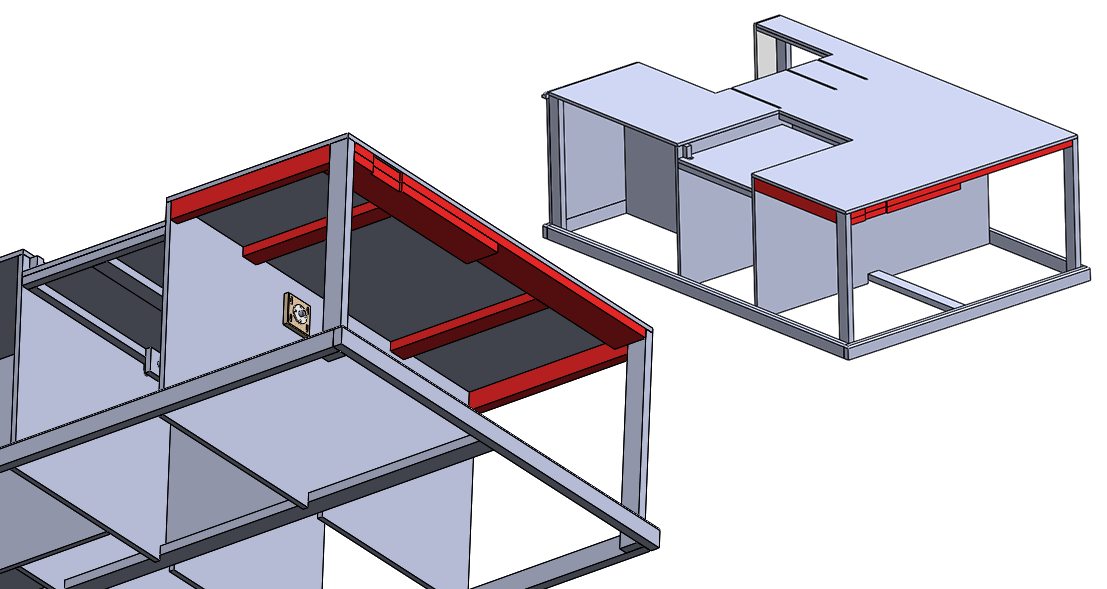
I added additional bracing to the area that was to become my workbench. The point of which was to stiffen up the 18mm MDF top and give me a solid framework that will be used to attach my vice to the bench.
The majority of the bracing was added using 35x75mm(1.37×2.95″) construction pine (the same dimension lumber that was used for the corner posts and the base frame).
For the long cross-sectional piece, however, I used lumber sized to 130x35mm(5.11×1.37″). This was done to accommodate the wide foot piece of the vice mounting bracket. I also doubled up the planks on the left side of the cross brace (where the vice would be installed) to prevent the jaws from protruding above the bench top.
Notice the cut-out made on the bracing in the above drawing. Installing my Record vice inside this cut-out allowed me to fit a trim piece the entire width of the bench that conceals the bracing but also acts as the inner jaw of the vice. This will be explained in Step 3.
Step 2: Partitioning and Paneling
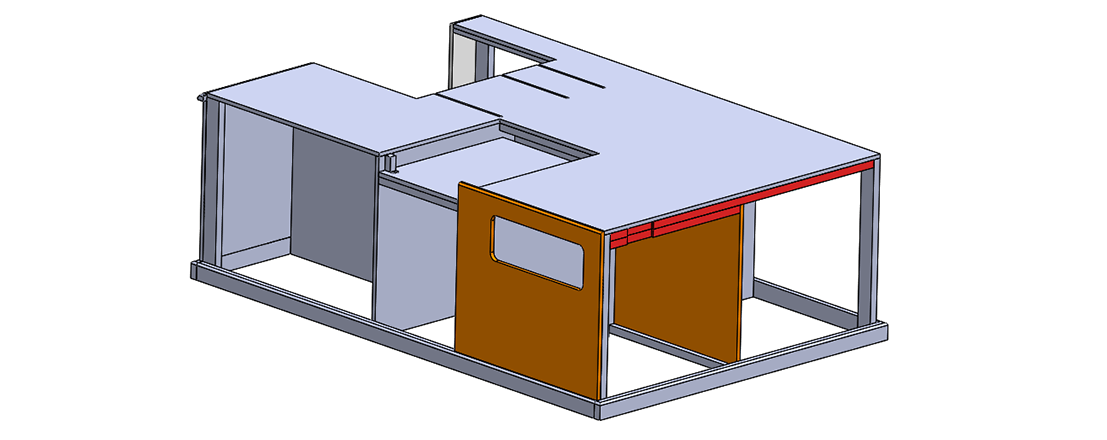
In this step, the left side panel and the center divider was added.
The left side panel had an opening cut in it that would allow the use of clamps when it is necessary to secure a workpiece to the bench top.
The opening was cut low enough from the top of the panel to allow the panel to conceal the bracing underneath the bench top.
The panel was also slightly wider than the side of the workbench area allowing it to reach 100mm(3.93″) into the miter saw cavity. The extra piece was to cover the toggle latch on the miter saw bed (installed in PART 3).
The center divider that separates the open cavity storage on the right from the drawers on the left had a cut-out made in one of its top corners to allow it to fit over the long cross brace.
It was then installed in the exact center of the workbench.
Step 3: Base Installed
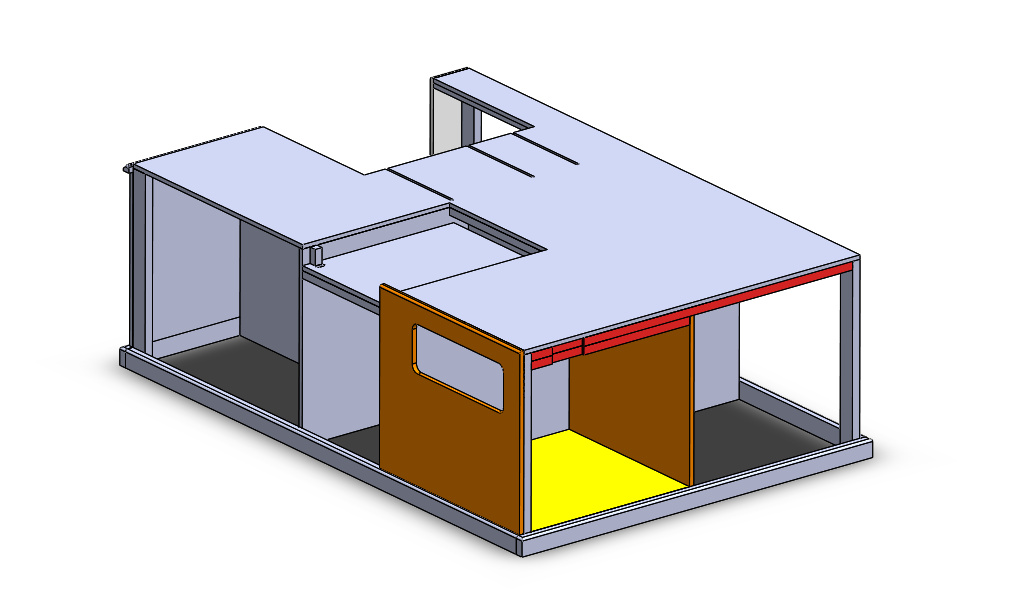
At this point, I could install the base for the open cavity storage area.
It was done in a similar way as in the previous parts of this build, by simply installing supports on the inside of the panels enclosing the area and fixing the base on top of them.
Step 3: Trim
With the vice in place, the trim piece was installed. Concealing the unsightly bracing and completing the open cavity storage area.
Step 4: Right Side Panel and Drawer Runners
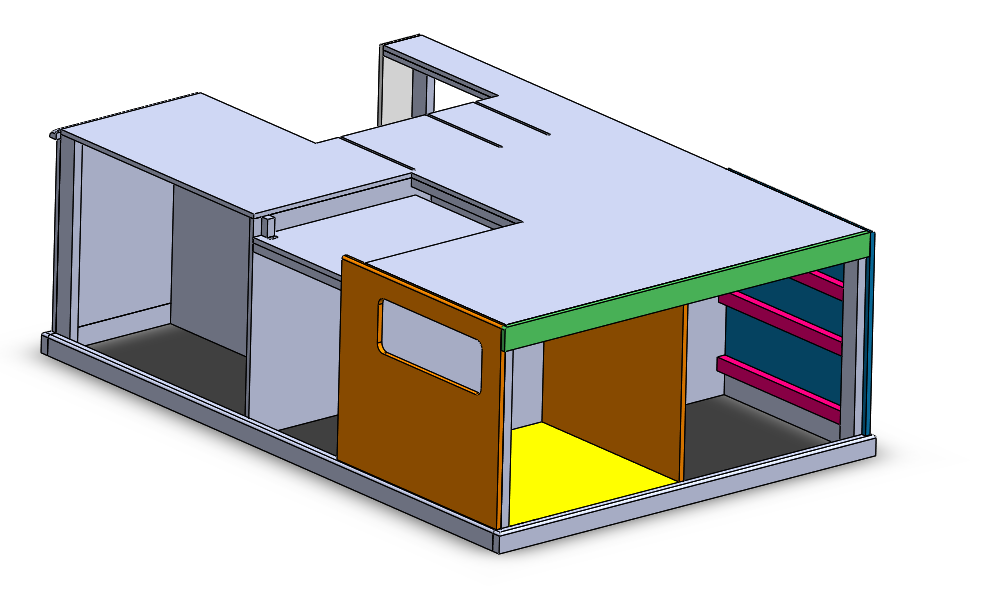
It was now time to get started on the drawer storage area.
Before installing the drawers, the right side panel was added in a similar way as the left side panel (without a hole for clamp access).
On the inside of this panel, spacers were installed on top of which the drawer runner was mounted. These spacers were the same width as the bench corner post, allowing the drawer runner to pass by the corner post when the drawer is opened.
The runners for the opposite side of the drawer can simply be mounted on top of the divider panel as there was nothing restricting the runner from functioning correctly.
Step 5: Drawers
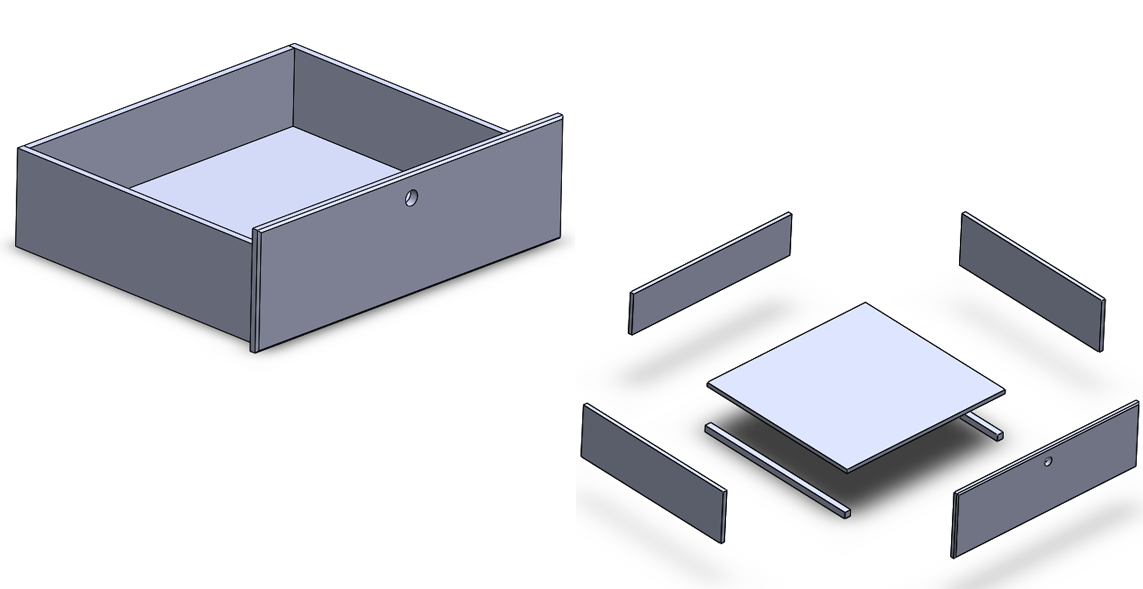
I decided to add 3 drawers with one deeper than the other two to allow me to store some of my bulkier power tools.
Power tools like my circular saw, jigsaw, belt sander, router, and electric planer would be placed in this drawer.
The other two drawers were made to be the same size and would be used to store some of the other pieces of equipment laying around my shop.
The assembly of the drawers was not overly complicated as they were made by simply screwing plywood panels together with the deeper drawer having a 250mm high drawer face and the others, a 200mm high face.
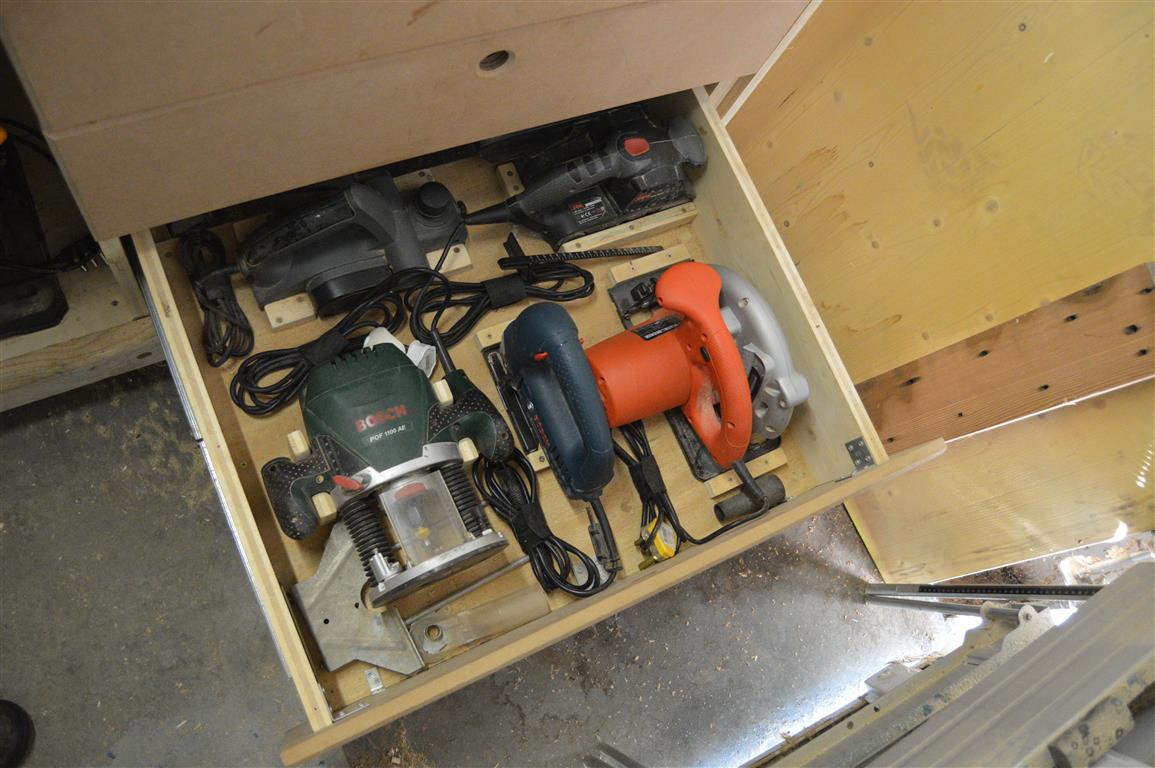
After installing the drawers to the bench, wooden blocks were installed to act as cradles and stoppers keeping each tool in place.
In addition to this, velcro strips were used to keep coiled power cords secured.

Part 4 Finished!
With my workbench area added to my All-In-One Woodworking Workstation, I once again had a space to work and assemble my projects.
Projects like PART 5 of this build that should be out shortly.
Hello There, Thanks for sharing this post about very essential Tool Storage, It’s really useful & Important for us. I really appreciate your dedication on this post, keep posting
ES REALMENTE EXCELENTE TU TRABAJO .. MUY BUENO !!!!!
Thanks Jose. Glad you like it.
Dude….how much would you charge me to build an entire all-in-1 like this but dimensioned to the tools I have? I’ll give you the dimensions, you design it and tell me what I need to buy 🙂
That drill seemed to be struggling in your vid. And do you think that just one slide on each drawer side is sufficient? Yikes.
I’m flattered Chris but you do know I’m in South Africa right?
The rails have managed fine actually. I haven’t had problems but if I ever do I would replace. Those rails are available in different load capacity but unfortunately, when I was building my bench I couldn’t make it to a supplier so I had to use the ones on sale at my local hardware store.
The drill is a bit of a pain but as I am moving to a new show soon I am considering removing the compressor and adding a more comfortable mount for the drill.
Aw come on!!! 🙂 My wife and I just bought our very first house, and I’m turning the garage into a workshop for wood/bikes/cars/etc. I came across your YT vids for this all-in-one wheeled station…..it’s genius. Exactly what I want to build. Not having any woodworking background, thought I could pay you for design/consultation 🙂
I will have a DeWalt table saw, miter saw, and planer. I do have a California Air Tools 3-4gal compressor, but since I use that for various things I won’t put it inside like you did. But I do have the DeWalt power battery station. But getting the compressor and my pressure washer inside a cabinet would be a good storage place…..I’m just trying to design the all-in-one right now. Your vids are huge inspiration, great work.
How is it holding up? Is there anything you did that you really wish you could change?
There are one or two things I have thought about changing and I probably will soon after I have moved.
I have asked a friend with an engineering background to re-draw all my plans that I am considering making available to people for a small price. These plans we are hoping to make available by the end of next month (Feb 2019).
I will announce on YT when they go up and how people can get them.
I’m anxiously awaiting your revised plans. I have a couple questions for you if you don’t mind:
1. My Dewalt DW735 planer weighs like 85 or 90 pounds. Is that heavier than your planer? If so, do you think mine is too heavy to have it on a rotating piece like yours?
2. My table saw DCS7485 has a funky fence rail setup with a metal rail contraption. I don’t know how I can continue to utilize that but have the saw table sit flush with the rest of the worktop. I am assuming you just entirely did away with the Makita built-in fence, and built your own on to the edge of the whole worktop?
3. How tall is your station? I’m assuming a standard 4′ sheet of plywood?
My planer is a bit lighter at only 70 pounds. I do still believe you could mount yours on a rotating bed but I would advise using a thicker wall tubing.
The rack-and-pinion fence on those table saws are very nice and I would try my best to accommodate it on the bench. Maybe add slots in the worktop at the back and front of the saw to allow the fence to adjusted.
My bench was made to be roughly the height of my wrist when standing next to it. Unfortunately, I can’t comment as to standard sizing as in South Africa our standard sizes aren’t the same as the US.
I am working very hard on the revised plans and they are coming along nicely.
Hey Jean, how are those plans coming? Looking forward to this build! Will this be available in inches as well?
Hey Tim
The plans are pretty much done. There will be a metric and imperial version.
I am meeting with the person who is drawing the plans for me next week to go through them and if everything looks good I will start making it available soon thereafter.
Unfortunately, the plans won’t be free as I had to pay someone to re-draw them (I simply didn’t have the time) but it will be at a low price.
The plans consist of +/- 90 drawings made up of about 150 parts so it is very detailed.
I noticed that your drill press is not retractable like your miter saw and planer. Was there a reason for that?
It has been my intention for some time to upgrade to a larger drill. That is why I didn’t add the small one I have at the moment to the bench. I have something different in mind for the drill I will be buying…eventually.
What is that jig you have there to cut bevels? That really looks cool. Is there a video or a plan for that? I stumbled on your videos and I’m very impressed indeed. You have some very good ideas going there. Thanks for sharing!