


Making the most of a small shop – Part 2
Not too long ago I had an idea to build one woodworking workstation to accommodate all of my most used equipment. One place to store and use all my power tools in an effort to optimize my very small workspace.
After weeks of planning, I jumped in and assembled a rolling frame with an MDF top that gets explained in Part 1 of this bench build series.
With the skeleton of the bench sorted it was time to get my first piece of equipment installed so I could start using my workstation.
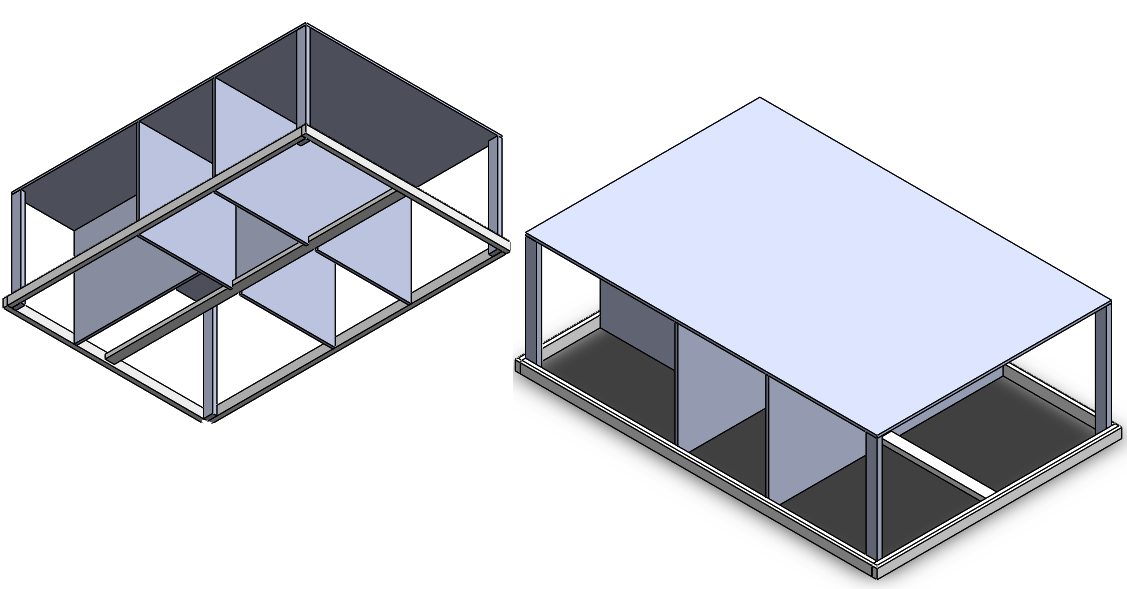
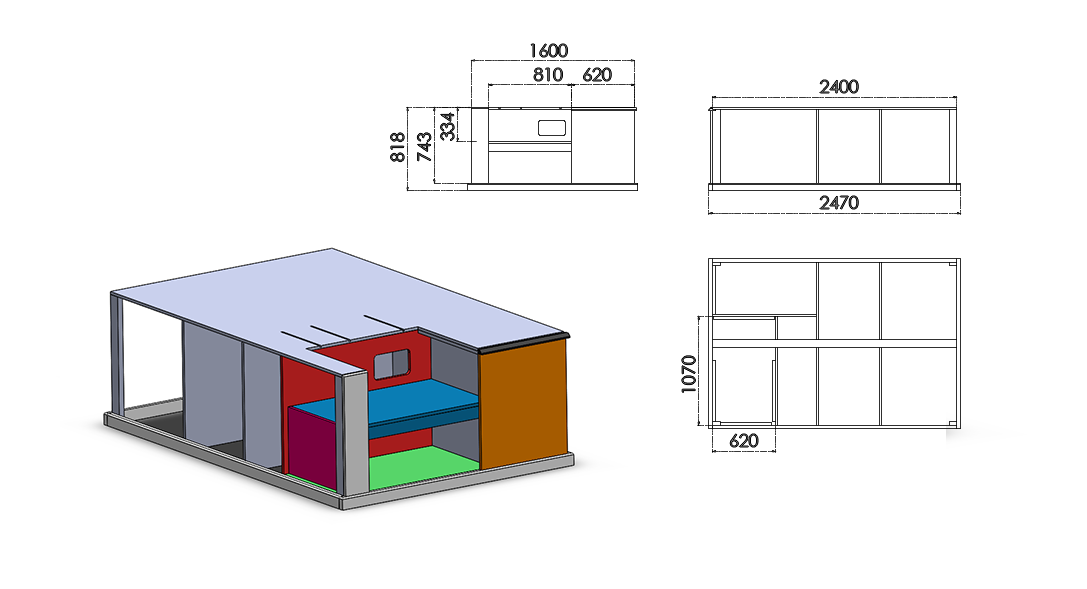
Completed bench:
- PART 1 – Frame and top
- PART 2 – Table saw
- PART 3 – Miter saw
- PART 4 – Workbench area
- PART 5 – Compressor
- PART 6 – Thickness planer
- PART 7 – Dust collector
- PART 8 – Router table
>>>GET COMPLETE PLAN<<<
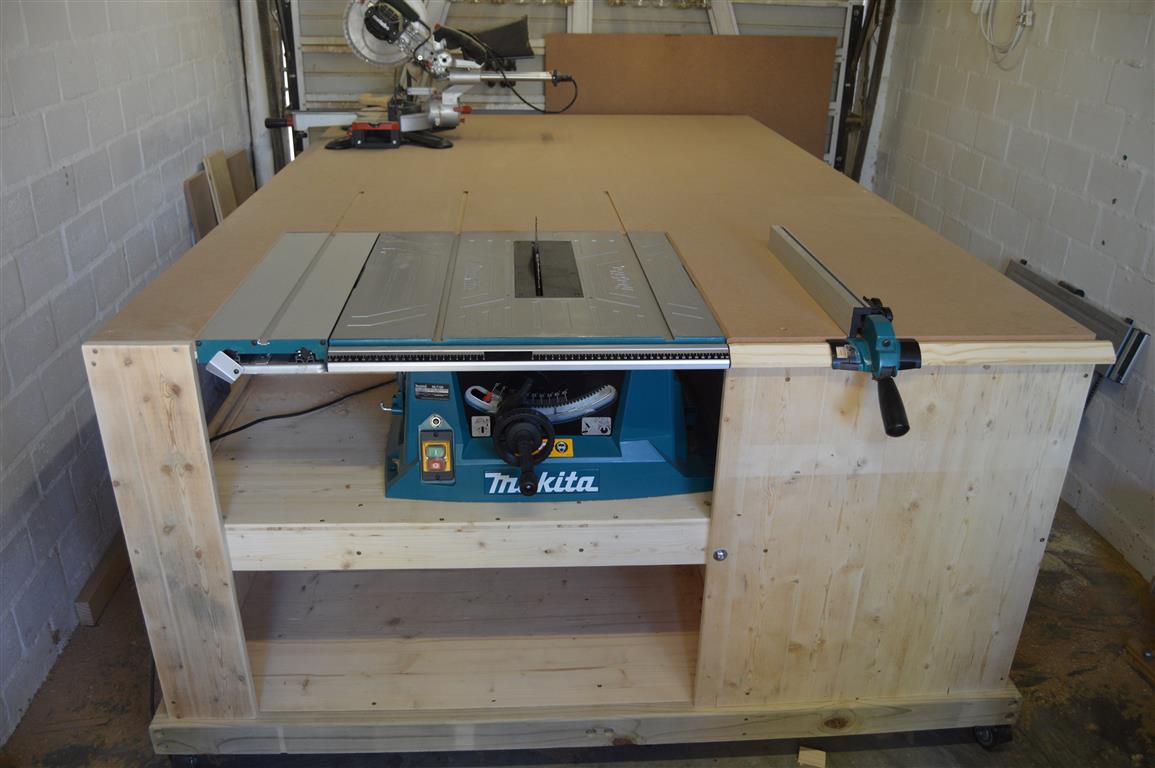
Table saw outfeed table
The cornerstone of my shop is my (Makita MLT 100) table saw so it only made sense that the table saw had to be the first tool that needed to be added to my All-In-One workstation.
I wanted to add my table saw on one of the narrow ends of the bench. Doing this would allow me to use the entire length of the 2.4m(7.8ft) bench as an outfeed table (minus the length of the table saw itself). It would also allow me to use the 1.6m(5.3ft) width of the bench to support any overhang when I needed to cut wider stock.
The only real obstacle I would need to overcome in doing this was to install the saw so that the bed of the table saw lined up perfectly flush with the top of the workbench.
Note: Because not all table saws have the same dimensions, this post will focus more on how I went about installing my table saw without too much emphasis on the exact dimensions.
PART 2: Table saw outfeed table
The instructions that follow are intended to be considered along with the visual instruction provided by the above video.
Step 1: Table saw backboard
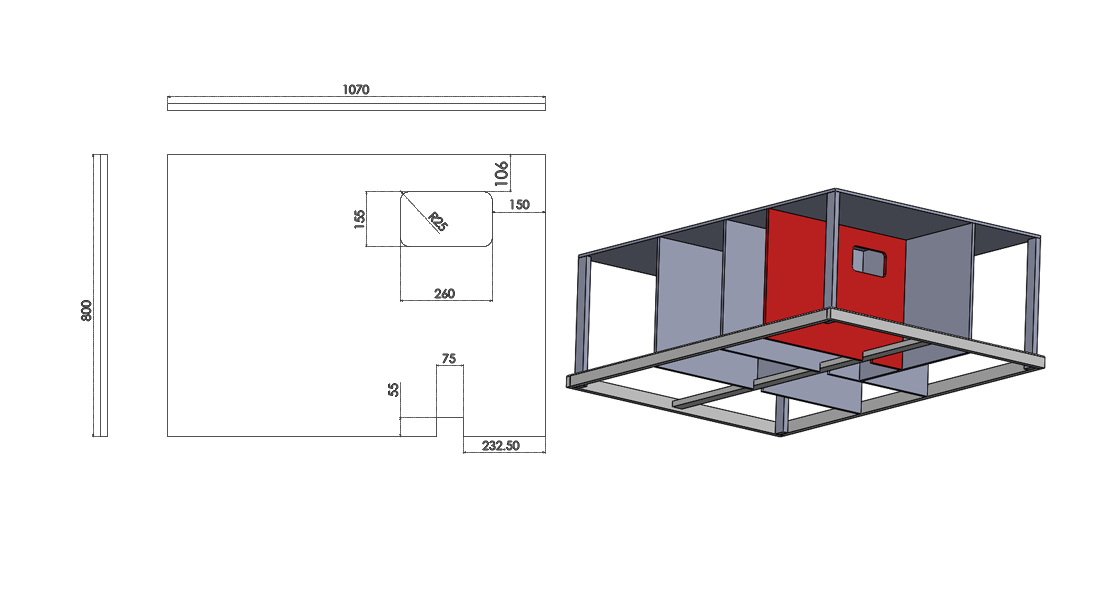
The first step in adding my table saw to the workstation was to install paneling that would box in the area where the saw would be placed. This was important as the base on top of which the table saw would stand was going to be fixed to these panels.
The first of these panels would be the back panel (as shown above) that was installed at a depth equal to the length of the table saw bed. This meant that when the table saw would be installed the bed of the saw would sit against the back panel while the front of the saw bed would line up with the outer edge of the workstation.
Installing the table saw against the back panel meant I needed to remove a segment from the panel to accommodate the table saw exhaust. Doing this would allow me to connect a dust extractor to my table saw.
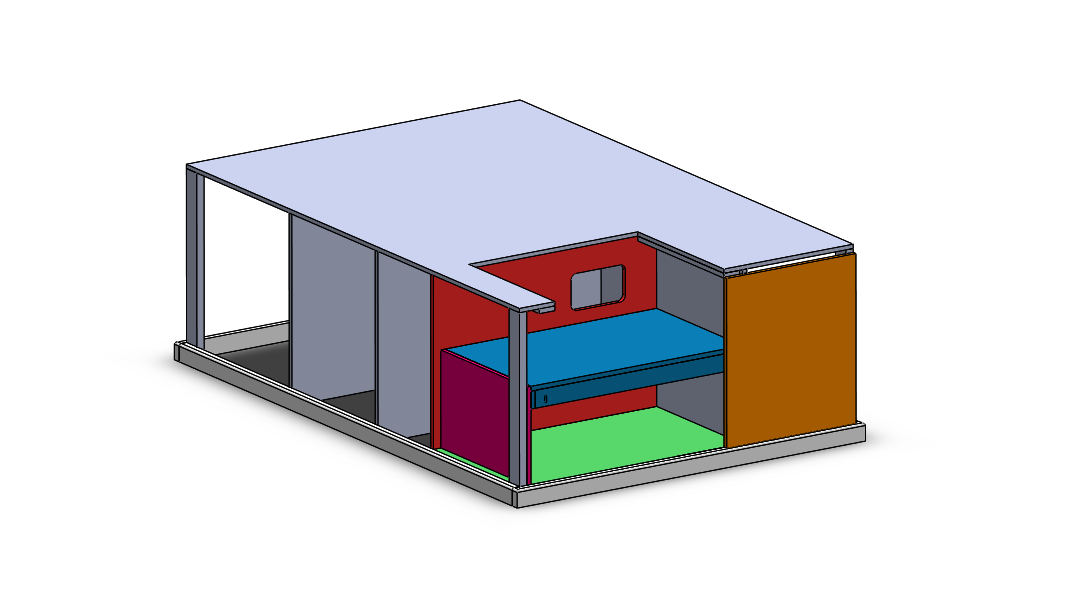
Step 2: Panelling

In this step, the remaining paneling was installed.
A base panel was fitted along with a panel to the left of where the table saw would eventually be installed.
The distance from the bench top to the top of the panel installed on the left was the exact height of the table saw.
The panel installed on the right did not have so much to do with the table saw installation but was added to increase the structural integrity of the assembly.
You will notice in the above image that the panel on the right was not installed to reach all the way to the top of the bench. This was done to accommodate a rail extension that would later be installed for the table saw fence rail.
However, because not all table saws have the same fence mechanism it is unlikely that the same provision would have needed to have been made for a different table saw. In such a case the panel would have been installed to be the same height as the bench.
Step 3: Table saw base

As I said earlier in the post, the hardest part of this segment of the build was to line up the table saw bed perfectly with the bench top. To do this I needed to get a little creative.
The base on which the table saw would stand was assembled and installed in a way that would allow small height adjustments. This was done by adding 20mm(1″) slots in the wall of the base (shown above). The base was then fixed to the paneling around it using bolts.
When installing the table saw, the base can be moved up and down slightly to line up the bed of the saw with the bench top. When the saw is aligned properly the base can be braced in position and the bolts tightened to fix the saw height in place. This would be done in the next step.
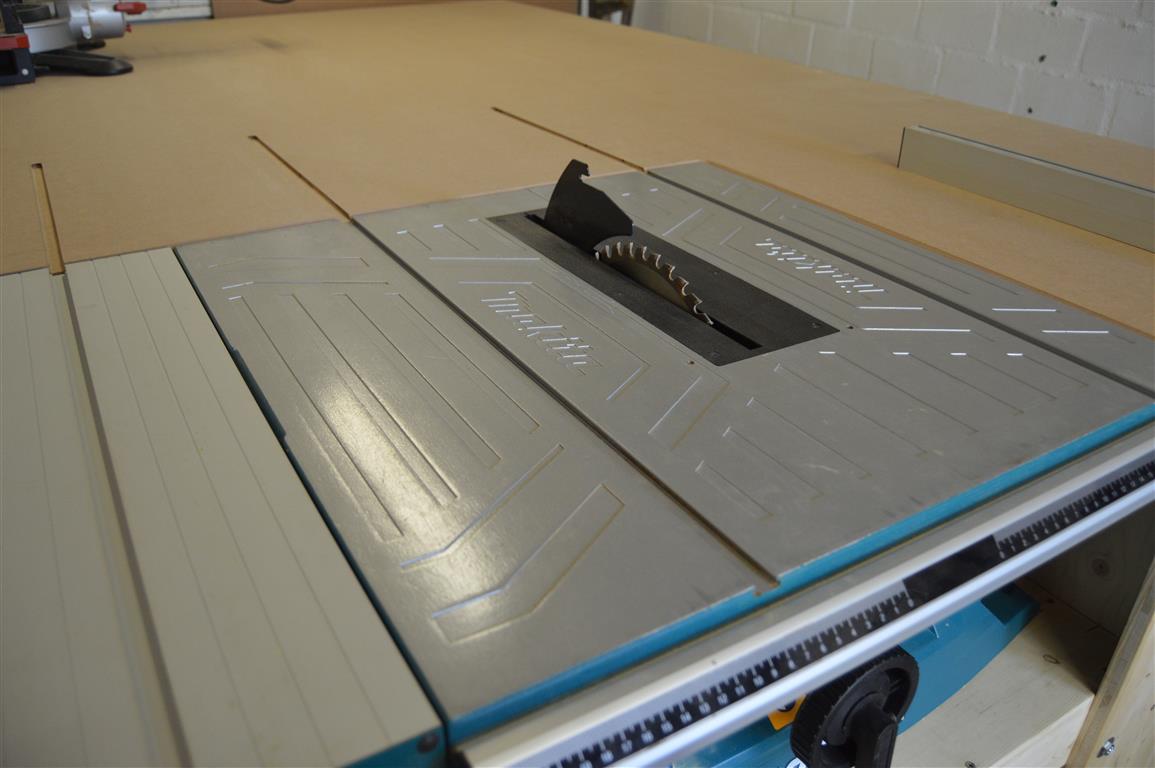
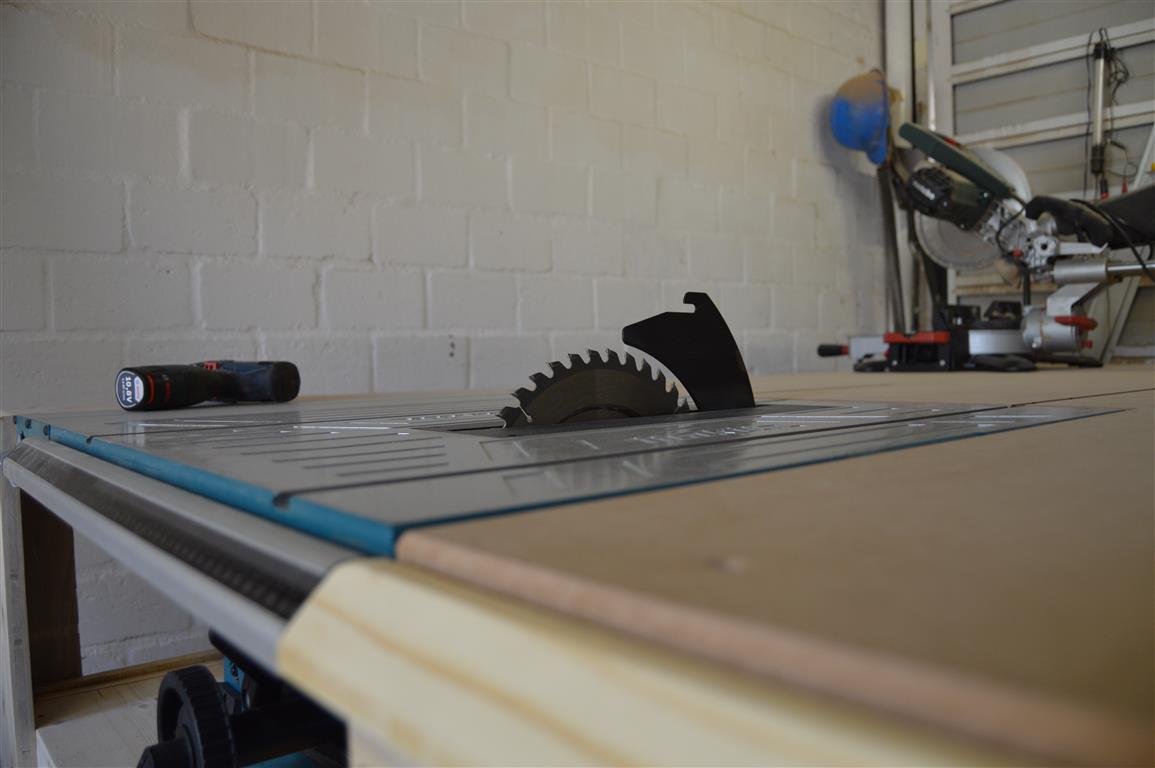
Step 4: Top cutout
With all the necessary paneling fitted and the base for the table saw installed, I removed the segment of the bench top that was going to be replaced by the table saw bed.
I found the easiest way to accurately make the cutout was to fit planks on the underside of the benchtop at the exact width of the table saw. I could then use these planks to guide my power tools when making the cutout.
Using a jigsaw, the bulk of the cutout was removed by cutting about 5mm(1/4″) toward the inside of these planks.
The remaining +/-5mm(1/4″) on the inside of the guide plank was removed using a router with a flush trim bit guided by the planks on the underside.
(Refer to the video for a better understanding of this step)
After doing this I placed the table saw on the base and adjusted the height accordingly. Before fixing the table saw to the table saw base I extended the slots on the table saw bed 400mm into the bench top using my router so that things like miter gauges and crosscuts sleds could follow all the way through the blade.
Step 5: Complete
The installation was completed by fixing the saw to the base, installing the rail extension and installing a final piece of paneling to the left of the opening.
Once again, the width and depth of the cutout, the depth of the back panel, and the height at which the base gets installed is all dependent on the dimensions of the table saw.
Did you just continue the contour of the front end of your table saw for a continuous fence support?
Hi Steve,
That’s correct yes. I cut the profile of the fence rail out of a piece of PAR’d wood using my router.
Jean
Hi Jean love this project, I happen to have the same table saw as you so I was wondering I you could give me a few more details around the fence support and if there are any pit-falls to look out for
Hi Andy,
Well, all I did was copy the profile of the fence rail onto a piece of pine.
I cut the same profile using my router as you can see in the video.
There are a few obvious concerns doing this like having to line it up perfectly with the rail on your table saw. If it is installed even slightly out it will result in lower quality cuts and in extreme situations can even cause kickback.
I paid a lot of attention to this part of the bench built and feel confident that I got it down and installed correctly but I still check the alignment before each use.
If you need more info feel free to ask.
Jean
Hi jean how do you plan on making this router fit in to the table cause I’ve watched all the videos and so far I think it’s absolutely genius how you fit all this stuff in to a dynamic workstation I mean this work bench is a wood worker dream any way can’t wait to see what you do with it and I expect to see more videos from you cause your a excellent teacher aleast I think so
Thanks Joseph,
I’ve done the plans for the router table but there is a slight hiccup. I’m just refining the design them I’m going to jump on making the video. In the meantime, I’ve been working on some other videos that I’m planning on posting through the course of the next two weeks. By then I should have the router planning done and can get started on finishing off the bench.
I’m really happy to hear you are enjoying the series and the videos. As long as there are people that enjoy watching them I’ll try my best to keep making them.
Cheers
Jean
Hi, thanks for all the hard work you put into this table. Ive completed most of the table and have it set up to fit my tools as i will place them. I have ran into a problem though concerning the table saw. I have a DeWalt DW 745. Do you have any recommendations for working with the fence that comes with it. Or jjst remove it and build my own. I actually like the fence so im hoping you can point me in a direction i havent seen.
That saw has a rack and pinion mechanism on the fence (if I’m remembering correctly) which is very nice indeed. I wouldn’t want to take it off either.
Someone has recently sent me pics of their version of the bench and they added a slot in the bench top behind the table saw to accommodate the fence.
That will probably be your best and easiest option.
Hi Jean,
Outstanding work and thanks for posting your videos and sharing your work with everyone. This is without a doubt the best workbench I’ve seen on the internet and I’m working on building my own now. I too have the DeWalt saw and I’m trying to figure out how to deal with the back fence rail. Are you able to post the photos you mentioned showing the slot to accommodate the fence?
Thanks again,
Mark
Hey Mark,
No, sorry. I never got around to it.
The concept involves a slotted cut out in the bench top to accommodate the fence when adjusting it past the saw bed.
It would be hard for me to make an accurate drawing of the slot without the exact dimensions of the Dewalt saw.
If you would like more clarity on it you can e-mail me jean@woodworkjunkie.com
and I’ll try my best to find the time to make a quick drawing.
Cheers
Jean
No worries, I think I have it figured out. Just thought if you had the photos from the other build it would help. Thanks!
Hi Jean
i lay in bed every night watching you Videos ear plugs in so as not to P the with off, and fully understand where you coming from with regards to the small workshop as i am sitting with the same situation you ideas are brilliant and you workman ship is really neat…weldone…
PS where are you from…as that Accent sounds very south african
Thank you so much!
I am South African yes.
Jean, do you plan on making a new fence to replace the one that came with your saw? I was thinking something like the fence you built for the router except that it should remain parallel with the saw blade. I would like to build one for my table but don’t know the best way to do it.
Regards,
John
Hi John,
I very recently designed a fence upgrade for my table saw and I hope to build it very soon. There are however a few small obstacles that I need to overcome first with regards to my design.
Your videos have me many ideas on how to do my workbench. I’ll have roughly an 11 foot by 15 foot shop. I’ll have to design my bench around my specific tools. But my other hobby is drafting. So I’ll be able to design the bench. Thanks for the ideas.
No questions, just a ‘job well done’. I’m moving into a new house with a dedicated 1 car garage for a shop, so after many years of pondering, I was finally planning to build a table saw station, and came across this looking for ideas. Now I’m planning a much bigger version that incorporates several tools – glad I didn’t get started before I found your site!
Very happy to help!
Jean
My table saw has a rail on the front and on the back to hold the fence parallel. Should I have a gap in the back for that rail? Also it doesn’t work as far as extending the front rail because I would have to extend the back as well. Any suggestions for me? Thanks, this has been a fun project.
Hey Mike,
If you want to use the saws original fence then yeah, you will need to add a slot/gap in the top at the back for the fence. Extending the rail is a bit more tricky. You could use the stock fence for narrower cuts and add a custom fence for wide cuts. The custom fence can attach to the bench.
Hope this is useful.
Dear Jean
Firstly a big thanks for this series which I have found incredibly practical, well presented and motivating. Based on your experience of nearly 2 years usage do you recommend leaving the left hand slide table in situ or could it also be removed like the right and rear sub tables? Forward travel is obviously restricted but have you found it useful still? Inspired by your videos, I chose the same Makita table saw and I am now at a stage of workbench construction where I need to start cutting holes in the top and have been pondering this for a couple of weeks now.
To be honest, I have never used the sliding table so I would have to say removing it might be a better option when it comes to building it into the bench.
Thanks for swift response Jean. Keep the videos and experienced advice coming please.
Could you please show me how to make a rail extension for table saw? Thank you very much!!
bought the plans in imperial. they show the top going on near last and videos show going on near 1st. which is the better way?
The top was added last in the plans to include all the different cut-outs but adding the top at the beginning means you can use the bench as you build it out.
Would you recommend a metal rail fabricated to match the rail and then mount to the table and the saw so you have an accurate cut…love the bench design.