

DIY Pallet Stripper
Woodworking with reclaimed wood and pallet wood especially has become very popular as of late. With the ever increasing and quite exorbitant prices tag placed on exotic woods, people often opt to build with pallet wood. Things like garden furniture and decorative fixtures are examples of articles where hardwoods would generally be overkill.
The largest downside of building with pallet wood is the quite labored and time-consuming endeavor of stripping the pallets to a point where the wood is workable.
This is often done with tools like mallets, chisels, and Tommy bars and in the process destroying a fair amount of the usable planks.
It is, for this reason, we decided to build our version of a pallet breaker.
Woodwork Junkie’s Ultimate Pallet Breaker Plans
mm[inches]
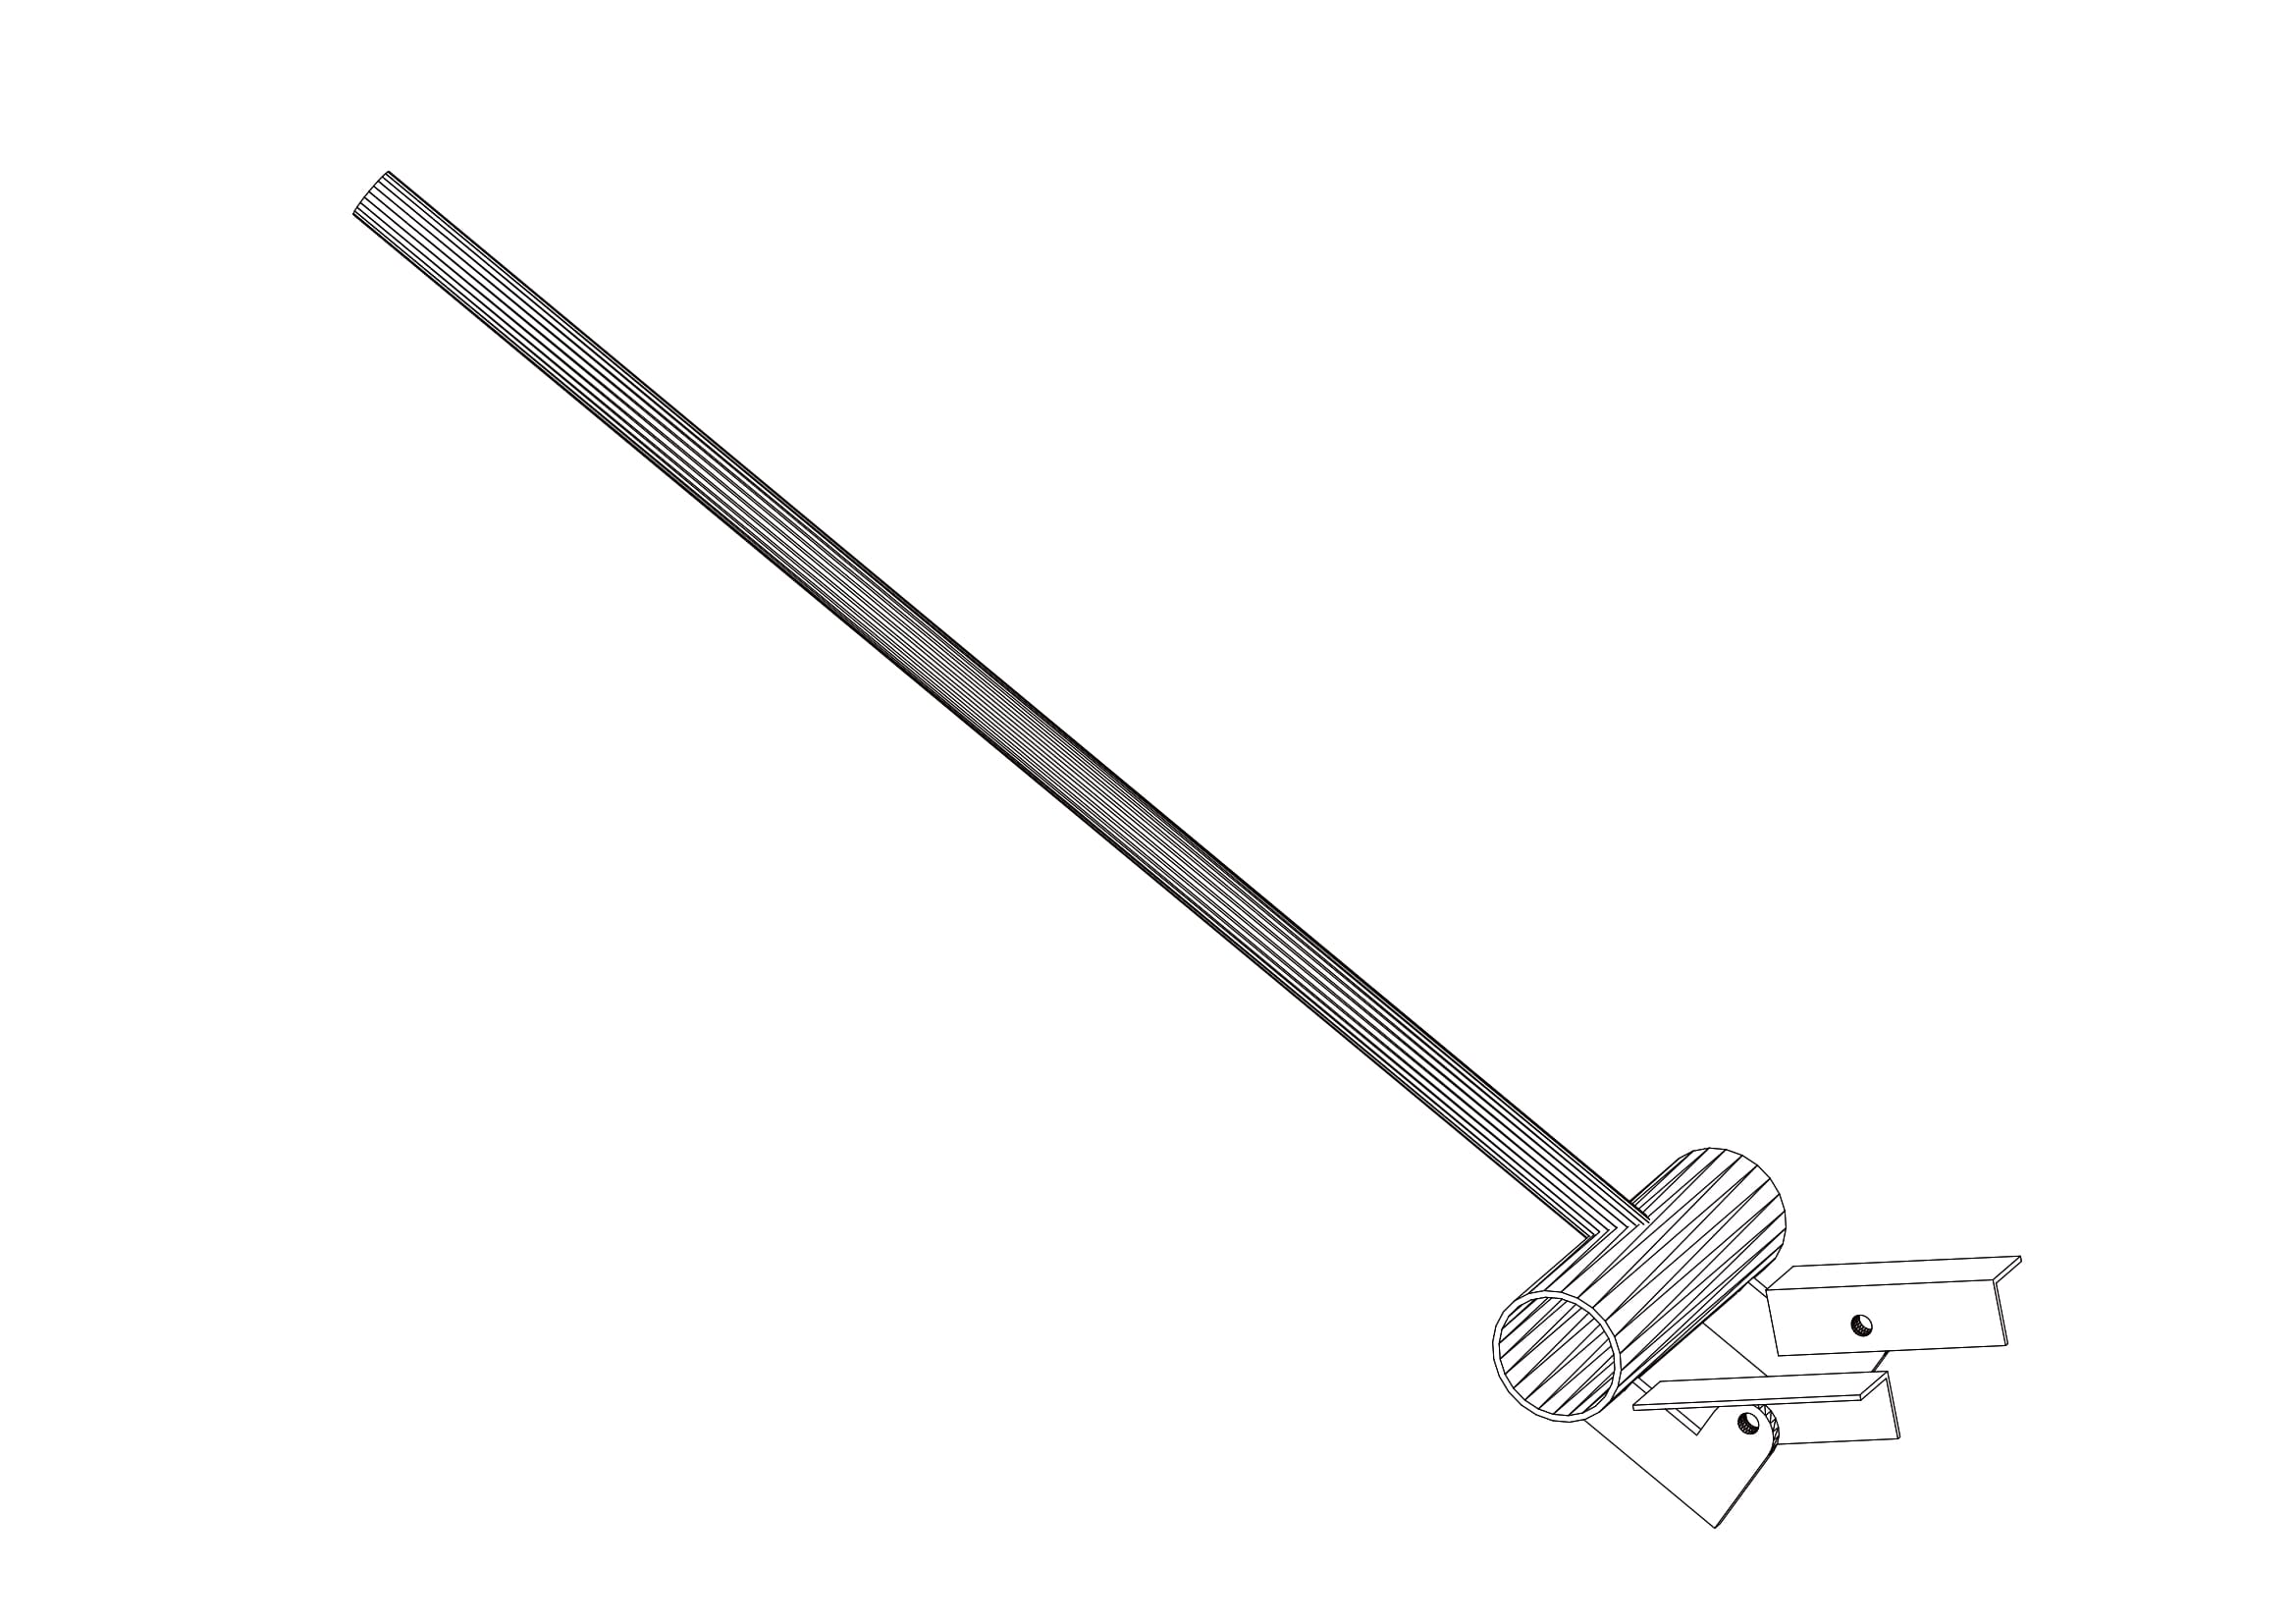

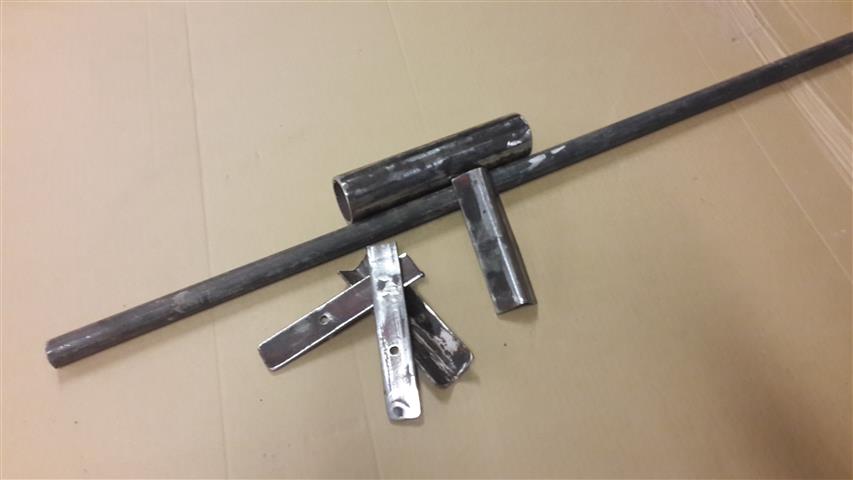 We used our very limited steel supply (Mostly offcuts and scrap) to source the steel components that would ultimately become our pallet breaker. This consisted of a piece of round bar, pipe, angle iron and flat bar (Dimensions above).
After a quick run over with a grinder using a flap disk to remove most of the rust from the old steel, it was ready to be sized and welded together.
Start assembly
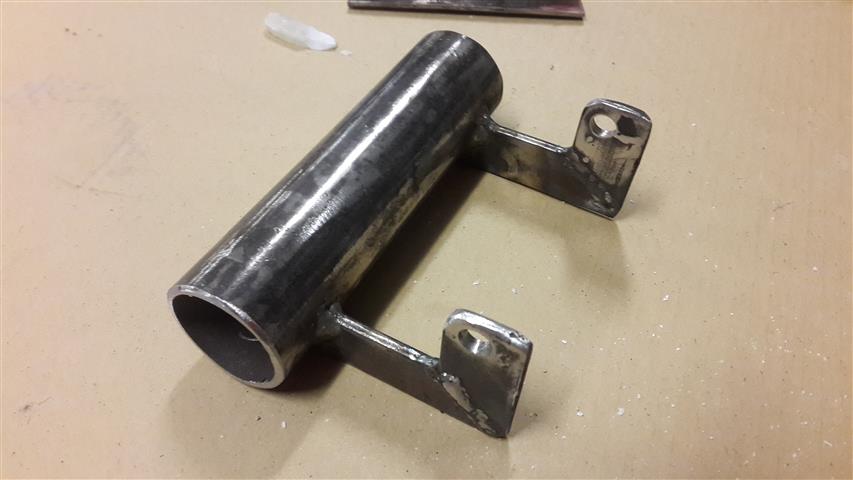
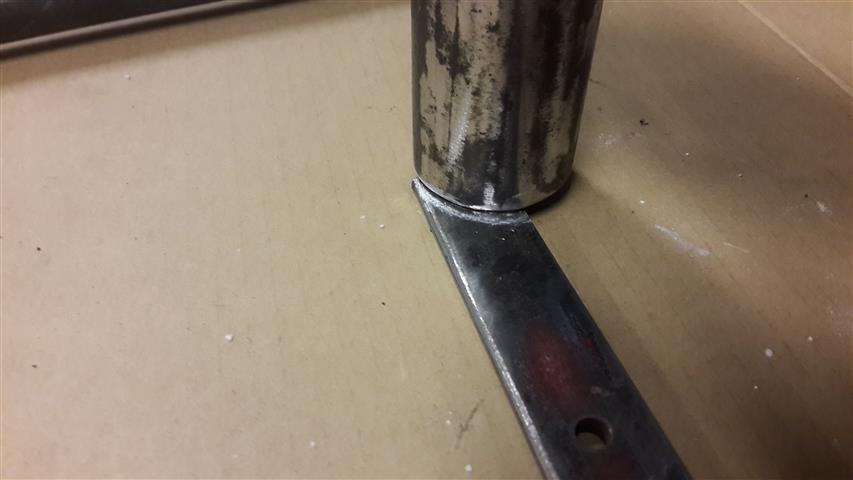 After cutting the pipe to size (150mm) the flat bars can be welded to it.
Use the pipe that would become the cross member to mark the flat bar.
After cutting away these areas the flat bar can be welded to the pipe.
This should be done in a manner so that the outer edge of the flat bar forms a tangent with the pipe (cross member).
The spacing between the two flat bars should be roughly 100mm (4″).
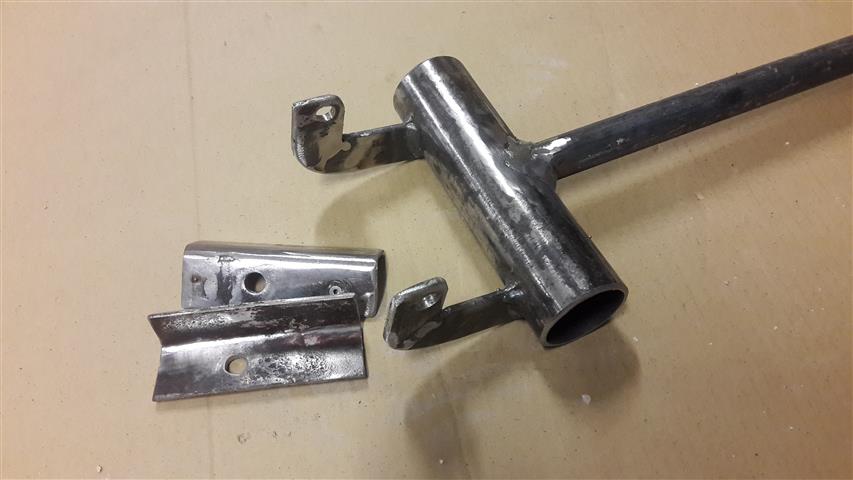
With the flat bars welded on the right angle can be added.
Cut the flat bars to the required length and after weld on the angled component with the pivot holes to which the foot plates will be mounted already drilled.
The purpose of the angled component is to allow the entire length of the foot plates to sit flush with the plank when the tool is in its primed position (before lifting).
At this point, the foot plates can be cut to length from the angle irons and the pivot holes drilled as per the diagram. (Keeping in mind that the hole should be measured from opposite sides for the two footplates will be mirrored versions of each other when fitted)
The last step would be to fit the handle.
The round bar will be used for the handle and thanks to the curved edge of the cross member a shorter than normal lever is required.
The handle is fitted to be parallel with the flat bars welded onto the cross brace. Welded on to form a tangent with the opposite side of the pipe with regards to the flat bars.
This offset adds to the output force of the tool when pushing down the handle.
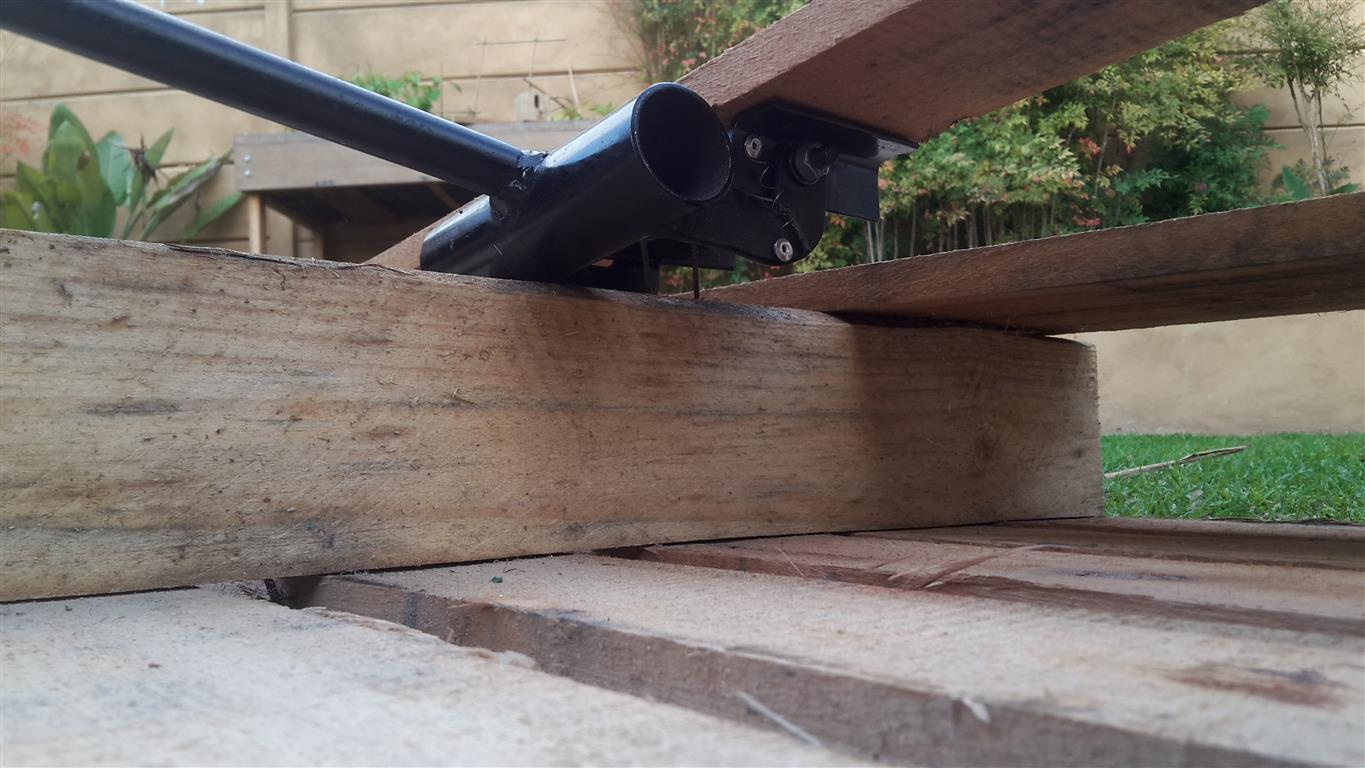
The Ultimate Pallet Dismantling Tool
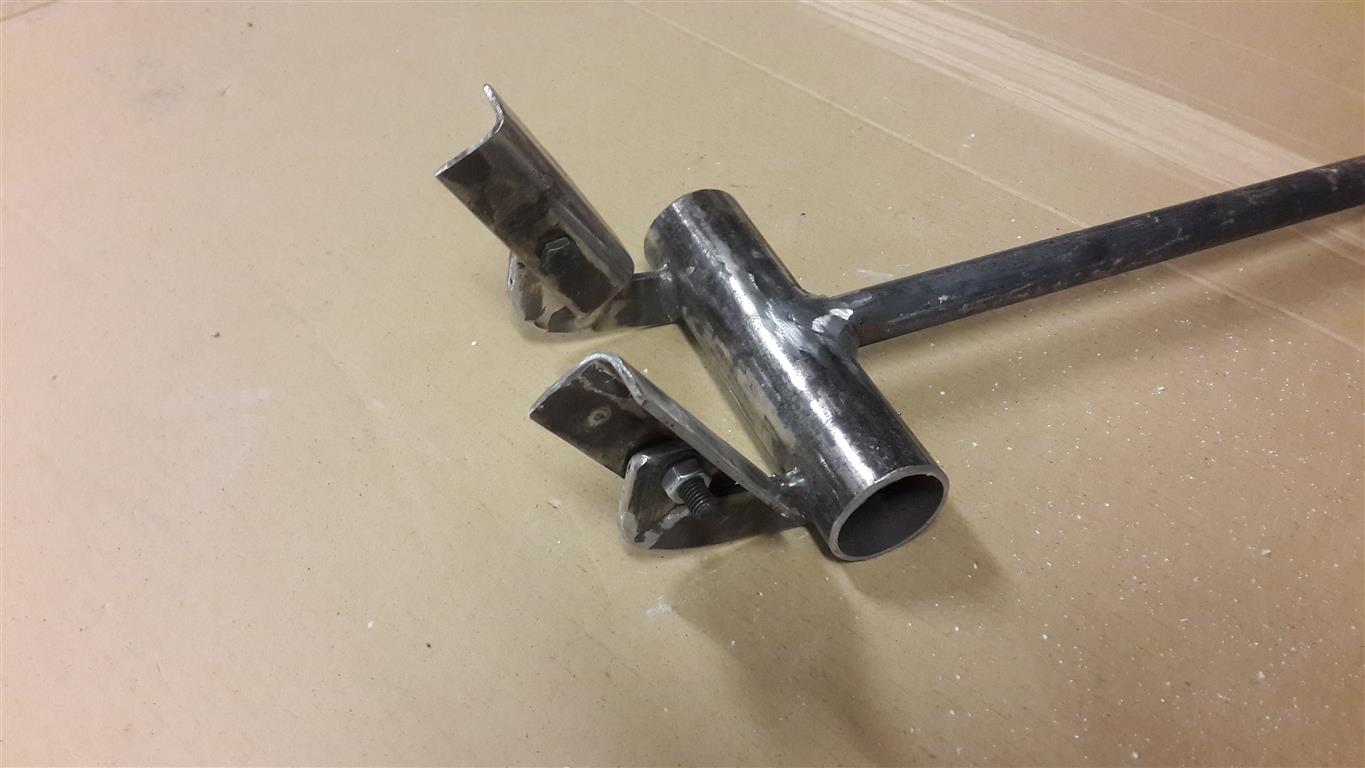
The footplates are fixed with two bolts. Using lock nuts would be ideal to stop the bolts from loosening with repeated use of the tool.
We also added spring to keep the tool in its primed position but this is optional as the tool will still work without it.
You can also opt to paint the tool with a quality primer to prevent rust build up.
What a great looking website! I am lost for words. Keep up the great work.!
Hey,
Thanks for stopping by.
Jean.
This reminds me of what my dad used to do. If he ever needs any help I will be sure to direct him here!
Hey Peter,
Thanks for stopping by.
Jean
Wow, I have never seen something like this. Astonishingly simple and effective! Great work:)
Marek
Wow, I’ve never seen anything like this. Astonishingly simple and effective! Great work:)
Marek
This is a great idea! I have my own design website, and I love working with reclaimed woods including pallets. Thanks so much for sharing!
Hey Jordan.
Not a problem. Thanks for stopping by.
Jean
Hi Jean…
I really enjoy and appreciate your posts and willingness to share. I am a YouTube sub. also.
On the “pallet breaker” project, you indicated, “We also added spring to keep the tool in its primed position but this is optional…” Can you post or indicate the type of spring and positioning/ attachment for it, please?
Sorry if I missed something in that part of the description. I’d like to add one too!
Thanks very much for all you do!
Brian
Hey Brian,
I just realized I have neglected to add that info in the post, however, there is a short snippet in the video where you can see how the springs were added to the tool. Sorry about that.
I will look into adding it to the drawings or add pictures to the post.
In the meantime I will tell you, the springs don’t need to be too strong at all. They just need to be strong enough to keep the small foot pieces in their starting position when no load is applied to the tool.
Jean
Build my own version of this based on your design and it works really well! The first version I made didn’t have the hinges and it would break and split the boards around the nails, but the hinges allow the tool to keep even pressure across the whole width of the board. I didn’t put return springs on for the hinges, but after using the tool I think they are really needed to make the tool fast and efficient as I find I have to flip the angle iron hinges back manually sometimes.