

Sanding disc holder

Clutter leads to an unproductive workshop and organizing your shop has to start somewhere.
Take the first step on the path to a shop without clutter by making an easy-build sanding station to holster your orbital sander and also organize your sanding discs.
What you’ll need – Cutting list:
- Base – 750x220m plank (at least 20mm thick)
- 6 – 40x8mm wooden dowels (Slightly smaller than the holes in a conventional sanding disc)
- A piece of 22x44mm plank (exact dimension would depend on the type of sander you will be placing in the holster)
Dowel positioning mm[inches]

Getting started – Sizing and marking
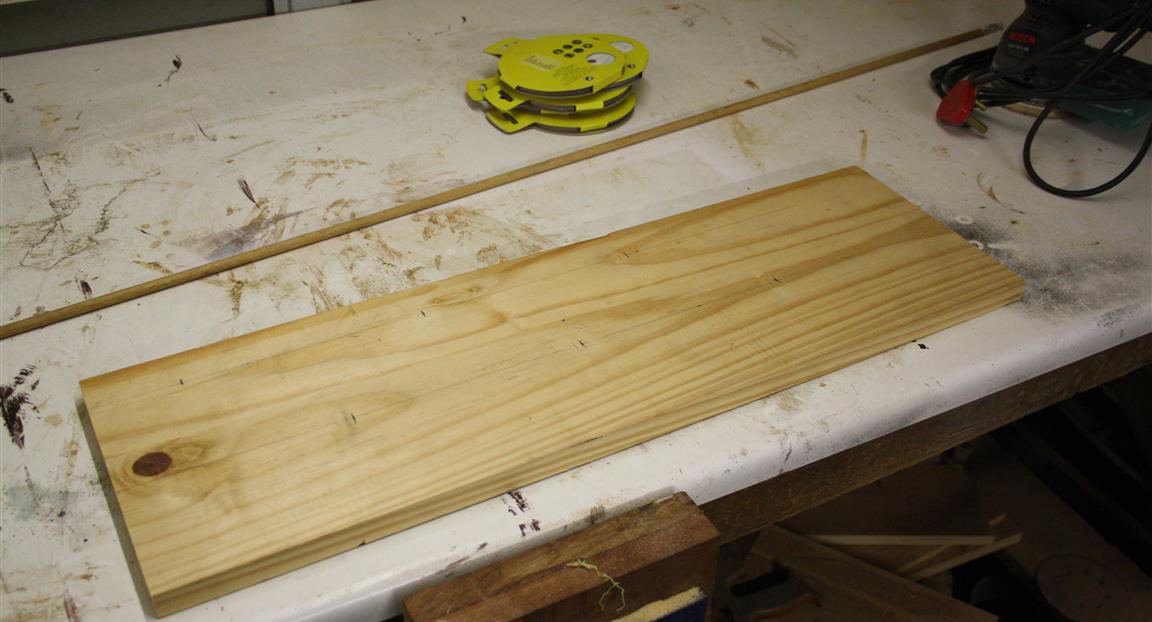
Cut the base blank as per the cutting list above (750×220 [29.5×8.6″]) from a piece of lumber at least 20mm[1″] thick. The thickness of the lumber is important because the dowels that the sanding discs will be hanging from, will be glued into holes drilled into the base plank.
Using the dowel position figure (also above) mark six points on the plank. These points will be drilled out and the dowels will be glued into them.
Also, at this point, cut the 6 dowels to their 40mm[1.5″] length.
The space to the right op the plot marks in the above image are to accommodate the holster that will be made for the sander.
Drilling the holes
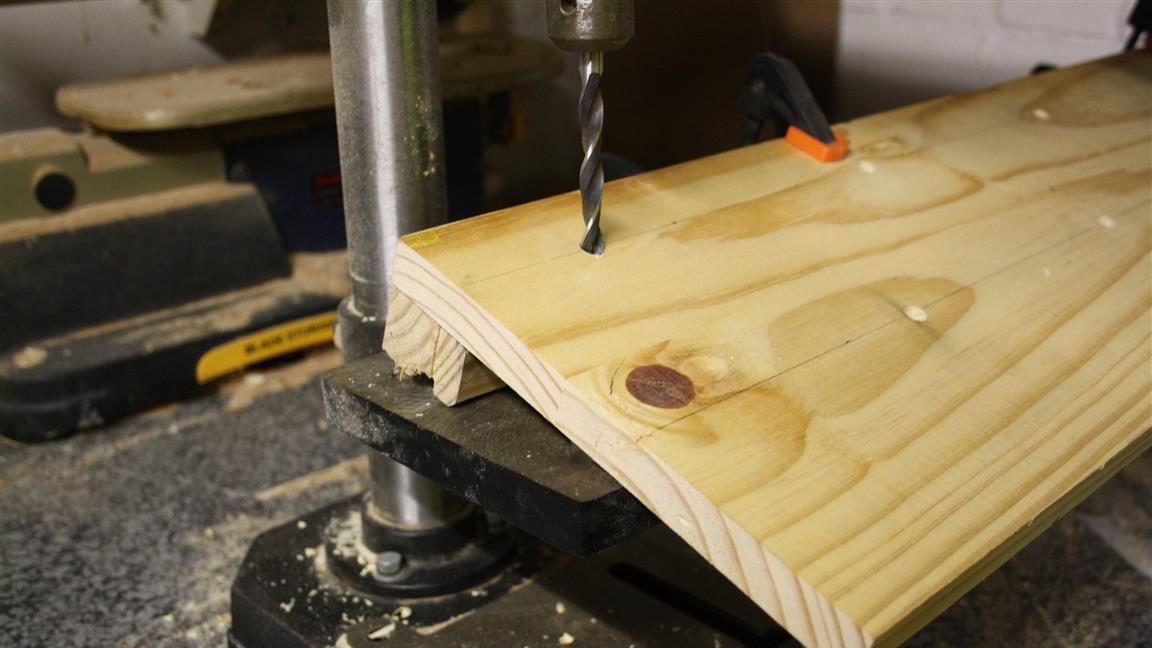
The holes for the dowels should be drilled using a bit that is the same diameter as the dowel (8mm) to ensure a snug fit when gluing the dowels into place.
Add a slight angle to the protruding dell that will ultimately become the hook to hang the sanding disc on by attaching a piece of off-cut lumber to the bottom of top edge of the base plank before drilling the holes.
The exact angle is not that important as long as the dowel leans slightly toward the top.
Use the depth gauge on your drill press, or mark the drill bit if you are using a hand drill, to ensure that you drill all the holes at the same depth.
Glue in the dowels
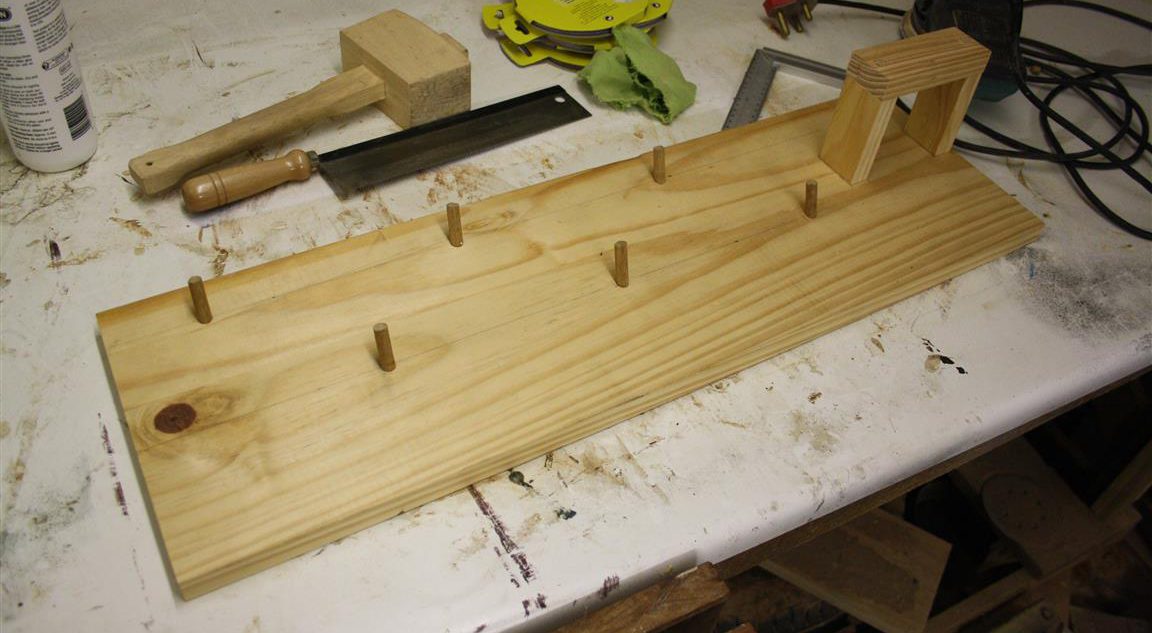
Place a small dollop of glue in each of the six holes and insert the dowels. Tap lightly with a mallet to ensure the dowels are secure.
After this, make and fix the holster for the sander. (I have not included measurement for the holster as this component will differ depending on the brand of sander you own).
The holster is made using 3 planks (22×44[1×2″]) that are assembled in a way that would allow the orbital sander to be holstered inside of it.
The “visible” screws are sunken and dowels are added to blank them off.
Fix to the wall
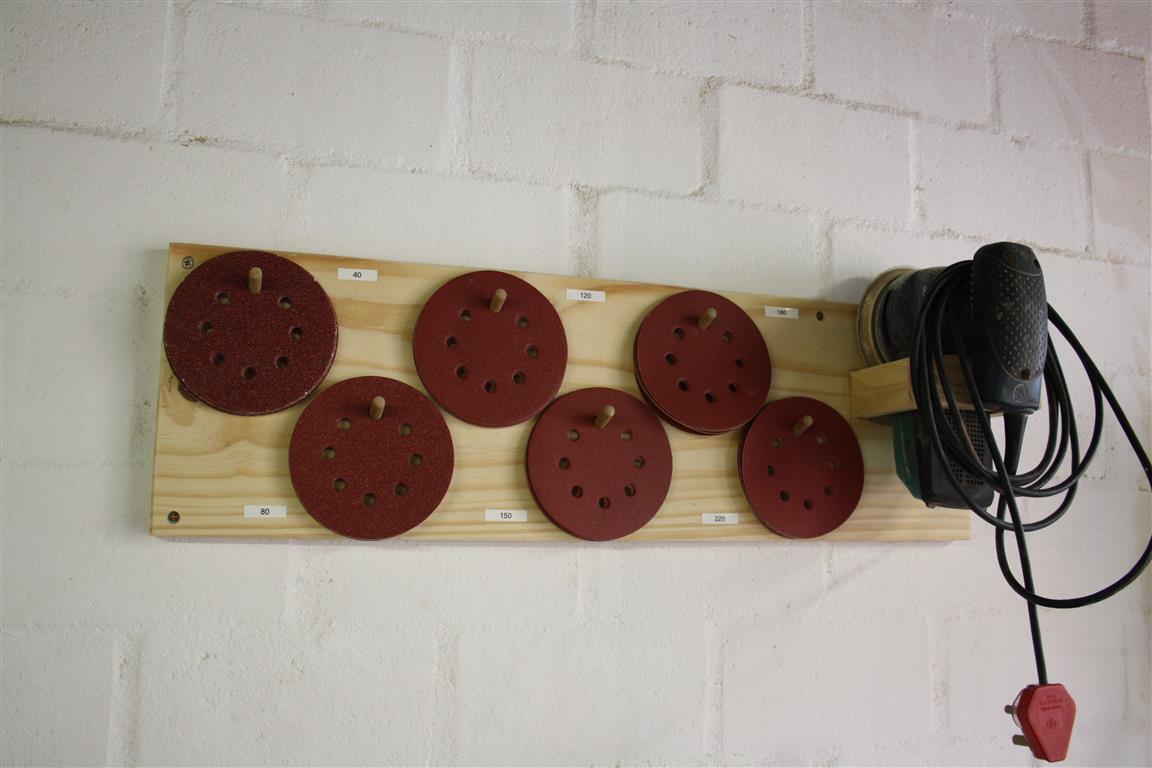
Fix the holster and give the sanding paper holder a good sanding down.
After fixing it to the wall use labels to indicate the grit of the paper hanging on each hook.
Holster your sander and start planning your next project.
Happy woodworking!