
Building a simple woodworking bench –
For beginners
 As discussed in a previous post, a workbench is not only a great project for a beginner at woodworking but also an integral part of a home workshop.
Your bench will be the cornerstone of your shop that provides you with a flat surface at a comfortable height to add to the quality and accuracy of the masterpieces you create on top of it.
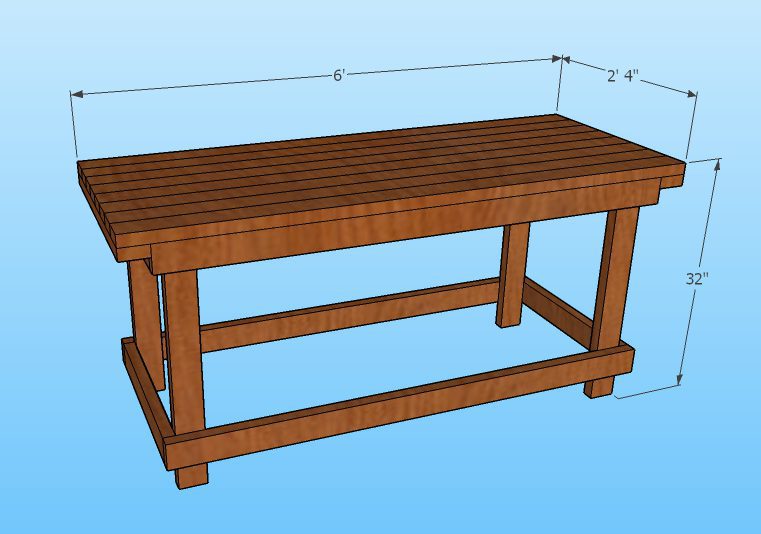
DIY woodworking bench plans: The bench I will be walking you through today is simple in design, only requires basic hand tools with the exception of a drill and is constructed using 2×4 (1-1/2 in x 3-1/2 in) lumber only.
Note: These dimensions are not set in stone. And can be altered to suit the craftsman.
Remember, woodwork is about being creative.
Tools you will need:
- hand saw (or circular saw if available)
- Power drill
- Pencil
- Measuring tape
- Square
Materials:
- 2×4’s
- #8 x 2-1/2″ screws (60)
- 1/4 x 3-1/2″ Carriage bolts with nuts and large washers (16)
Step 1 – Cutting planks to required length’s
Cutting list:
- 4 x 5′ 5″
- 5 x 2′ 1″
- 8 x 6′
- 4 x 2′ 8″
- 2 x 2′ 4″
Step 2 – Assembly of the bench top
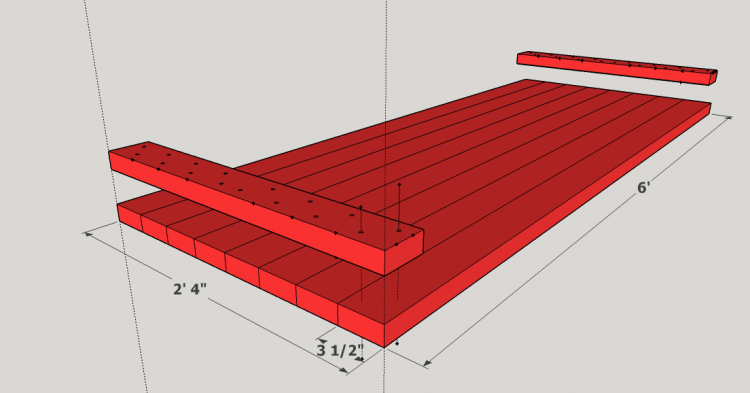 Your Benchtop will be made up out of 2 x 2’4″ planks and 8 x 6′ planks.
Start by laying your 6 ft planks next to each other on a flat surface (If you have clamps, clamping them together would make assembly a bit easier). At each end, you will fix one the 2’4″ planks using two screws per 6′ plank as indicated by the above diagram.
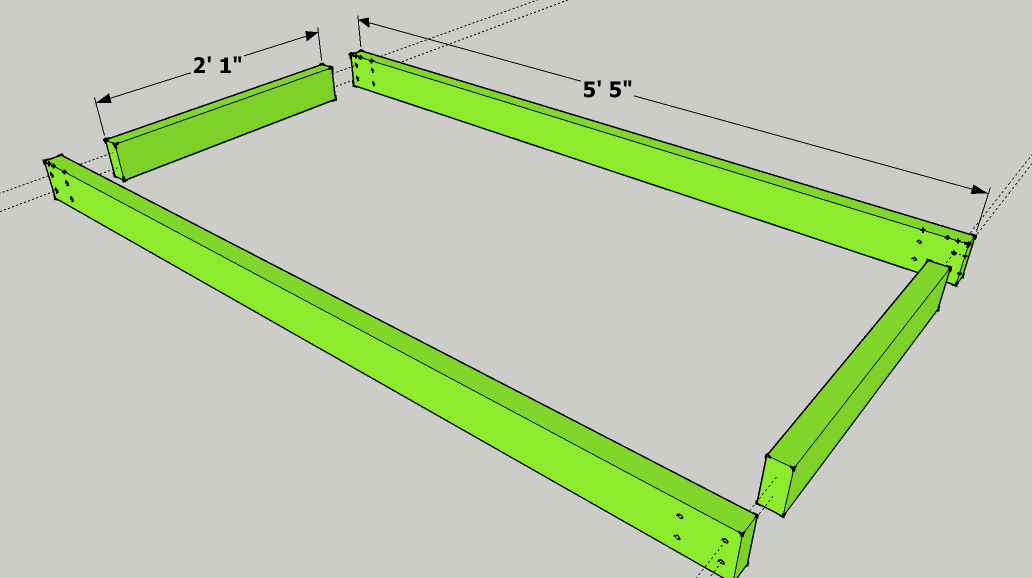
Step 3 – Assembly of the top frame
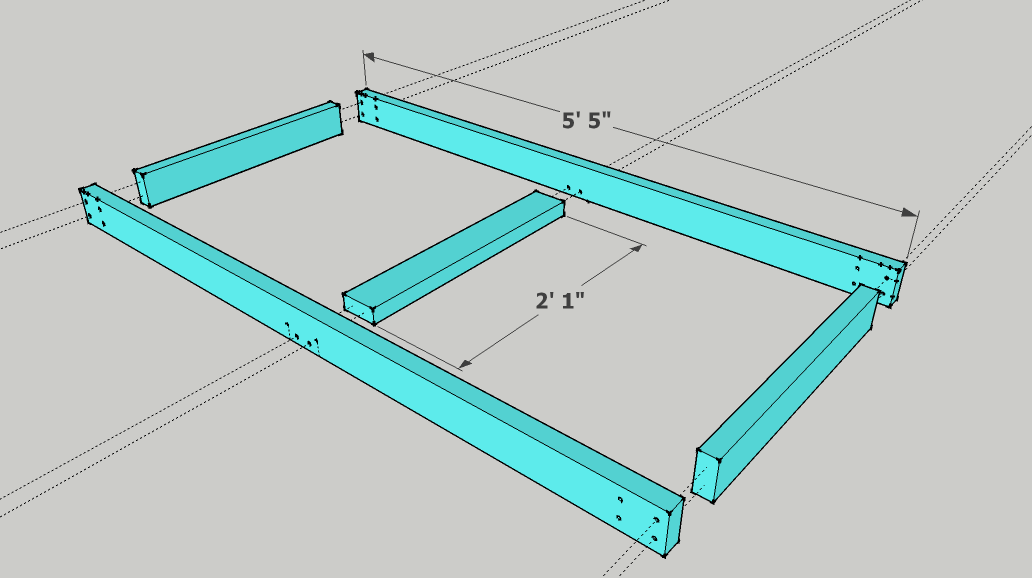

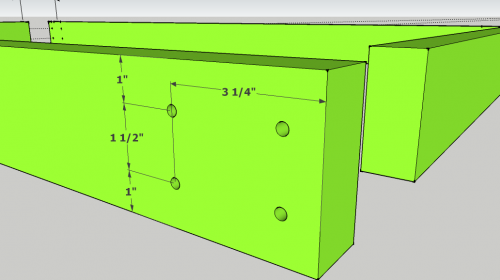
Assembling the top frame will require 2 x 5’5″ as well as 3 x 2’1″ planks. Prepare the planks for assembly by drilling the holes (Hole sized to fit screw) Fixed together using screws as indicated by the diagram. (Don’t worry too much about the other holes on the diagram, we will be getting to them in just a moment)
Step 4 – Assembly of base frame
Like the top frame this frame is assembled using 2 x 5’5″ but in this case, only 2 x 2’4″ planks. Assembling the corners in the same manner as the top frame.
Step 3 – Fixing the top frame to the bench top
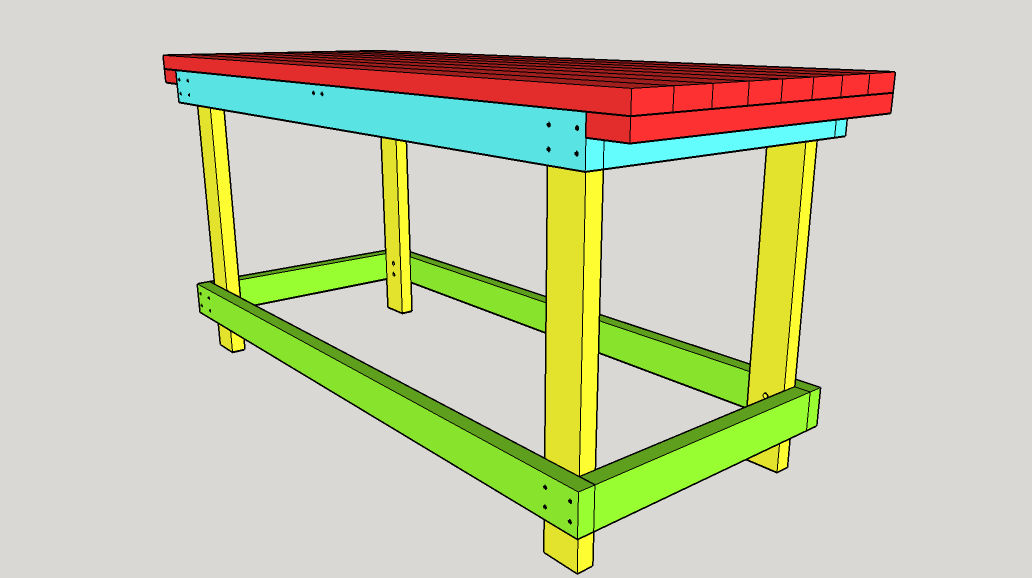
Now that you have your major components of your table assembled you can start turning it into a workbench.
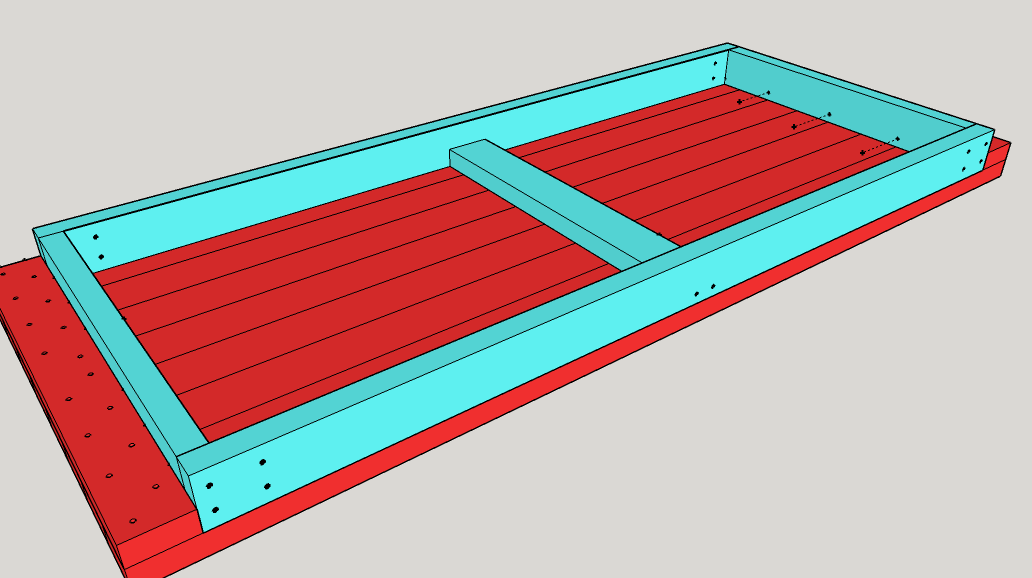
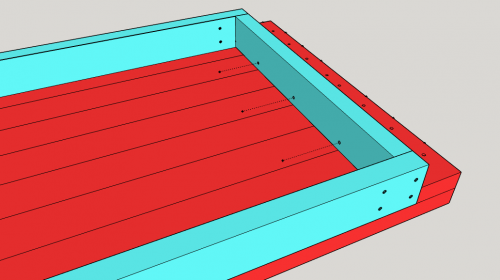
Fix the top frame to the bench top using screws as indicated by the diagram. The screw spacing can be placed at your discretion as the screws are not load bearing but rather just to keep the top from shifting.
Final Step – Fit legs
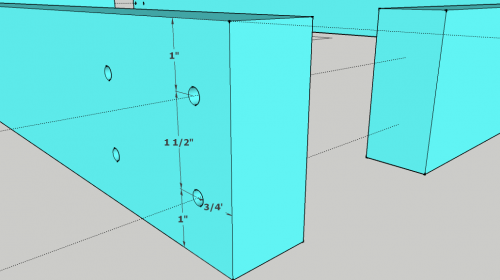
To complete the workbench you will use the 4 x 2’8″ planks which will become your workbench’s legs. Prepare the legs by drilling holes for the carriage bolts as indicated on the diagram. Each leg using 4 bolts to fix. (Hole should be sized to accommodate carriage bolts)
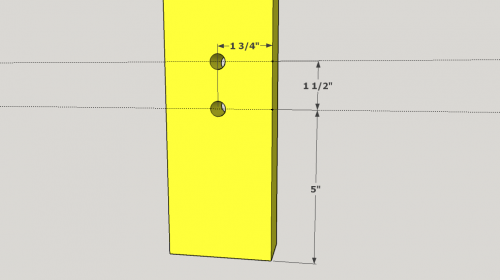

Also, drill holes in the top and base frames to which the legs will be fixed. (The hole being the same size as the ones on the legs). Once this is done the legs can be fitted using the carriage bolts with large washers. I would advise sanding the top of the bench once the bench is assembled.
Once assembled the bench will be ready to undertake your first project so get out there and build something.

woodworkjunkie.com, DIY like a pro
If these plans were helpful or you have any suggestions please let us know in the comment section below.
Hi, Jean, this is really good and well timed for me.
I know it’s not quite the same, but my dad, who retired last year, has been talking about doing more woodworking as a hobby, and was asking me if I wanted to help build a table!
I am a complete beginner with woodworking, though my dad has a few power tools, and some experience, I was a little apprehensive because it sounds like a complicated thing to make a work bench or table for a beginner.
Your explanation and guide detailed the process very well and I think I may just suggest we try making a bench like the one you have outlined for us here.
Thank you
Neil
Hi Neil
Although a more seasoned woodworker may prefer a more customized bench, this bench is a great all-rounder. You can build it in less then a day and have fun doing so.
Never be hesitant to attempt woodworking. It’s a very rewarding hobby.
All the best
Jean
What a great tutorial, Jean! Thank you for this. My husband JUST got a new shed built and we was talking to a friend about coming over to build a woodworking bench! I can’t believe my luck that I stumbled across your site.
I know you said to use 2×4’s but do they need to be treated on untreated? I’m always worried about the treated wood but wasn’t sure if it matters in the shed?
Thanks, Amy
Hello Amy.
Thank you for the nice comment.
Treated wood is better in the sense of rot and insect repelling. But as a alternative wood can always be treated at home with a good oil-based paint, oil or varnish. Personally, my benches are not treated at all as my workshop is of a dry environment.
Happy woodworking
Jean
Thanks for the sharing. It is a great article. But I really don’t like woodworking as I cannot tolerate the sawdust. But my friend who is a carpenter would really love the detail and design.
Thank you for your comment. Yes the saw dust is a bit of a issue for some. Especially for people like myself who suffer from hay fever. There are good dust extraction systems available however. Unfortunately they come at a price.
Hi and thanks for this wonderful article on woodworking it is a great way for me to get started with woodworking really found it useful.
Great job on the article, Jean! I like how you set it out in a step-by-step manner, it helps me know exactly what I’m suppose to be doing, while many newbies will be able to follow along to it much easier as well. It’s great to see that you don’t even need much tools to build this amazing bench either, while there is only 5 steps in total! Thanks a bunch.
Nice instructions. I have a little cousin who’s currently doing a lot of workshop practical work. He’s studying Bricklaying and Wood work starting with the basic level 1 – 3.
I’ll have to email him this website. Maybe he’ll be able to receive value from it as he studies the modules going forward. It’s like competitors advantage when you’re learning from difference sources who have a lot more experience.
Thanks for sharing.
Sam.
Thank you Sam
I place a lot of focus on beginners and amateurs in woodworking with this site.
Watch this space I have a few very exciting projects coming up.
Jean
Thanks for sharing your plans. The plans will make it a lot easier to build a bench. Instead of me doing the trail and error approach.And having to redo wasting time and material.
Fantastic!
I have been looking at buying a bench but the cost keeps putting me off. And as I figure I’m getting into wood work why not try building one? But TBH It seemed a bit above me. But not with this tutorial! you make it seem very easy and the diagrams really help visualise stuff I have been reading elsewhere…
Think I’m going to give this a go!
Hey Steve
So happy you found value in this post.
I designed this bench to be a simple-to-build project for amateurs. Often beginners attempt too elaborate projects and get discouraged if they cant manage them.
Good luck with your bench building.
Jean
Wow…love it.
It’s very good and very excellent article. I really enjoyed this post and I hope you will keep posting this kind of post in future.
In my head, your directions make good sense. I have a sort of “chicken and the egg” question, though, as an absolute ignoramus who’s contemplating woodworking. How do I cut the wood to length without a bench? I mean, if I put a piece of wood on my cement garage floor, then the saw would hit the floor, right? In other words, how can I build a bench without a bench?
Hey Amy,
I used a pair of sawhorses to size the panels for the bench.
To make them is very easy and they are awesome if you need to set up a quick, makeshift work table.
Jean
Hey Amy, why don’t you put two bricks under your lumber? With extra help you can saw your wood pretty easily. Just have someone stand on your pile of wood and bricks to keep it in place while you sawing.
@jean, thank’s mate. I’ve been planning to make woodworking bench for a while. My dad asked me to build one so he wouldn’t get bored by the time he retires. Your plan is a good place to start. Quite enough for beginner like me.
What program do you use for making your plans?
I have a few programs for design but sometimes I ask some of my engineering friends to draw my designs because they have access to more powerful design software.
Fusion360 seems to be the favorite for hobbyist though.
Hi Jean,
How are you? From your accent I gather you are from South Africa. If so any idea where we can get wood in imperial sizes or any chance of getting the plans in metric sizes? Also if you still in SA it would be nice to know who you buy your tools and supplies from.
Thanks in Advance
Hey Omar,
Drop me a mail. You can use the addresses listed on this site.