

Miter saw stand for small workshop – Build tutorial and plans
Many hobbyists, like myself, don’t enjoy the luxury of large shops. Like myself, they find themselves practicing their beloved hobby in sheds and small garages while dreaming of the day that they too can enjoy the space and freedom that comes with a large workshop.
During one such a moment, daydreaming in front of my cluttered workbench, I came to realize that even though I can’t do much about the size of my shop, I can find a way to optimize the little space I had.
After this rude awakening, the first to fall victim to the radical revamping of my workspace was my miter saw and the area occupied by it.
Miter saws may not in themselves be the largest power tool found in a woodworking hobbyist’s workshop but it is definitely one of the power tools that require the most space to operate. The reason for this is the amount of space required on either side of the saw to accommodate the stock that will fall victim to the saw’s wrath. Also, in the case of a sliding miter saw, the saw requires a certain amount of wall clearance as to accommodate the sliding mechanism. This is wasted space.
Fold-away miter saw workbench
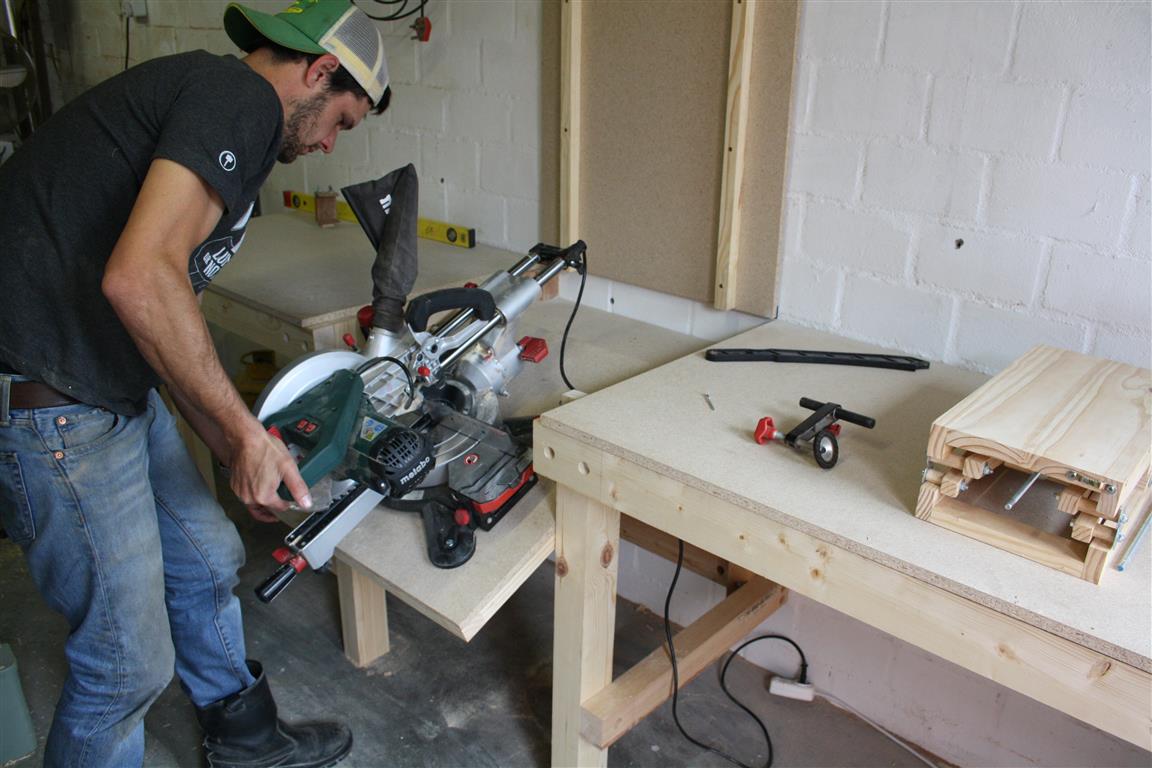
Considering a simple way to pack away a miter saw after use to free up counter space for other functions is what lead to the birth of the DIY fold-away miter saw stand.

The idea behind this bench was to free up the space being selfishly occupied by the miter saw when it not being used, but more importantly, being able to unpack and pack away the saw quickly with minimum effort. In that, it has absolutely succeeded.
The folding feature is achieved by simply adding a pivot point to the rear of the miter saw platform that allows the miter saw to swing down and be stored when it not being used. There are however a number of considerations when building this bench that I will cover in this tutorial.
In this “how to build a miter saw table” tutorial, I will be making plans available for the bench I built. Keep in mind that not all miter saws share the same dimensions and therefore certain measurements may vary as to accommodate the saw that will be used with the bench.

Lumber used
Frame:
- 50x70mm
- 80x70mm
Top:
- Squared board (Chipboard or plywood)
Bracing:
- PAR’ed pine 30x44mm
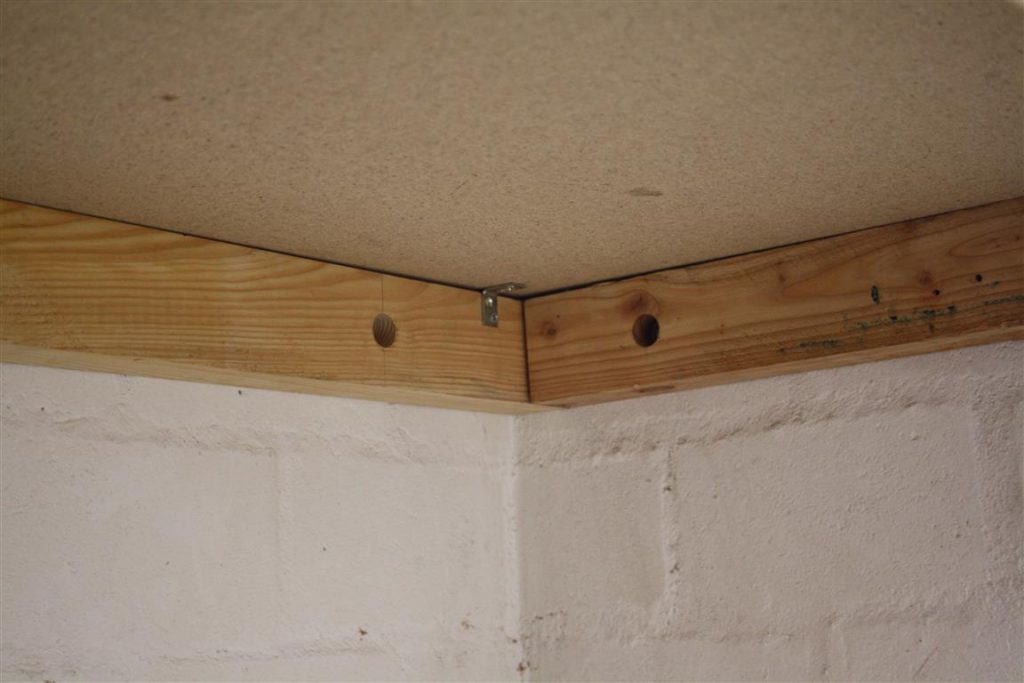
Step 1 – The frame
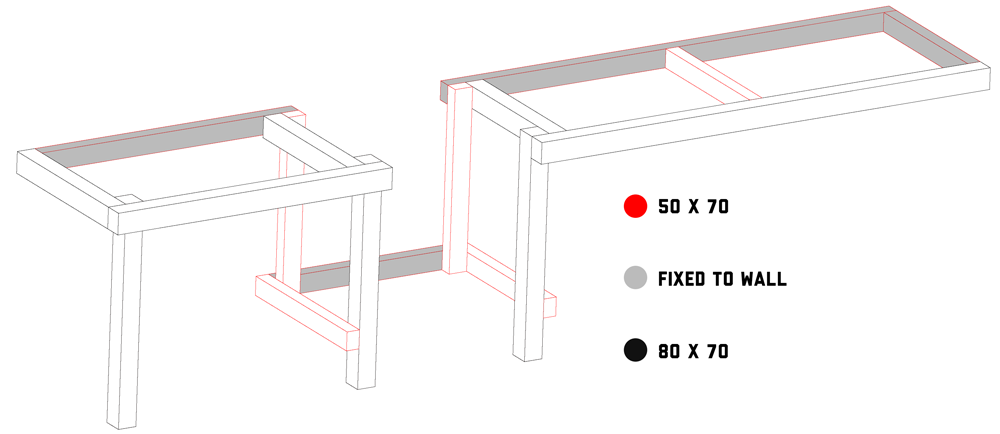
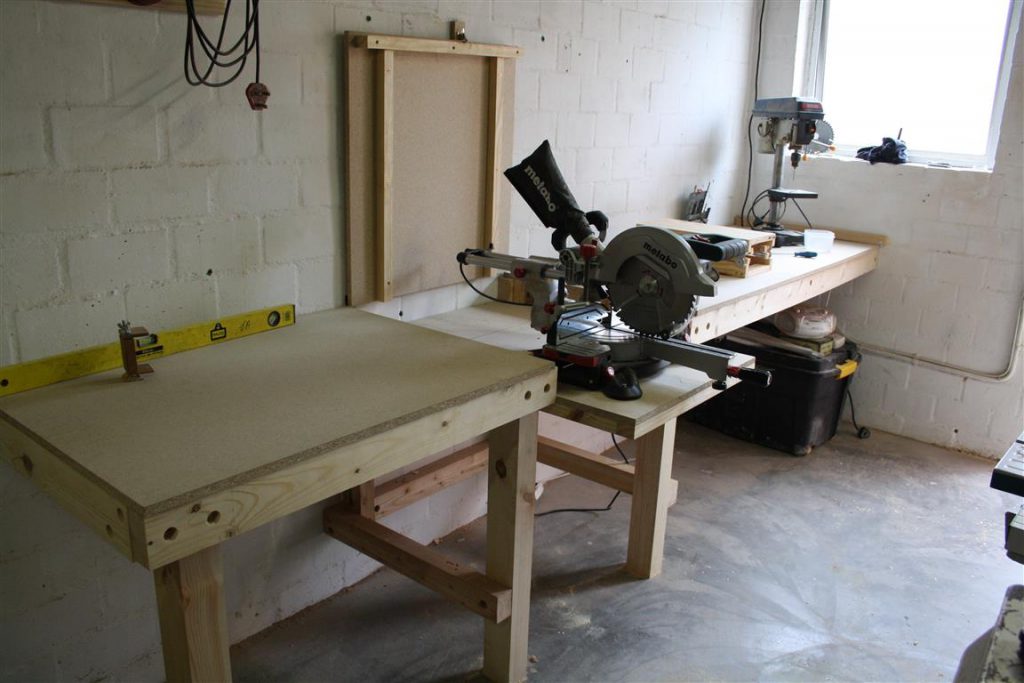
Outer dimensions: 3500(L) x 700(W) x 850(H)
Note that any of these dimensions can be adjusted to better suit the space available while keeping in mind that the height of the bench has to be able to accommodate your saws length (back to front) as this will be that space it takes up when it is folded down to a vertical position.
 The assembly of the frame is fairly straightforward with the only noteworthy aspects being the width of the space in the center that is intended to accommodate the miter saw.
My saw is just over 500mm wide so I built the gap at 600mm.
The bench is assembled as a counter with the back fixed to a wall. The miter saw table in the image is also fixed to the wall on the far right side but this, however, is not a must. The far right of the bench can be assembled in the same way as the far left if there is no wall available to fix the counter.
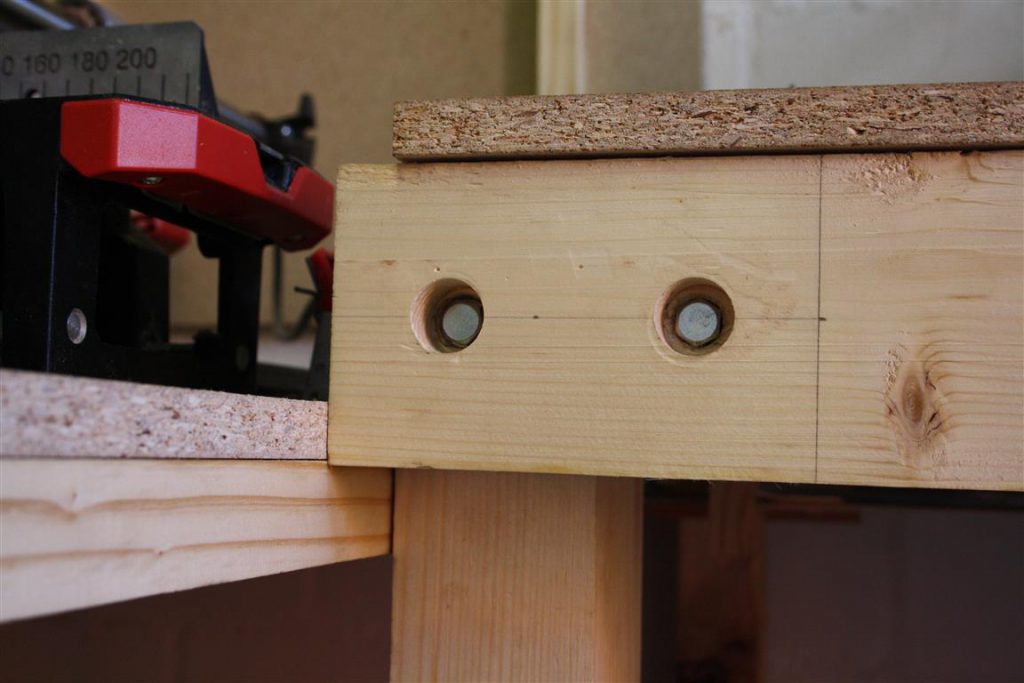
To save time, the frame is assembled using coach screws/lag bolts (refer to video).
It is important to ensure the components that make up the frame are properly fixed together or it will compromise the integrity of the completed miter saw station.
Step 2 – Benchtop

 The bench top is made up of 3 components (Squared boards) of which two will be fixed to the bench using store-bought galvanized 90 corner brackets.
One (1080x700mm) board on the left and other (1780x700mm) on the right of the gap. The third (640x700mm) will be the countertop over the gap.
This third board will be fixed to the wall using hinges and will be the folding countertop that will be down when the saw is stored and up when the saw is working.
When referring to the “front” view of the above diagram it can be noted that the board over the gap is slightly wider than the gap itself. This is to allow the board to line up with the other two countertops when it is down.
Adding some sort of latching mechanism to secure the countertop in its open position when working is advised.
For the bench in the tutorial, I used chipboard for the top and therefore I needed to add a good deal of additional bracing to the underside of the boards.
Less aggressive bracing would be required if a more robust wood like laminated plywood is used for the top.
Step 3 – The folding mechanism


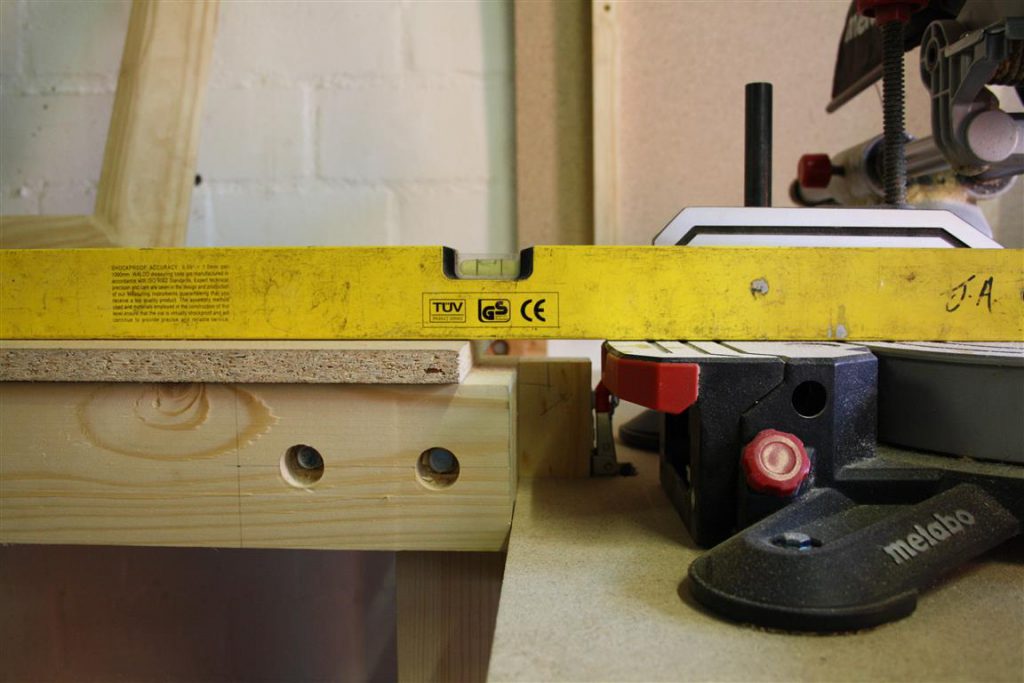
After assembly of the frame, and attaching the bench top, the folding platform can be installed.
When installing this platform there are two important factors to consider.
The first would be the bed height of the miter saw.
The platform should be installed at a depth equal to the height of the bed on the miter saw. This is done so that when the platform is locked in its working (upper) position, the miter saw bed will sit at the same level as the bench top.
The second consideration would be the type of miter saw. Sliding or not?
 If the miter saw does not have a sliding function, the pivot point on the platform can be moved to the far back of the gap and the platform can be made to line up with the front edge of the bench.
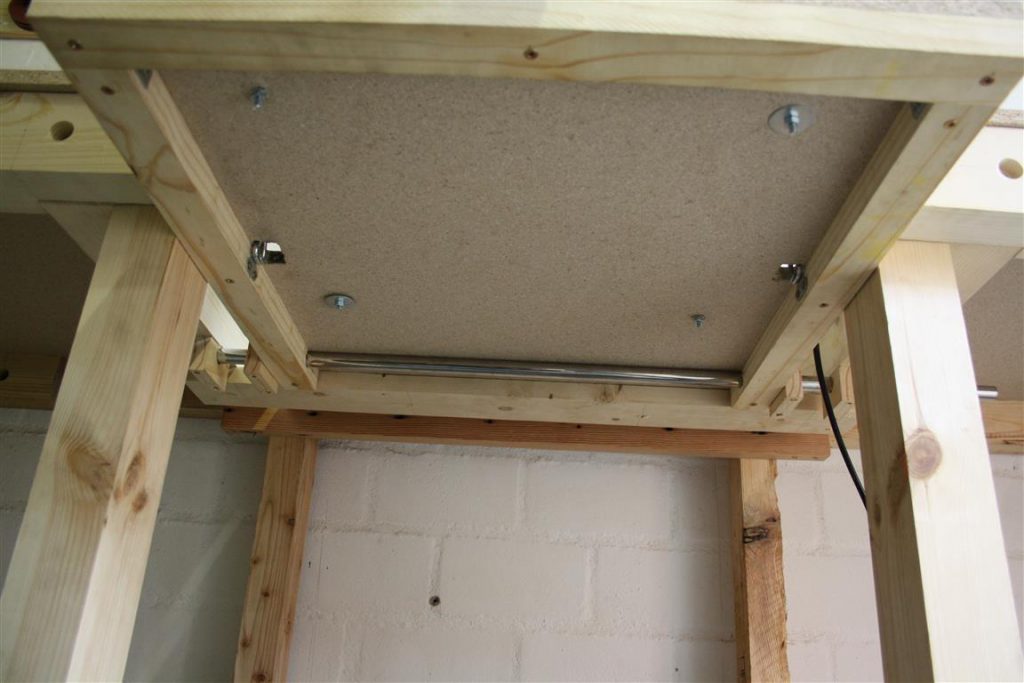
In the case of a sliding miter saw, however, a much longer platform would be required. Too long to place the pivot at the back of the platform as it will not be able to fold down all the way. To overcome this the pivot point gets moved forward to a point where the saw can fold down underneath the bench when the slide is locked in its font position. (Refer to video)
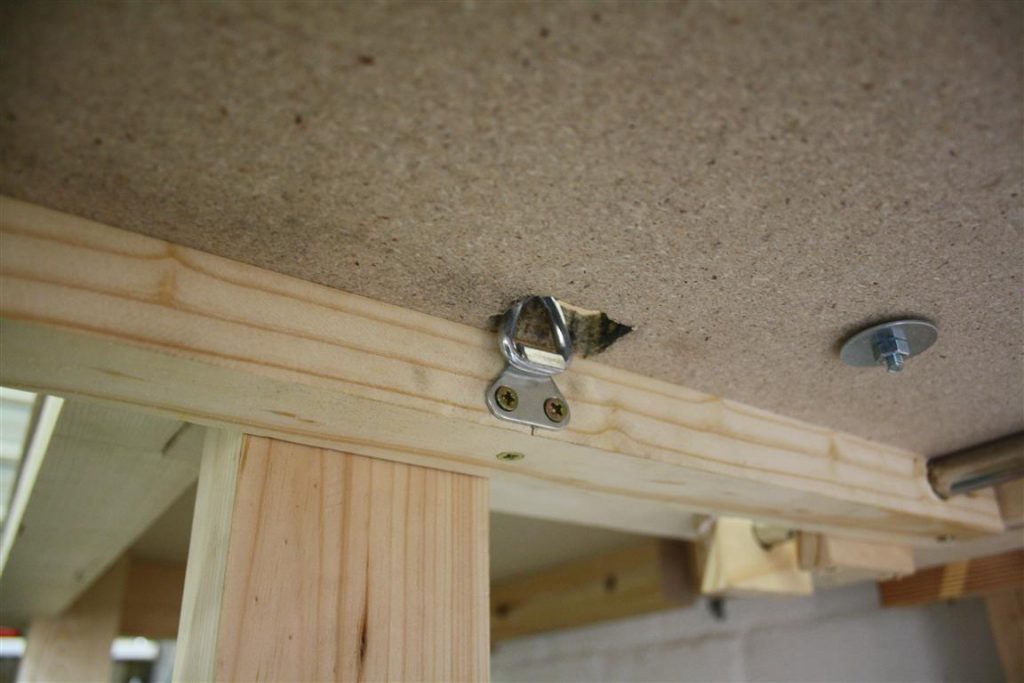
For the pivot, a 19mm stainless steel pipe was used.

Latching

When the platform pivot point has been installed at the appropriate height with respect to the bench top, the platform needs to be able to be secured in its working position.
Using toggle latches mounted on top of stopper blocks would yield the best results.
The stopper blocks will be installed on either side of the gap toward the front of the bench. The bottom of the stopper block should also be at a depth equal to the bed height on the miter saw to ensure that the platform is level from back to front when locked in.
Ensure that these blocks are properly secured as they will be carrying the weight of the saw when it is in its working position and being used.
The toggle latches are then installed on the stopper blocks.
 Make sure to use lockable latches to prevent them from popping open while the saw is being used.
Also, make sure that the latches you use are able to hold the weight of the saw.
The latches should be secured in a way that won’t allow it to come loose, the screws to pull out of the wood, etc.
When the bench has been completed and the pivot installed in a way that will support the saw while operating, the saw can be fixed to the platform.
Space the saw in a way that won’t allow it to bump or crash into any of the other components on the bench when swinging up or down and secure it to the platform using bolts.
Packing/unpacking the saw
In the case of a non-sliding saw with the pivot point in the back, the latches can simply be released and the saw folded down underneath the bench.
The sliding saw with the pivot moved forward needs the slide to be locked in its forward position. Release the latches and fold away the saw.
Remeber to brace the saw with your hand when releasing the latches.
Fold down the top and continue working on your new fold away miter saw table.
Happy woodworking.
Warning:
Not ensuring that the saw is properly secured in it’s working position can cause it to drop while being operated. ENSURE that the latching mechanism is installed in a way that won’t allow screws to pull out of the wood, latches to break, or any failure to occur that can cause the saw to drop while it is being operated.
Ensure that the materials used for the pivot are adequate and able to carry the weight of the saw and the stock when the saw is operated.
Always unplug the saw before folding it down and while it is being stored to prevent accidental startup.
Make sure that the saw you will be using with the bench is able to be stored in a vertical position.
Love this post mate! As a chippy anything to do with wood work really interests me. And this fold away miter saw in definitely something I’ll do when I have my workshop set up. Cheers bro
Thanks Mike.
Glad you enjoyed it. If you need any advice or additional information, don’t hesitate to ask.
Jean
See I find this so interesting because I’ve been meaning to start a few DIY projects myself. However I know nothing about building so I can see this being pretty difficult admittedly. I think this post was super easy to understand thought because of the pictures. Since a lot of people are visual learners, this helps immensely. I just wanna ask, how long did it take you to learn how to do stuff like that?
Hey Jasmere,
How long did it take? That’s a hard question to answer. What I can tell you is that when I left school 10 years ago I had zero technical skill.
Being an electrician, however, I quickly learned my way around power tools.
As for woodworking. It’s a passion that developed only a few years ago and there’s no better teacher than failure. Experimenting and a lot of trial and error have taught me a great deal.
It’s never too late to start.
Jean
You sure have made the journey easier for others, and we thank you for it.
Always a pleasure friend.
Great article. I am always in need of more space. Or better use of the space I have. . .
Looking forward to more helpful ideas
Hi Ken,
I think many people struggle with space to practice their hobbies. Especially if their hobby is woodworking. That’s what inspired this bench and so far it has gone a long way in freeing up some space in my shop.
Jean
Wow! Amazing stuff. I find this very informative and i’d like to know more as I am about to start out with my new home.
Cheers
Hi Dennis,
You can save a good deal of money doing things yourself around the house. There is a world of information available online and what you don’t find here you will be sure to find somewhere online.
If there is anything specific you would like me to do a tutorial on feel free to let me know.
Cheers
Jean
This is awesome. My mates a chippy and I have shared this to him. He will find it much more interesting then me. What do you like most about the milter saw?
Hey Charlotte,
Miter saw have their place in most home woodworking shops. They make life so much easier as they can produce very accurate crosscuts but more importantly they are quick and when speed meets accuracy you have a winner.
Jean
Hello friend, this is awesome! I have a really large garage but I still like the minimalistic look of the things built for compact spaces. This might be a project/post I revisit in the spring. It’s already snowing here in Canada. Thanks for the great content and I love the video as well – I subscribed to you on YouTube. Very helpful! Thanks again!
Hey Mary Ann,
I’m very jealous of your really large garage, haha but unfortunately for me, in my country, large garaged are reserved for politicians. This means I have to make due with what I have but it’s not all bad. As you can see, it forces people like me to get creative.
Enjoy the snow.
Jean
Wow, good article. My hubby is going to do some DIY project, so I show your article to him. You know, mastering in DIY can definitely save us a lot of money. I hope my hubby will take serious on it and learn the knowledge from you.
Hey Kalis,
Being able to do things yourself does not only save you money but it also gives you a great sense of accomplishment. No matter your skill level as long as you keep challenging yourself.
Jean
Hi Jean, I just found your channel and watched through all the videos on your woodworking station. I loved the ingenuity of it, but couldn’t possibly use it in my (UK) garage (similar size to yours) as mine also has to accomodate 3 bicycles, a motorcycle, camping gear, and, and, and… so I figured at least I could use the idea of the fold away mitre saw and put it along one wall in place of my current workbench. I pop across to your site – and lo and behold you were there first! My saw and its table are always in the way when not in use, and I only ever get to use it outside as there’s never room inside the garage to set up, but this plan covers both issues. Your plans look great and I look forward to building something very similar! All the best, Adam
Thanks, Adam! Best of luck with your build.
Mike
This video addresses exactly the issues I have been struggling with – making a shallow work area functional with a miter station. The sliding miter creates the need for a deeper worktop, but only when the miter saw is in use. Any thoughts on incorporating your flip up panel into a deeper dust collection box?
Hi,
I don’t know if you are aware of my latest workstation build but shortly after building the worktable in this post I abandoned the idea because I wanted to find a way to incorporate my other machines in a similar way. I decided to go for an island option. Here is a video where I use the above technique to install my miter saw to it: https://youtu.be/3wQZ74Agc0k
Jean
I watched the entire series and loved the concept. Unfortunately, my lay out has a beautiful section of bowling alley that I meticulously cleaned, sanded and finished as a final assembly/finish table. Your original design was something that was in my mind, and it really lit a fire. I have about 24 feet of wall I can use, so my plan is to layout my router table, downdraft table, sanding station and miter station on that wall with a flip up for extended stock. My issue has always been the sliding miter, which as you know, requires about 33″ of front to back space….thus your design is actually perfect! I am going to try it out, adding a dust hood on the wall and see how it works. I’ll sed you a picture when it’s done! Thanks for your videos, ideas, and inspiration
Hi Jean
Great build – like it ! I’ve been watching lots of similar videos on Youtube and whilst they are brilliant they are often posted from the USA where their idea of a small workshop is usually bigger than my house ! They often assume that you have all of the machinery whereas yours looks a little more practical for those of us who don’t.
I’m reorganising my shop where I am mainly a turner and I was looking how to utilise and store my mitre saw so this looks perfect.
Thanks again.
John
This is amazing! Exactly what I needed in my little workshop, which I’m still finalizing the design for. Thanks for sharing.