
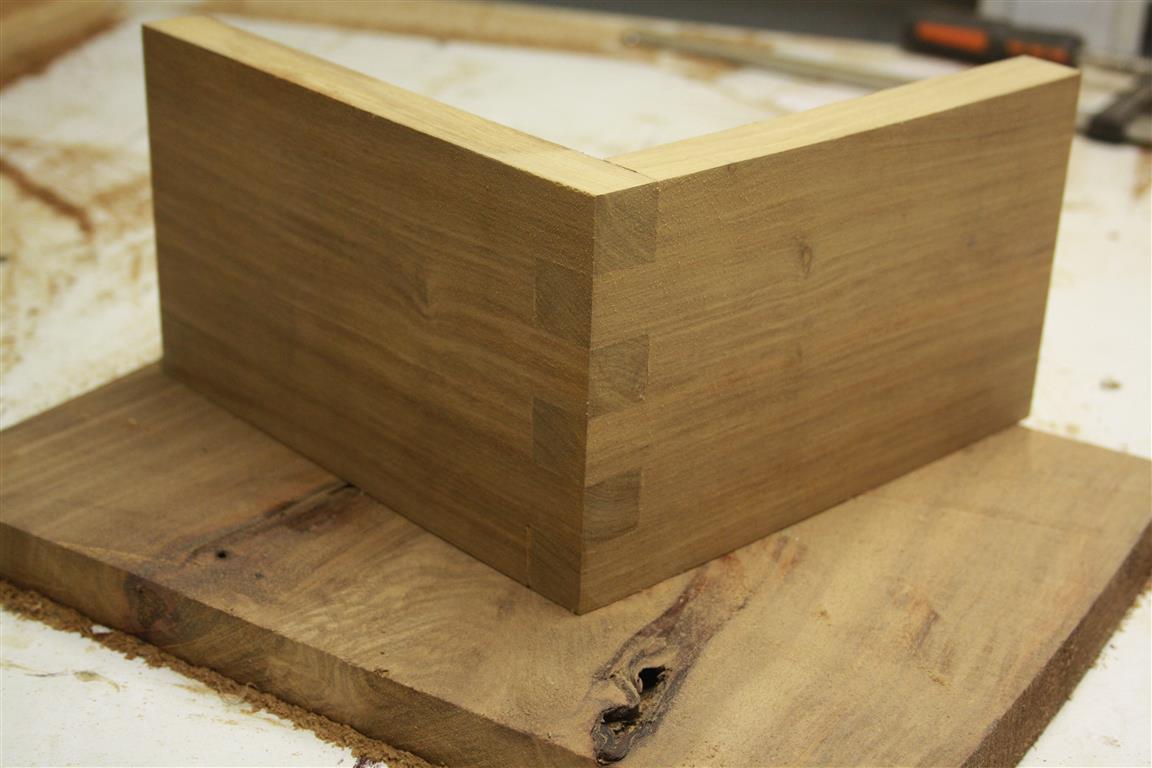
How to make finger joints with hand tools.
Handmade joint making is a skill that really separates the men from the boys.
Besides making for a better joint, joints add a level of sophistication to wooden articles crafted using them that is unmatched while being able to make them with hand tools is an art.
If you are interested in practicing this art, finger/box joints should be your first step in refining your “joint making by hand” skills before moving on to more complex joints like dovetails.
Hand tools you will need:
- Dovetail saw
- Coping saw
- Chisels and a mallet
- Smal try square
Tip:
When making wood joints always make sure to use a sharp chisel.
Even a brand new chisel needs to be sharpened before it is ready to produce quality joints.
Whetstone sharpening is a quick and easy way to make sure you always have razor sharp chisels in your shop.
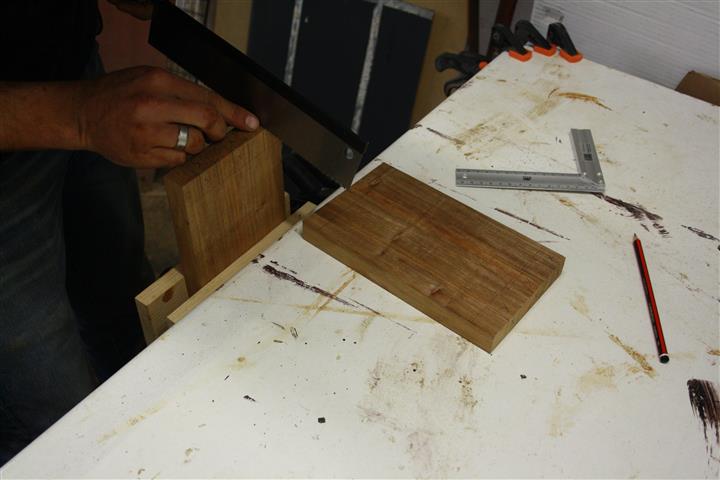
Step 1 – Mark the cut lines

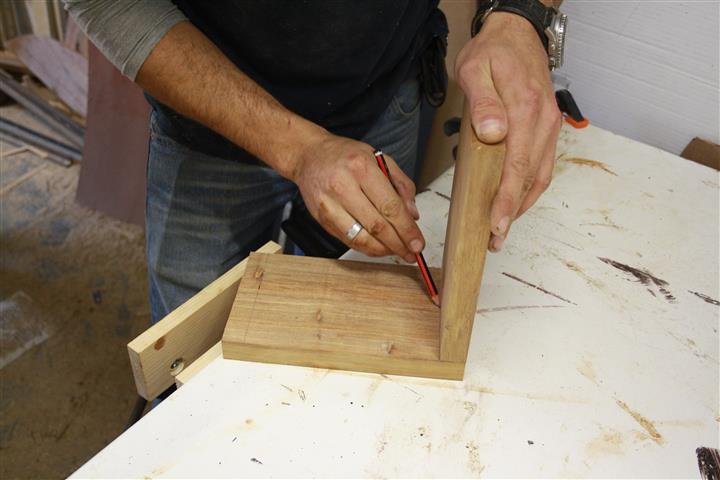 Accurate marking is the first step in making secure fitting hand cut finger joints.
Placing the two pieces of wood together in a vice that are to be joined makes for more accurate marking.
Use a try square to mark the cut lines across both pieces simultaneously. This allows you to close to perfectly line up what will become the positives and negatives of the finger joint. Clearly marking the areas to be removed will help to prevent unwanted errors when you saw.
After marking the face of the box joint you need to mark the depth of the joint.
Use each piece to mark the other and so ensure cutting the 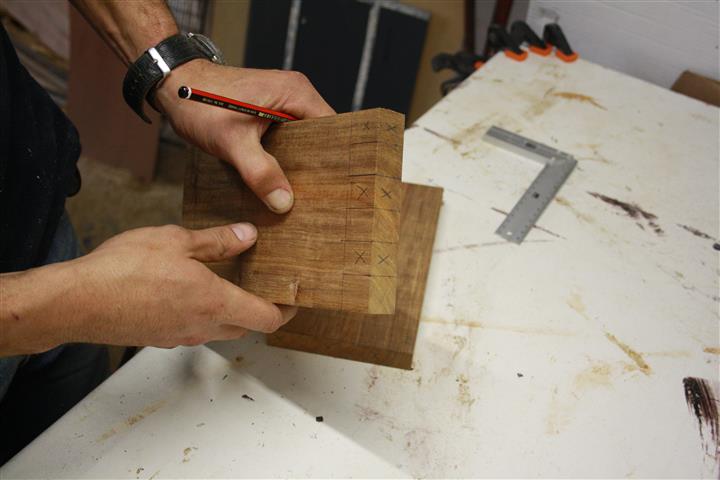 joint at the correct depth when sawing.
Once this has been done use your try square once again to mark the depth cut lines using the already marked lines as references.
Once again clearly mark the areas to be removed to avoid confusion.
Once completed you will start removing the negative areas of the finger joints.
Step 2 – Saw on cut lines
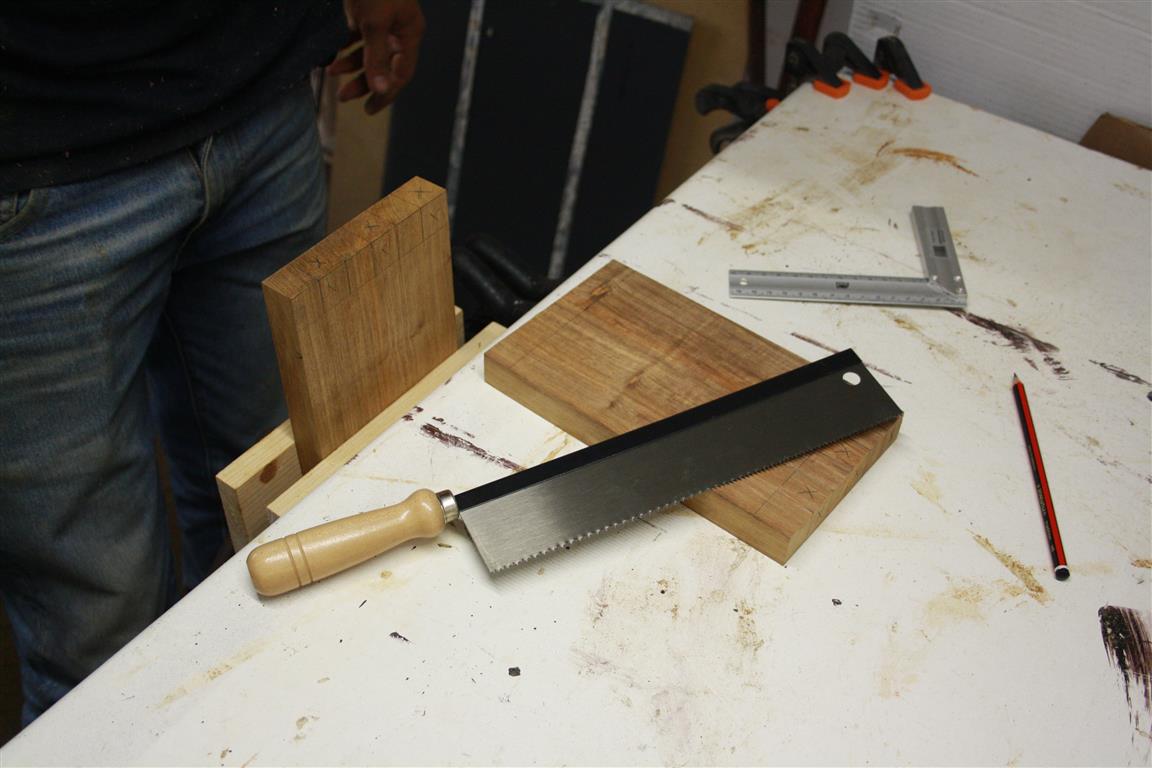
 Removing the cutouts is a two-part procedure that will start with a dovetail saw to be used for the horizontal cuts.
These saws produce a fairly rough cut which is not the desired result for your joint.
To overcome this you will saw slightly to the side of the line toward the area that will be removed and clean it up with a chisel in the next step.
The same applies for the saw depth, however, if the joint is cut too deep and the fingers stick out when the joint is assembled, the protruding areas can be sand down.
To make the horizontal cuts you will use a coping saw, again keeping inside the lines.
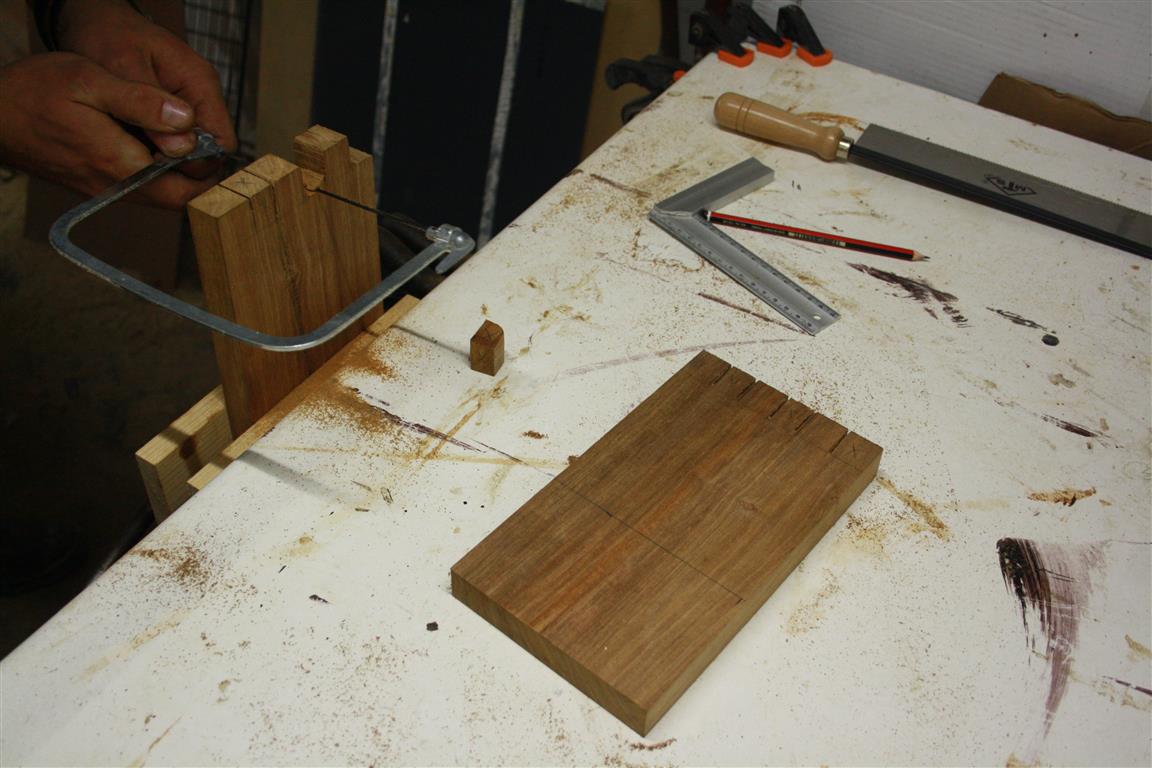 Note that the closer you saw to the line the less labored it would be to tidy up with a chisel but at the same time, the closer you saw to the line the less room there is for error.
After this step, the result will start to resemble a box joint but should not be able to fit together just yet.
In the next step, you will crack out your chisels and start cleaning up the joint to a point where they fit together.
Step 3 – Clean up the joint and make it fit
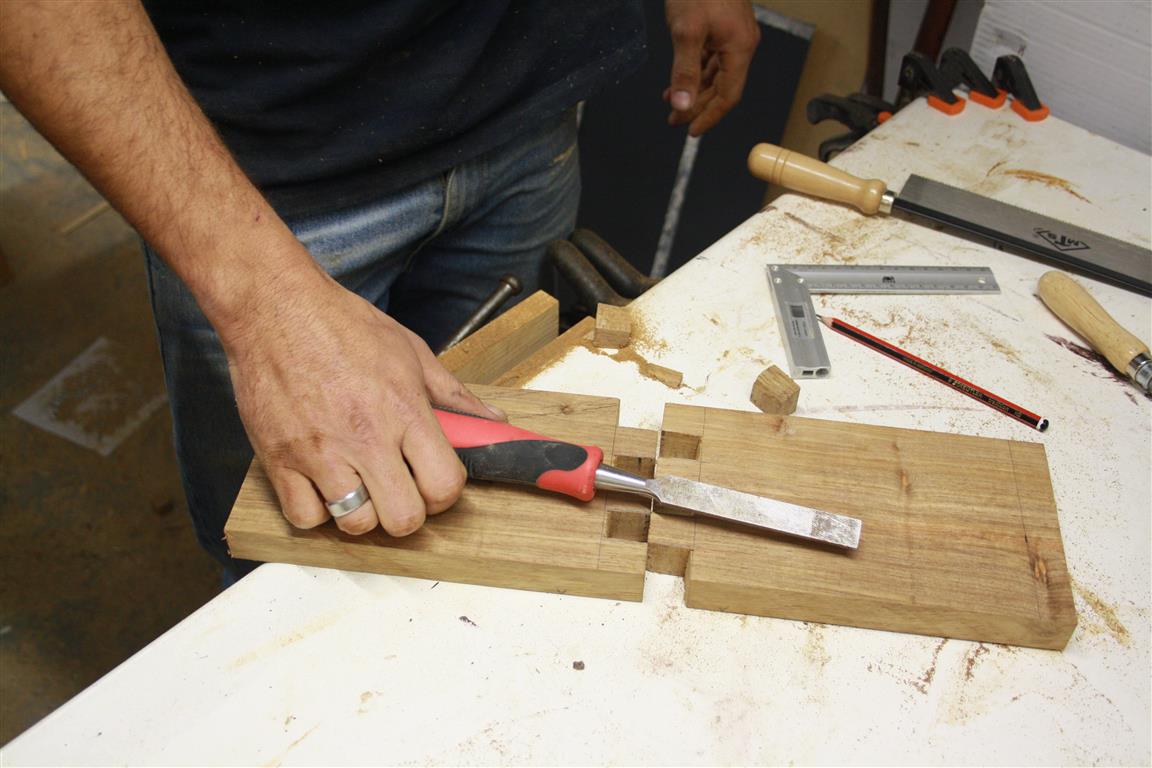
 Now you will use a chisel to make the joint come together.
With the chisel remove the remaining wood in the way of the joint.
It would be a good idea to check how the joint lines up regularly to make sure you are not removing too much wood.
With the chisel, you will want to get as close to your guidelines without going over it and ideally, end up on top of the lines.
Avoid using a mallet to drive the chisel. This way you will have more control of the direction your chisel is moving in.
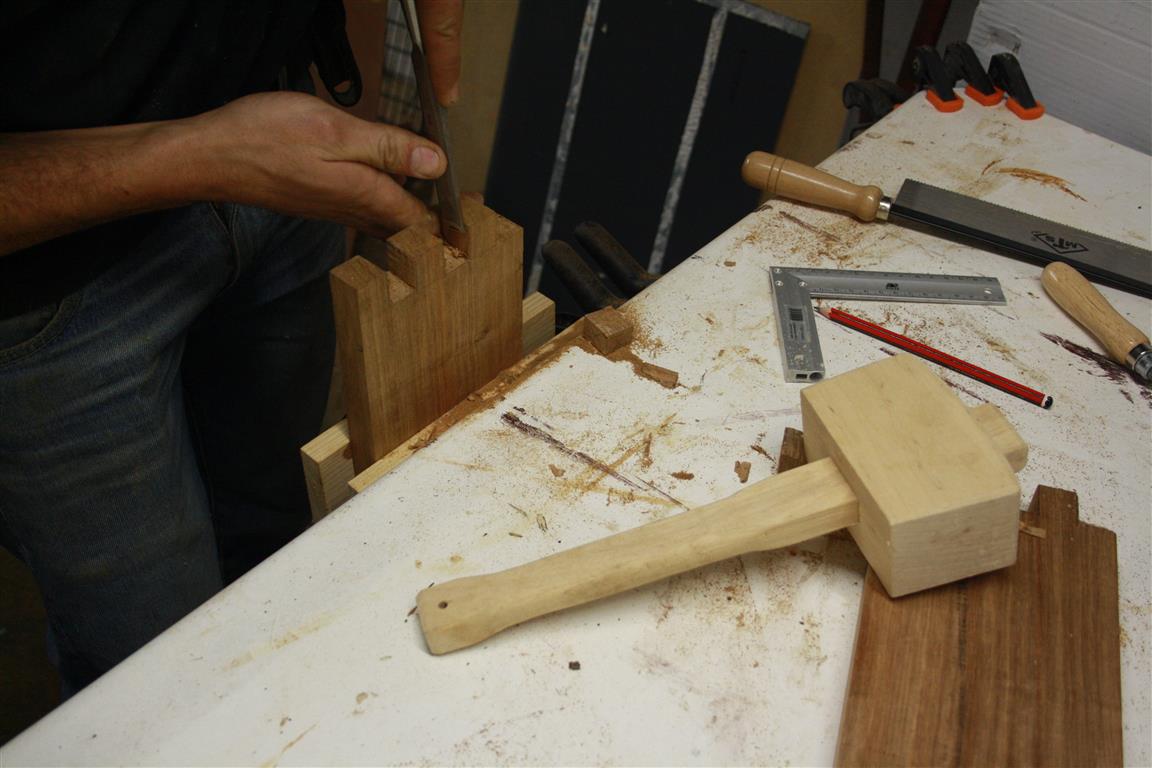
When you are confident the joint will fit together you can use a 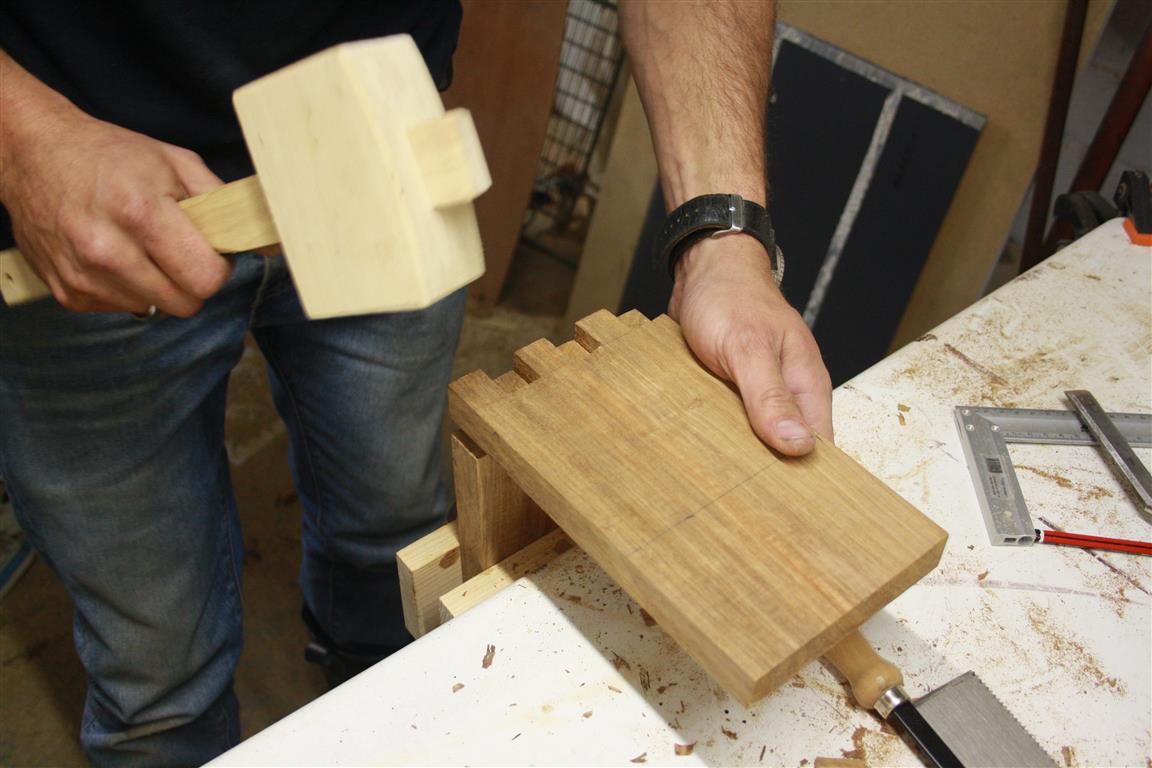 mallet to gently tap it into place.
Remember, while you want the joint to fit as snugly as possible you should not force it. If you crack or break the wood at this point all your effort would be for nothing.
The joint is completed by gluing it together and after curing, sanding it to a flush finish.
 Woodworkjunkie.com, DIY like a pro.
If the post was helpful or you have any suggestions, we would like to know about it. Leave a comment below or send us an email at admin@woodworkjunkie.com.
Wow, nice. I am into woodworking, it’s a passion I have that I am slowly working on. I especially love DIY projects and this tutorial will help jumpstart my woodwork hobby. Am I wrong or does this type of joint look very versatile?
Hi Ami,
They are indeed and that’s why they are one of the first joints a woodworker should learn. They are simpler to make than many other types of joints while still doing their job well.
I could understand why people enjoy DIY. It’s a very gratifying feeling to build or make something yourself.
Stop by soon for more.
Jean
Nice job there, Jean. What a simple and beautiful joint! I’ve tried doing these in the past, but I think I just don’t have the patience. I didn’t get it right the first time, and I ended up getting frustrated and putting it down. Maybe it would be good to learn to take things easier and feel the satisfaction of getting it right!
Hi Steve,
Fine woodworking with hand tools and esspecially joint making is indeed a art that requires patience and practise.
But once you’ve got it down you won’t regret it.
Thanks for stopping by.
Jean.
I’m always looking for a way to improve my woodworking skills. Thanks for the info Jean, I will probably use this when I make a toybox for my son. What kind of wood are you using in this example?
Hi Chad,
That’s a great idea. Making toy box using handmade joints would look great.
The wood in the post is Kiaat. It is similar to the more common, Blackwood.
You will notice I often work with Kiaat as it is one of my more favorite species to work with.
Jean
Hey Jean. Awesome website. Keep up the good work.
Jean,
Great lesson on a simple joint that will be very strong. I like restoring old cabinets and stuff I find in old houses. I am currently working on a wood wine rack for table top. This will not help me here, I do have a couple of drawers that I need to make for my shop, This will be a great idea for the corners.
I have a question about joining two different woods together. I have walnut and oak that I need to put together, an suggestion on weather I need a biscuit or not. The walnut will have several holes cut in it after it is joined to the oak.
John
Hey John
If I’m understanding you correctly, you are asking if you can join these woods together on flush surfaces?
In my personal experience joining denser woods like oak and walnut does indeed require a bit more than just some glue and a clamp. I don’t know what the application would be but if it’s for example for drawers where the drawers will be opened and closed by pulling and pushing on them I would definitely advise using, at the very least, a biscuit.
At the end of the day, when joining wood, the larger you can make the area of the surface that will be joined (like when making a finger joint to increase the joint surface area) the stronger the joint will naturally be.
Hope this is helpful.
Jean
Hi: I have a very old and rusty tool that i think was used to make “finger joints “???? How can I send some photos????? to get your thoughts on it????
Hey Keith,
You can send me an mail at jean@woodworkjunkie.com
is your name pronounced john or gene? thankks
Neither, it’s a french name.
I have a design for a small box that uses 1/8 inch box joints. It would normally be made using a table saw, which I don’t have. Cutting box joints this narrow by hand is proving to be a challenge as my chisels are too thick to pare down into the joints. What would be the smallest width you would suggest for hand cut box joints? I think it would be better to scale the box up – make it bigger overall and use 3/16 or 1/4 inch joints.
Have you considered cutting the joints with a router?
This article was quite helpful from almost a month I was searching for a carpenter who can do this for me but couldn’t find one and I landed at the finger joint technique, to actually make a slab out of scrap wood and the finger joint machine is quite costly and we have a big merchant who does that but they don’t take up small job works.
Thank you for the article.