
A push stick
A simple and easily produced tool that might just save you from a world of discomfort.
This is the Woodwork Junkie “How to?” – DIY table saw push stick making tutorial for beginners.
What it is.
A push stick is a tool that can be bought or alternatively, easily produced yourself and although very simple in design, plays an important role in the safety operating procedures of a table saw.
Table saws are useful tools that can chew through a piece of wood but when not used correctly will show no mercy in its retaliation.
The main focus of push sticks is to extend arms reach when operating a table saw and so allowing the operator of the saw to increase the distance between their limbs and the very dangerous rotating blade of the saw.
To feed:
Your main focus here should be a tool that can hook the workpiece and trough applied pressure, feed the workpiece trough the blade with the objective of clearing the operator’s hands from the blade.
Ideally, should something go wrong and kick back occurs, the push stick will take the punishment from the blade.
What you’ll need.
- A piece of off-cut wood – 7×14 inch (I used a 3/4 inch thick plank)
- Measuring and marking equipment.
- Figure saw, jigsaw or scroll saw.
- Router for edging
- Sandpaper (100 grit should do the trick)

Step 1 – Plot the basic outline of the push stick
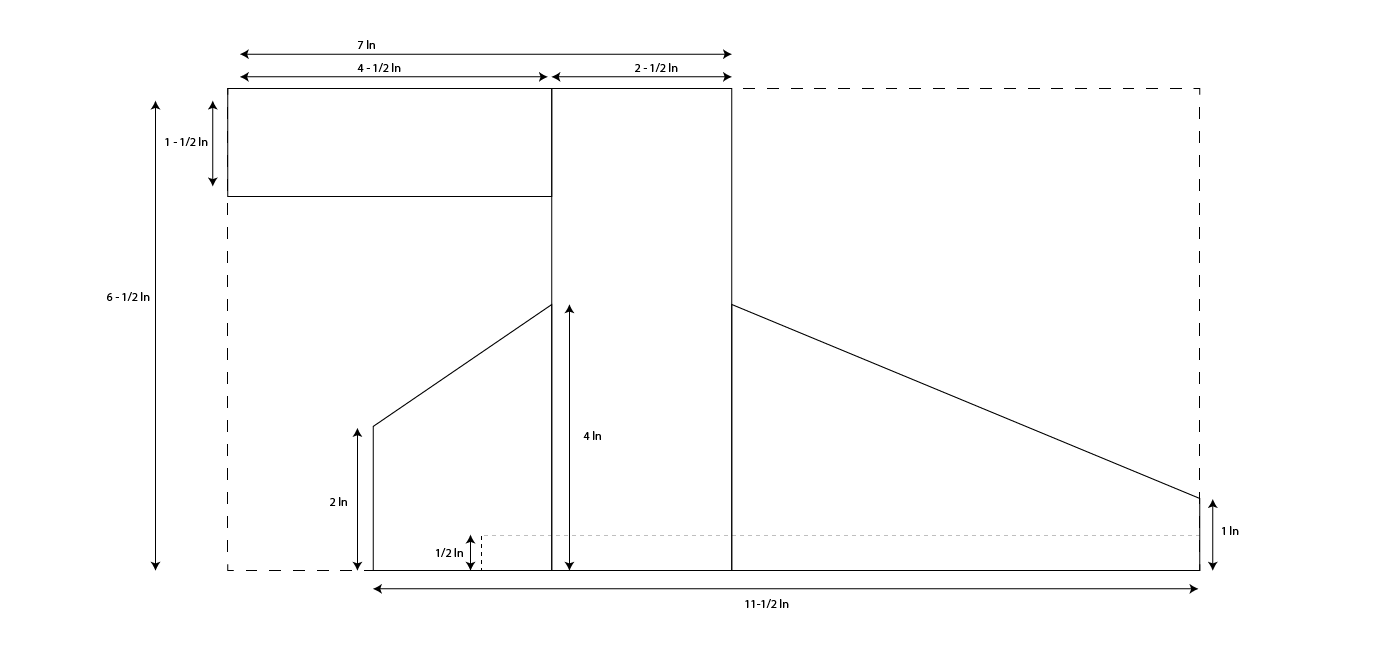
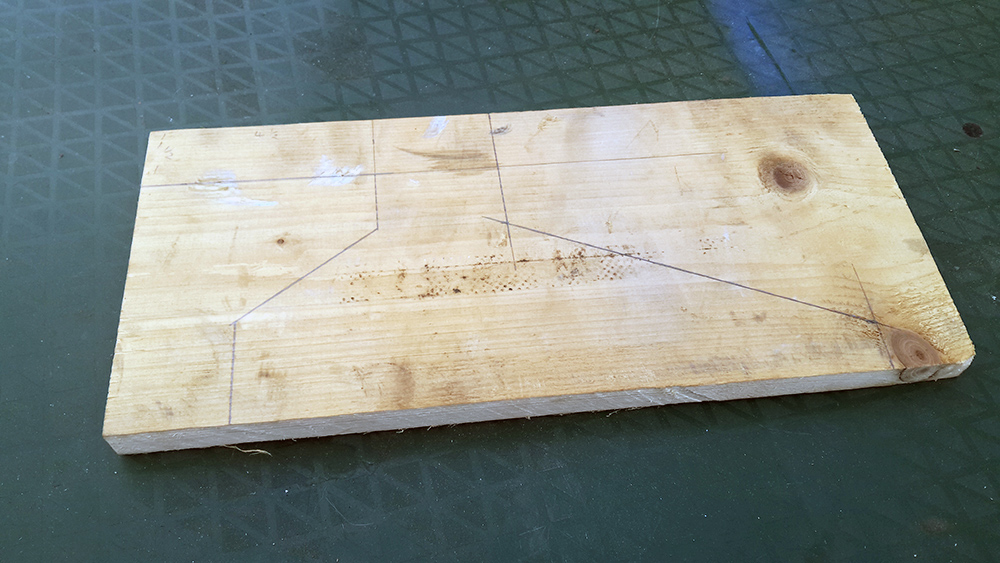
Using measuring equipment and a marking tool, plot out the push stick on the piece of wood as per the supplied dimensions.
Step 2 – Soften the edges
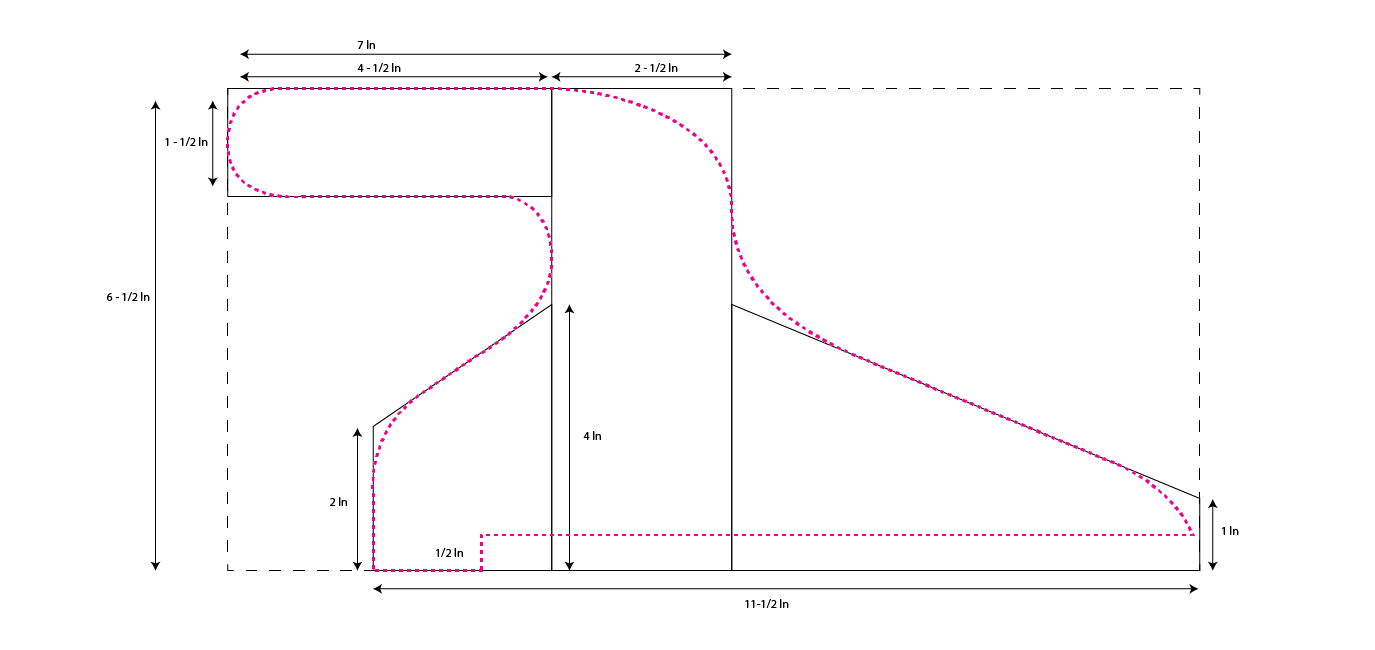
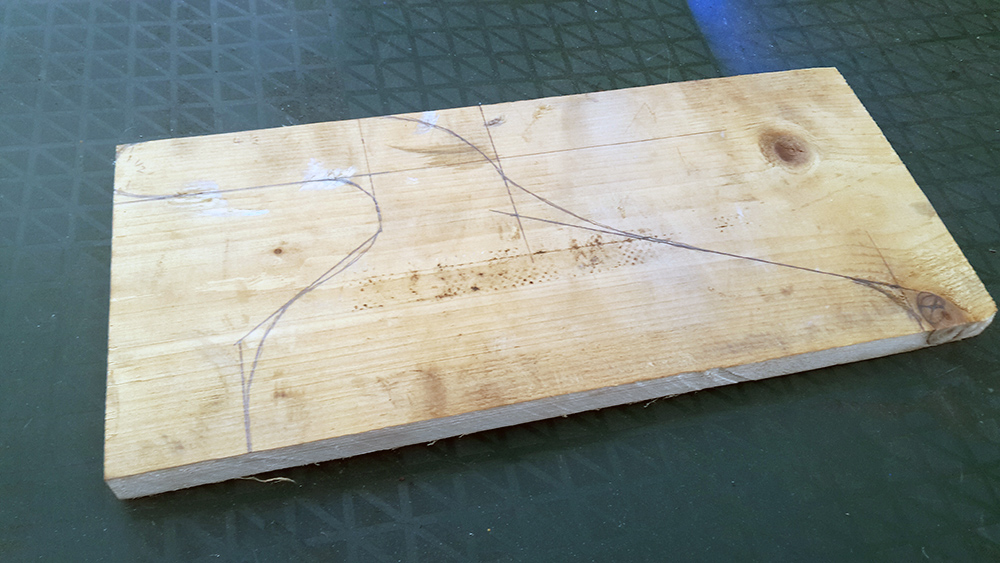
Using the marked lines as a guide, free hand draw a curved edge for a more comfortable look and feel.
This will be the cutting line.
Using a marking tool that produces a more prominent line or a different color can make differentiating between the lines easier.
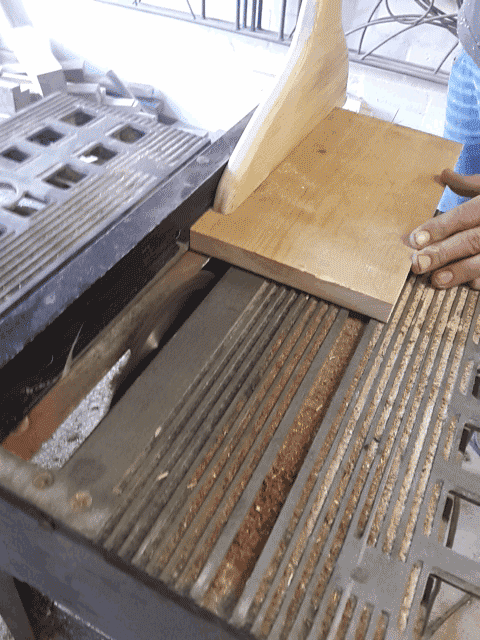
Step 3 – Cutout

With a scroll or figure saw cut along the guidelines to produce the rough push stick. (If needed a jigsaw can also be used).
Step 4 – Router and sand
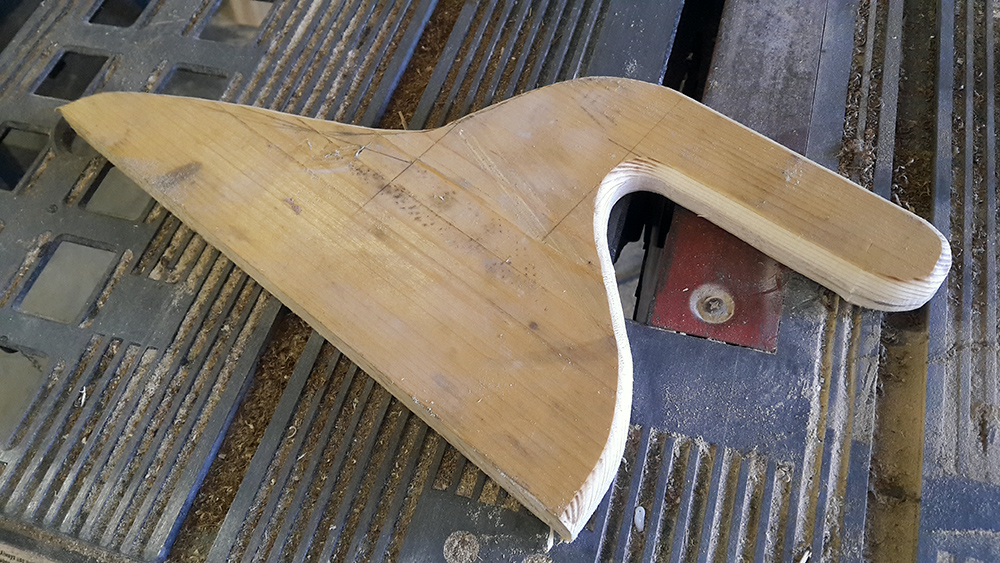
Use a router to cut a curved edge on the push stick for a better look and feel. Do not router the base (sole) of the push stick.
When completed all that is left is to cut the heel in and sanding down the push stick for a smooth finish.
Step 5 – Cut heel and finish
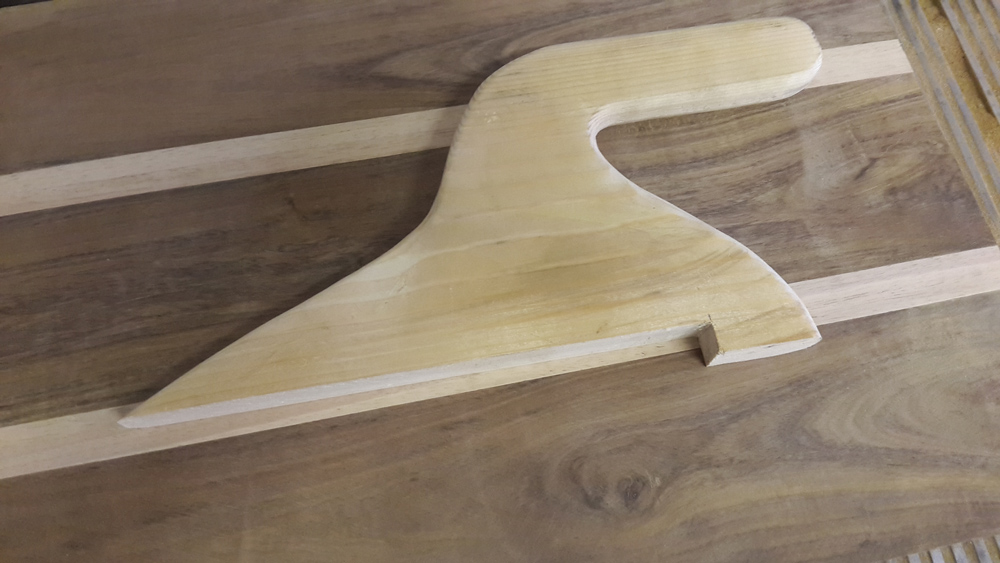
As indicated in figure 1 & 2, cut in the heel of your push stick. When doing so it is important to keep in mind that a deeper heel offers more control but also limits the operator with regards to the minimum stock thickness it can be used on (The stock should not be thinner than the heel of your push stick).
The heel in this tutorial is a 1/2″ deep but can be produced at a 1/4″ to accommodate thinner stock.
Table saws are dangerous if not used correctly.
If you have no experience or you are not familiar with the operating procedure of a table saw it is strongly advised that you only use the saw under supervision. ALWAYS follow the safety instruction in the manual of your saw and use the appropriate protective equipment.
 Woodworkjunkie.com, DIY like a pro.
If the tutorial was useful or you have any suggestions please let us know in the comment section below. Alternatively, you can mail us at admin@woodworkjunkie.com
Hi Jean,
I have my own table saw but haven’t done any woodwork in a while.
The last time I used it I needed a push stick so I cut the end off an old wooden clothesline prop and used the end of that to push the wood through.
It wasn’t ideal and having read this piece I think next time I start a project I’ll make a push stick to your design it looks a lot safer lol,
Cheers ,
Paul.
Hey, Paul.
Thanks for your comment.
The great thing about these types of push stick is the amount of control they offer as opposed to just a stick with a notch to push the stock through the blade.
As far as table saws go you can never be too safe.
Jean
Hey, I love wood working and have created many pieces for my own personal use. I don’t have a table saw. I use a jig saw and an electrical hand saw. Making very simple pieces out of refurbished wood. I love your push stick and has given me a great idea how to create one for my electrical hand saw. Keep up the great work helping other be safe.
always a better way
sending blessings your way,
Linda
Hi, Linda.
Thanks for your comment.
Happy woodworking and remember, safety first.
Jean
This is fantastic, what a fantastic overview on how to make a diy table saw push stick and the 5 steps are so easy to follow, I need to get one of these made, thanks for sharing the pictures, diagrams and dimensions, must appreciated
Hey David
No problem.
Happy woodworking.
Jean
Great design, practical as well.
Great! Glad you like it.
Jean
Hi Jean!
I just got a mini table saw for my jewelry workshop. Even though it is small and cute, I am well aware that it has the potential to cause real damage if used improperly. I am looking for a push stick that is sized correctly as I will be cutting small pieces of wood and I believe that in itself increases the danger level. I can’t find any patterns or ready made sticks out there; and am unsure if scaling down an existing pattern will result in a piece of equipment that will be both sturdy and safe. Do you have any ideas? Any help would be much appreciated. Thank you, Lori
Hey Lori,
Working on a small table like saw can definitely be riskier. Especially because you will find your hand closer to the blade.
Scaling down an existing design might not be the answer as it may create a weak point that has the potential to collapse while using it and you don’t want that.
If you can reply with the model of the saw maybe I can look into it for you.
Jean
I made one like this today, and really like the control it gives me. I cut a finger on my tablesaw last fall, and while it has healed nicely, I get very nervous whenever I turn it on. Having a good push stick like this is helping to restore my confidence.