
Raised dog feeder with sliding drawer for food.
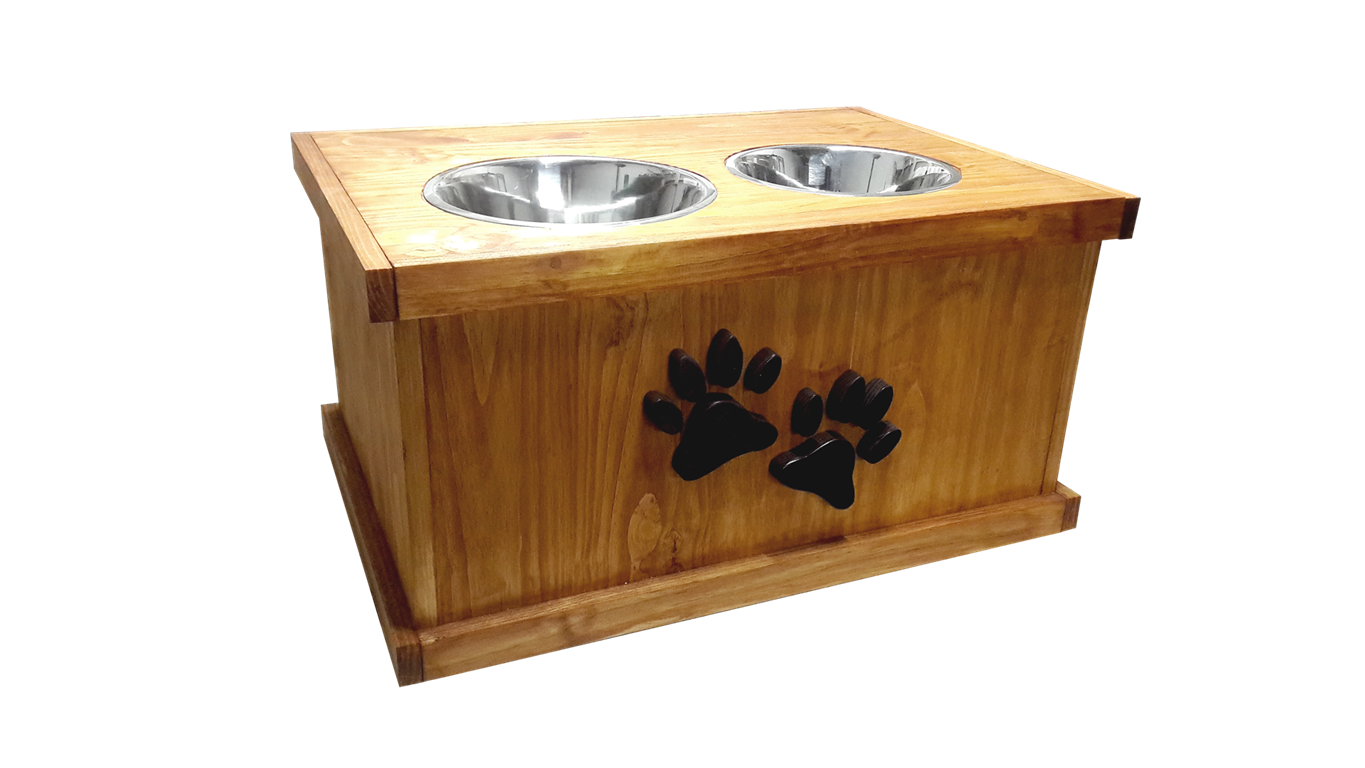

Your best friend deserves more than eating off the ground.Let them dine is style. With the Woodwork Junkie raised dog feeding station plans and tutorial, build a feeding station for large breeds.
The beauty of this raised feeder is the easy access to the dry dog food stored inside.
Note that as the design dimensions are dependent on the size of the container you are using to store the dog food and also the height of the dog it is being built for.
It is therefore advised to build the feeder according to the dog it is intended for.
We will be posting the dimensions based on the container we used.

Tools you will need:
- Saw to make cross cuts (Miter saw or miter box)
- Power sander
- Jigsaw
- Router (optional)
- Drill
Also:
- A container that the dog food will be stored in.
- Two dog bowls
Consumables:
- Sandpaper
- Screws
- Wood glue
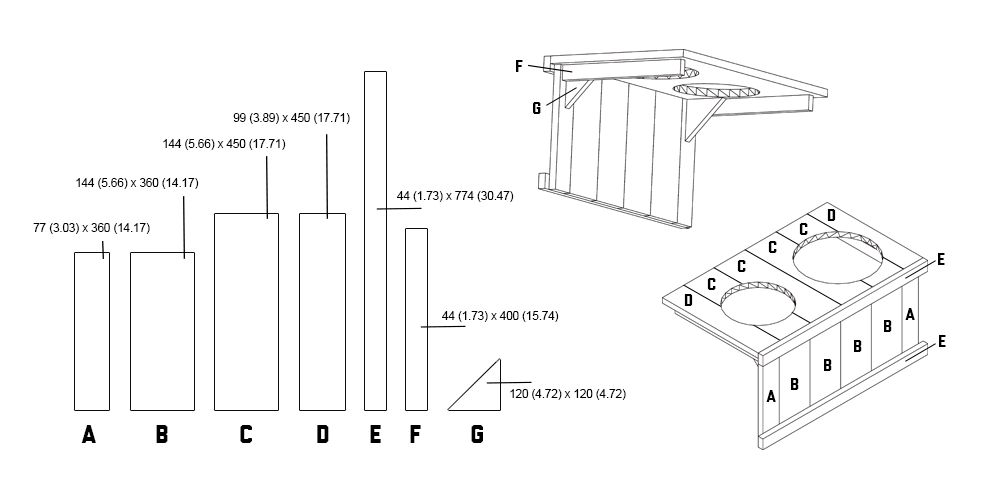
Cutting lists:
The cutting list supplied is to accommodate the container we used. As these containers are not standardized the woodworker should adjust the widths and heights to accommodate their containers.
The height of the finished large breed feeder should be able to accommodate the container and the bowls on top of each other and should be roughly the bottom of the dog’s chest height.
All components are made using 1-inch thick lumber with the exception of the cradle which is 2 inches thick.
Assembling the base – mm(inches)

Assembling the drawer
Assembly
Step 1 – Glue the panels
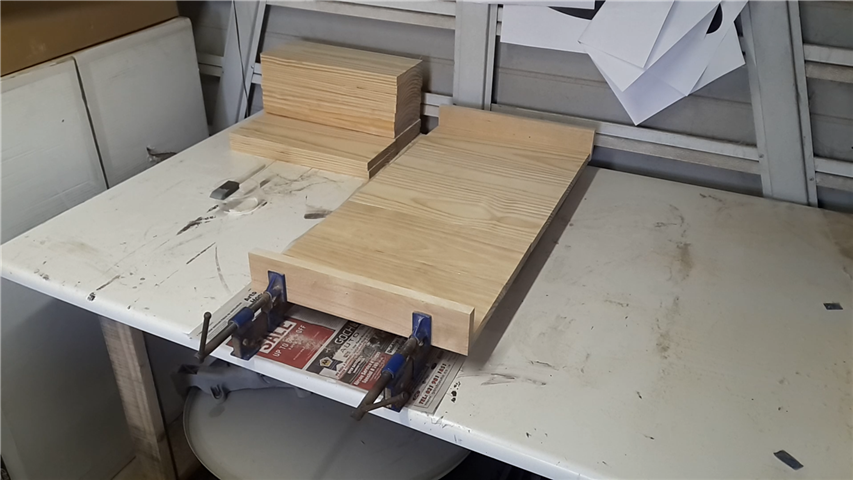
Start off cutting all the components that will be assembled to make the feeding station. After cutting all the pieces of wood to size, start the assembly by gluing the panels that would form the top, front, back and sides of the box and allow to cure.
Step 2 – Assemble cradle and base panels
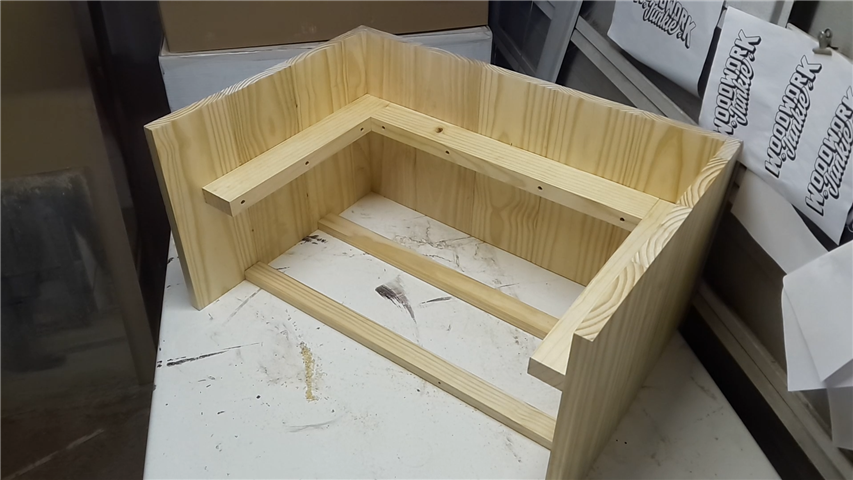
The cradle will be built to accommodate the container for the dry dog food and consists of the cradle sides to hold the container centered while the braces at the bottom support the weight of it. The bottom braces also add to the stability of the entire base.
Step 3 – Fit rails and skirtings
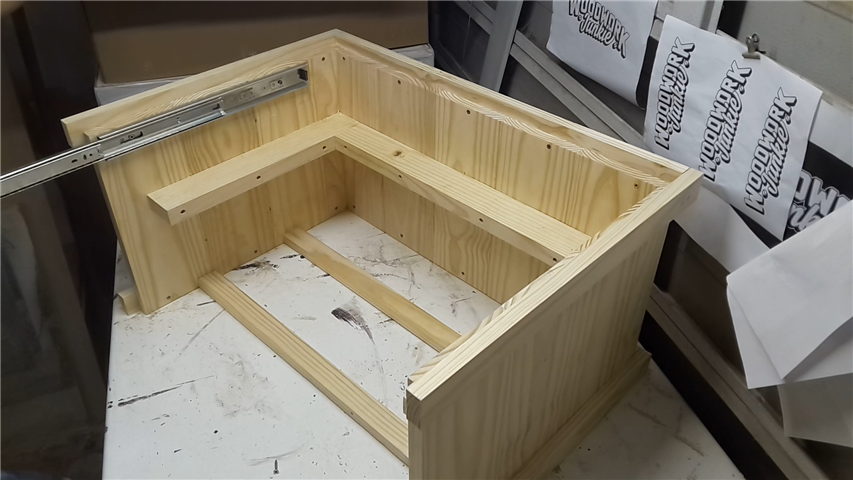
The skirtings are fitted around the edges of the base. The skirting around the top edge of the base should protrude enough as to allow it to be the same height as the drawer when the drawer is fitted. Besides for its visual appeal, the skirtings are also fitted to conceal the majority of the screws visible on the outside of the box.
The rails will be fitted on the inside of the box sides along the top edge.
Step 3 – Assemble drawer
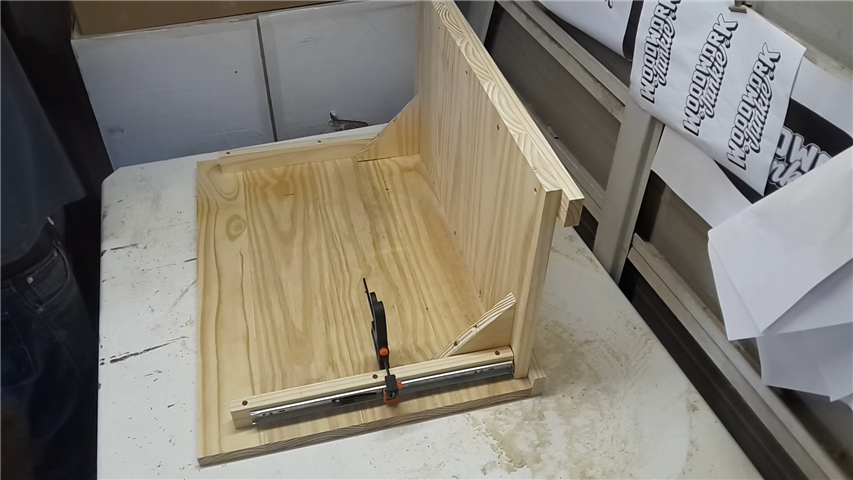
The drawer is assembled in much the same way as the box. The two panels are fixed together using the two triangles to form a perpendicular angle. The rails are fixed to the rail mountings as indicated by the photograph above. When the drawer is fitted, the space between the rail mounting and the inside of the side panels should be just enough to accommodate the rails.
Step 4 – Cut holes and router edges

Use your pet’s bowls to mark the holes that will be cut out. The holes being cut should be slightly smaller than the bowls and so allow the edge of the bowl to overlap onto the wood.
After making the cutouts you can use a router to add a curve to the inner edge of the cutouts.
Step 5 – Finish
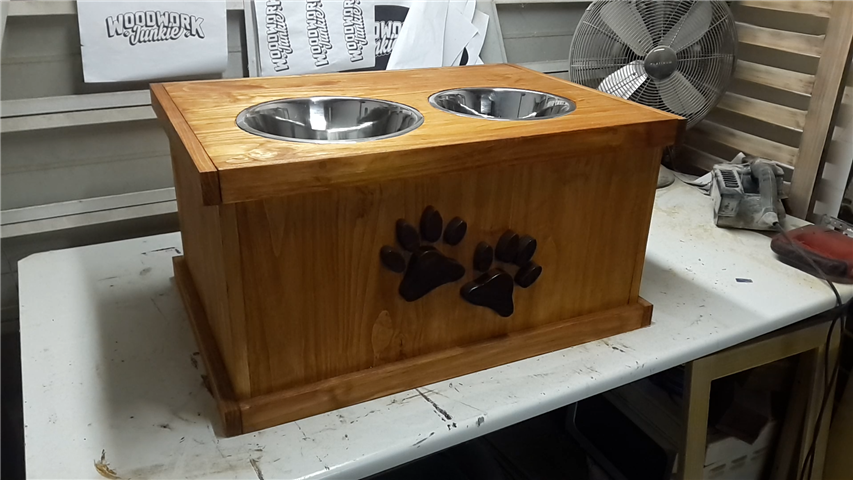
Finish the feeding station as desired. We opted to fit paws to the front of the feeder as a decorative feature. Instead of paws, you can also consider a bone or even the pets name.
Finishing this feature in a darker color will make it more prominent.
 Woodworkjunkie.com, DIY like a pro.
This is a really nice, clear, informative walk-through this project. The photos and video accompaniment really helps. I’d like to see a photo of dogs eating from it though! I know for one that it wouldn’t suit my labrador because she loves to flip her bowl over after meal times.
Hi Robert.
In the beginning of the video, there is a short snippet of a Doberman eating from it.
The design might have to be adapted slightly for a Labrador as they are smaller than a Doberman.
Thanks for your comment.
Jean
This looks amazing, my beagle would love something like this.
The photos and videos really help. Thank you for providing a clear step by step process.
Might even have a go at making this-this weekend?
Kirsty
Hi Kirsty
It is a fun project for beginners. And the doggies enjoy it also.
Happy building.
Jean
This looks amazing! I’m just wondering if it wouldn’t be to small for my yellow lab – he is quite a big dog. The other thing would it be possible to have slow-feeder bowl instead of regular bowl installed.
Do you think this would be too complicated project for a person that has never done anything similar? 🙂
Hey Robert,
This feeder might actually be too big for a lab. The dog in the video is a Doberman, quite a large breed. I have two Chows which are similar in size to labs and this feeder is too big for them.
The design can however easily be adapted to be suited to any breed.
With regards to the slow feeder bowl, I would imagine it to be straight forward depending on the specific bowls design.
Hope this is helpful.
Jean
Thanks. I’ve saved the link, and probably will start the project during winter, as I will have more free time.
What is the overall height of the feeder you made. I wanted to judge how much smaller I will have to make my cuts. I have a medium sized pitbull and know the feeder you made would be too big. Thank you. Great job by the way!
Hi Rich,
The feeder in the tutorial was built for a large dog. It’s about 40mm (17.5″) high and takes the dog up to its chest.
Hope that’s useful.
Jean
What type of lumber did you use? I see the dimensions and thickness, but did you buy a sheet of plywood or something else?
Hi Katie,
I used PAR’d pine planks to build the feeder as it would be used indoors. If you are looking at making one that would be used outdoors, you would need to consider a more dense hardwood.
Plywood will work just fine also if you are looking to make a feeder that would be used indoors.
Jean
Okay great! Thank you! I will be making one for indoor use only next weekend so now I know what I can use haha. Thanks again!
Always a pleasure.
I have a doberman (used to have 2 dobies – but one passed away recently) and a standard poodle. This is exactly the height I was looking for and how I’d like it to open. All the others I see online are too short (and way too expensive). I’ve never built anything before (only Christmas Yard cut outs with my jigsaw). I have the tools (except a router) – I use them for home projects. Is this project for medium to experienced woodworkers or could a woodworking novice, like myself, build this too?
The project isn’t very complicated and can be done with minimal tools.
How many Board feet were used in this build?