

How to make wooden cutting boards with inlay designs
Cutting boards
Most of us start out making these and many of us keep making them long thereafter. Why? Because their easy to make, stylish and functional. Whether you are making it for yourself or as a gift for someone special, cutting boards are great woodworking projects.
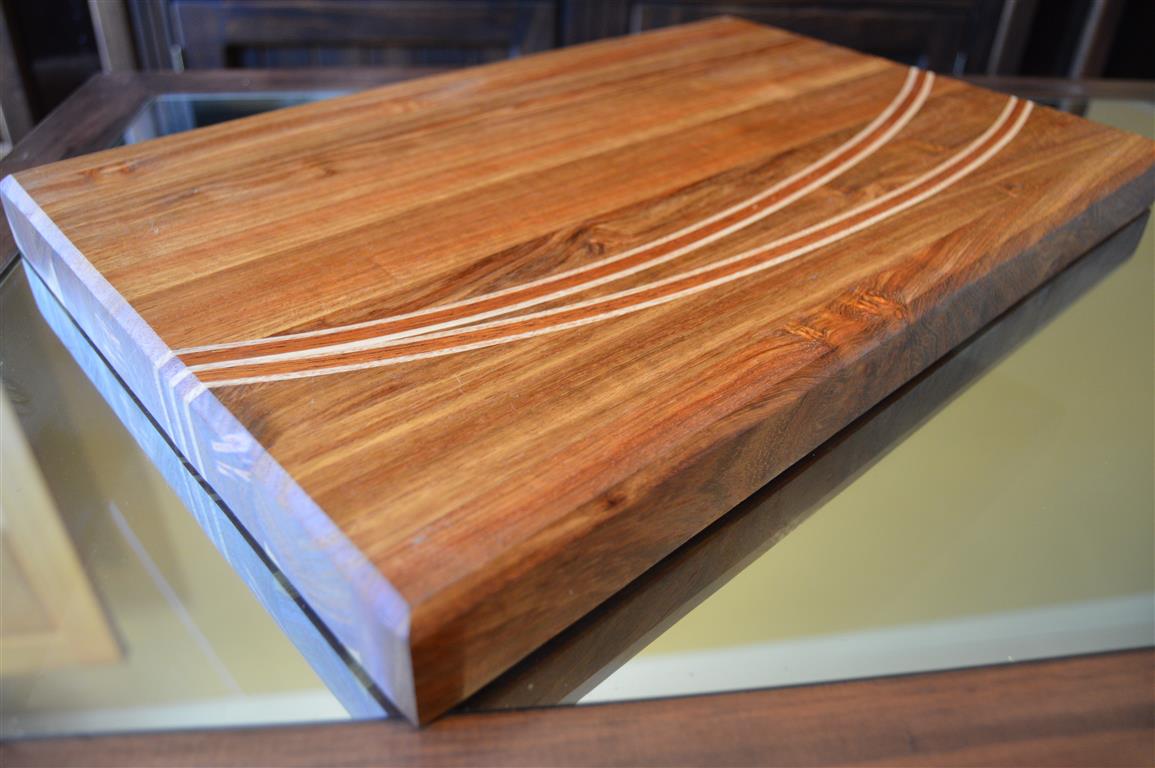
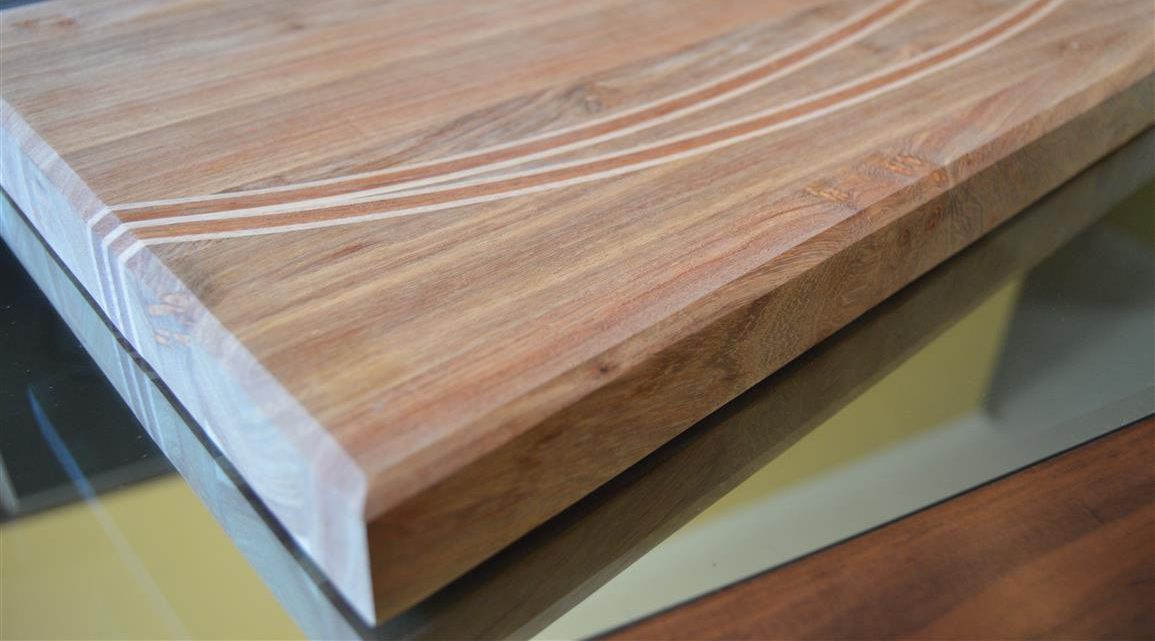
Grouping together offcuts from different species can produce all kinds of beautiful results but when you are looking to break away from the conventional straight parallel lines of a normal face grain cutting board nothing can beat the look of a curved inlay.
How to add a curved inlay
The method described below does so much involve adding a real inlay as per the definition of an inlay but rather adding curved laminates that would resemble an inlay when completed.
Power tools you will need
- Router
- Thickness Planer
- Band saw or (if you don’t have a bandsaw)
- a Table saw and
- Jigsaw
Materials you will need – The wood

To add a laminated inlay to a cutting board that you have made you are going to remove a segment of the board using a router and then glue in an arrangement of deferent wooden planks that will produce a desirable result.
These planks can be cut from larger stock using a table saw or by resawing using a bandsaw. They can then be planed down using a thickness planer to get rid of any cut marks and ensure they are indeed flat. If they aren’t it can cause gaps between the laminated layers of the board.
The planks need to be cut and planed down to be thin enough to bend without breaking. Ideally, the planks should also be cut in lengths slightly longer (4-6 inches) than the board it will be added to. The reason for this is to allow you to remove any ends that may have suffered planer snipe.
The guide
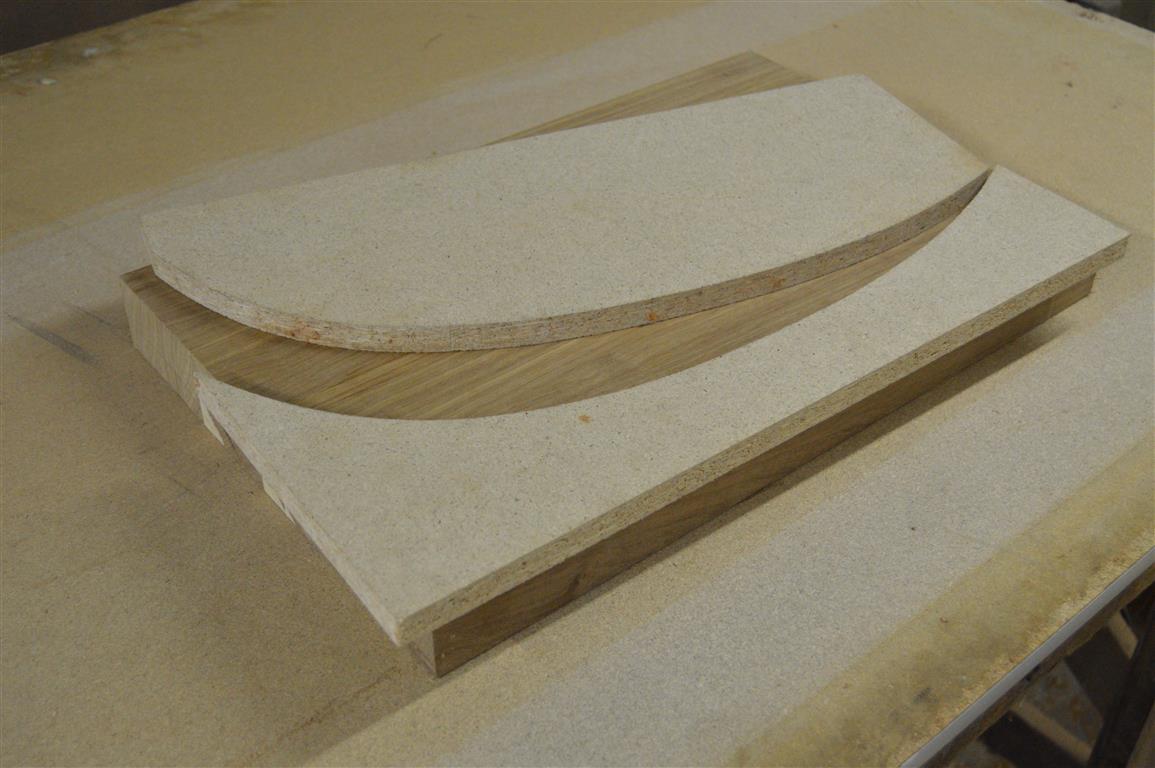
You will use a guide to direct your router while removing the segment of the board that will be replaced by the arrangement of thin planks you have selected.
To make the guide, simply draw the curve you wish to lay into your board on a piece of offcut plank, MDF or chipboard and then cut it using a jigsaw or band saw.
If you wish to add two or more different curves to the board you will need to make a guide for each.
The router bits
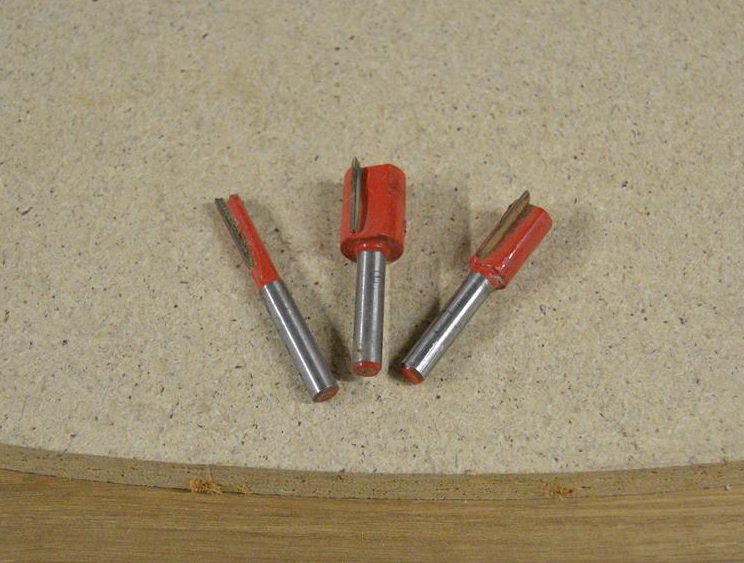
To remove the segment from the cutting you will use a straight router bit that is the same width as the inlay you intend on adding to the board.

This is very important in ensuring a good looking quality inlay.
The board, that is likely made from different species of wood layered together, has parallel lines and different grains running across its surface.
Laminating in layers that are the same width as the bit used to remove the segment from the board will mean these lines will line up after the packing/inlay has been added and the board has been glued back together.
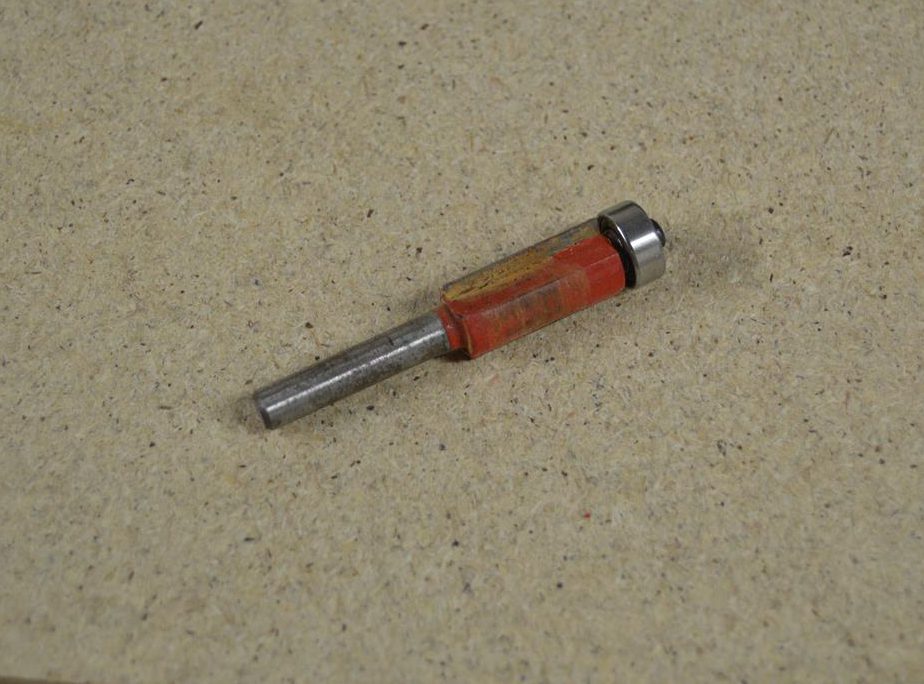
In addition to the straight cut bit, you will also need a flush trim bit. The use of which will be described in more detail later.
Step 1 – Removing the segment
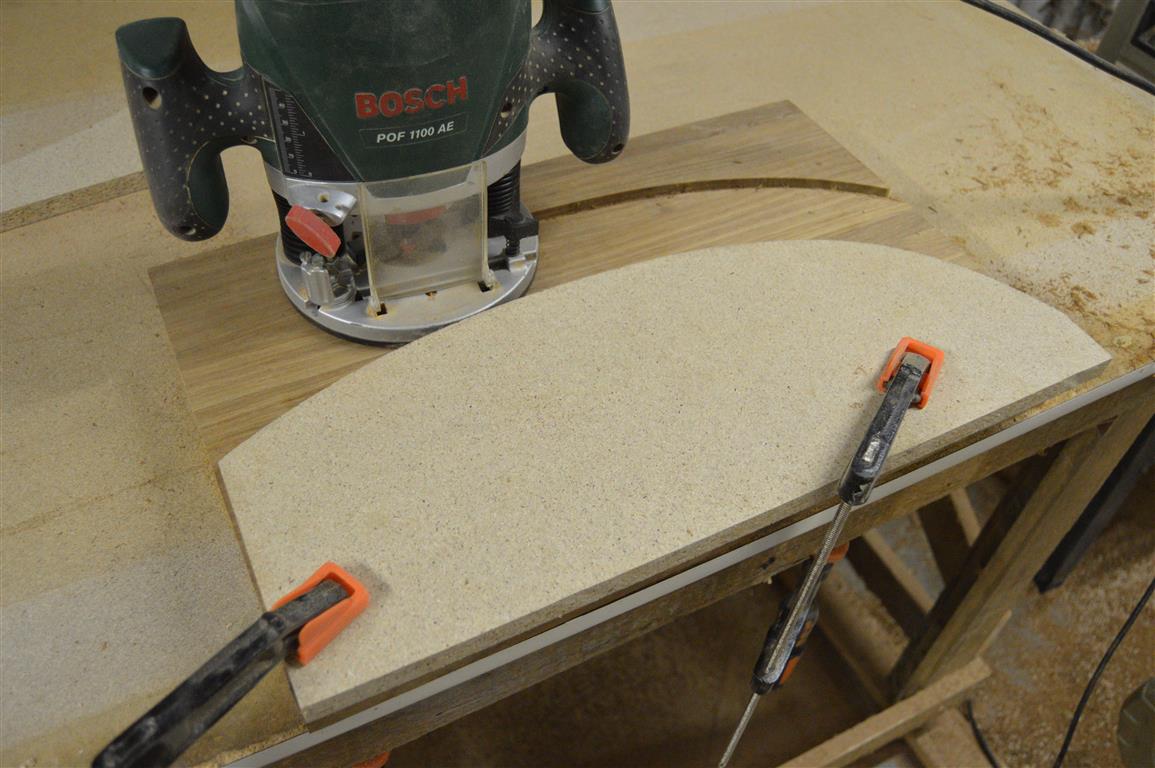
Clamp the guide to the board in the desired position.
Using the appropriate straight bit run the router along the curved guide.
For the best result perform a few passes while slightly increasing the depth of the cut with each pass.
Continue doing this until the cut depth has reached half or little over half the thickness of the cutting board.
Step 2 – Split the board
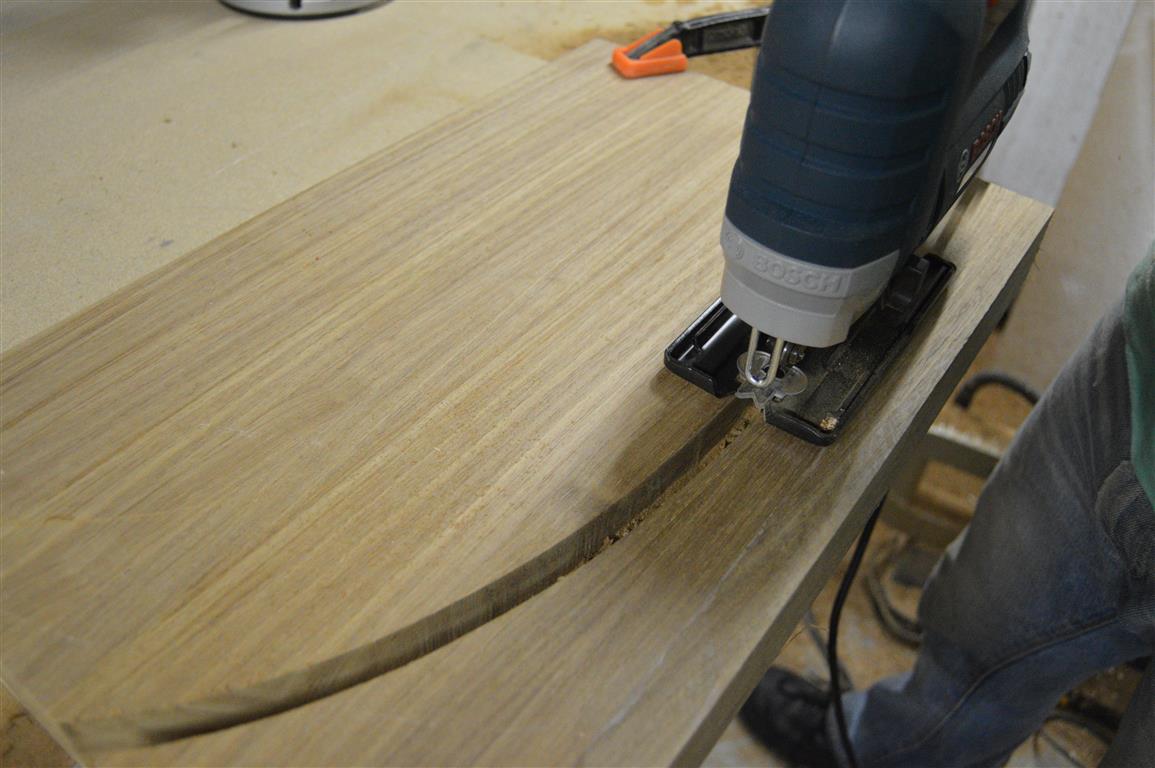
The next step will be to split the board into two parts by cutting inside the groove created by the router.
Using a band or jigsaw cut more or less in the center of the groove.
It is not a problem if the cut floats slightly however the saw blade should never touch the walls of the groove.
Step 3 – Flatten out the cut
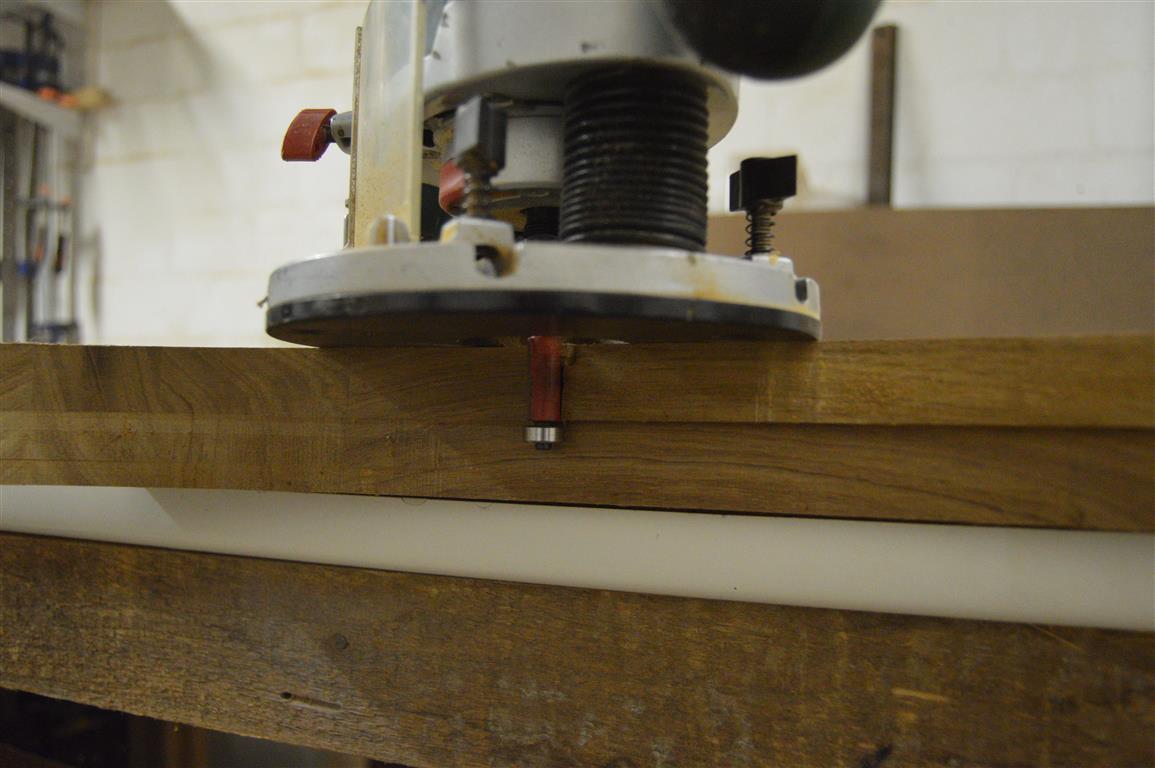
Using a flush trim bit trim the area that was cut using a jig/band saw so that the cut surface is level and smooth.
Now, when you place the two part together along the curved cut, it should make a nice even seam.
Step 4 – Laminate packing
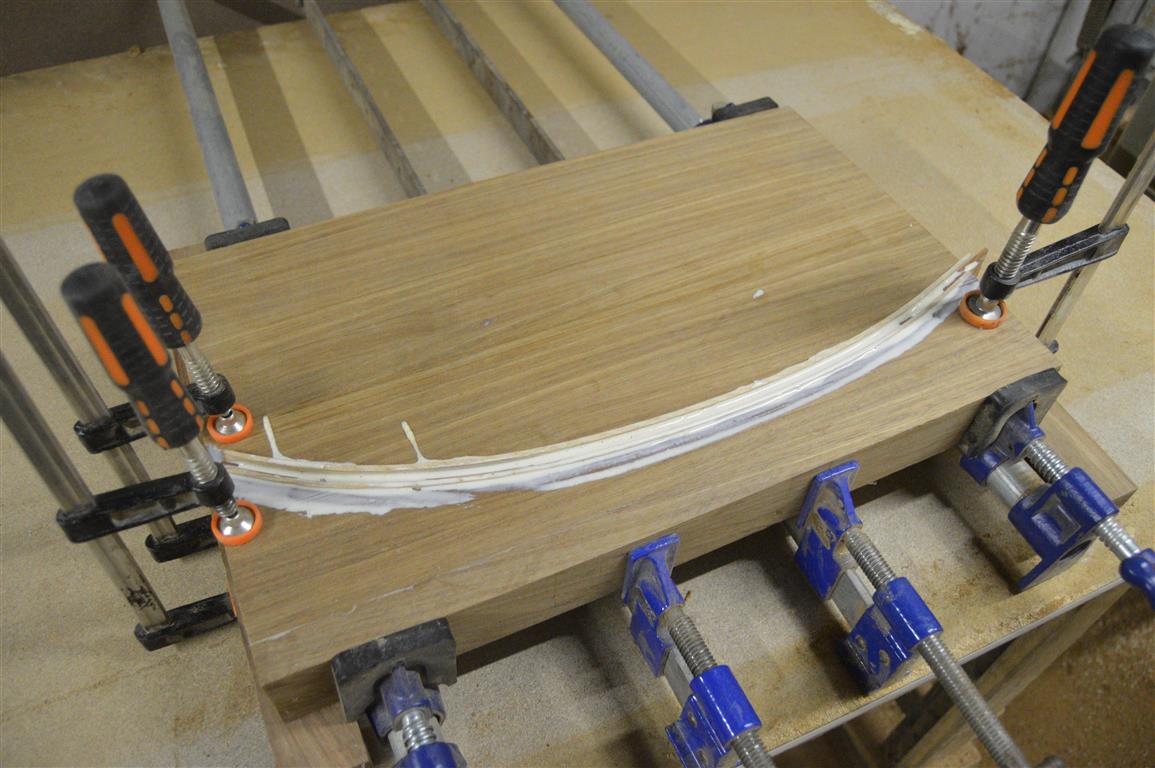
The next step would be to clamp your selected arrangement of thin planks between the two parts of the board.
Spread enough glue evenly across all surfaces that are to be laminated together.
Place the packing along with the two parts of the board in a clamping rig and tension the clamps.
As the clamps are tensioned the packing will follow the curve cut into the board.
When the board is fully clamped it can be left to cure.
Step 5 – Finishing
Once the glue has cured the board can be leveled using a thickness planer.
The process will be repeated for each additional inlay you wish to add to the board.
All that’s left then would be to give the board a good sand down as you would have done when making a normal board, treat it and enjoy it.
Wow, thanks a lot for this guide! Amazing detail and the result is just beautiful.
I’ll jump on it during the weekend.
Take care!
Glad you like it, Harry.
Have fun and remember to work safely.
In my high school days, I used to see people making these woodwork designs and thought of them as very difficult. It seems very easy to make a wooden chopping board. I just might try making one of my own
Hey Aladin,
Every job is easy with the right equipment and the right mindset.
Best of luck making one for yourself.
Jean
This is fantastic. My son is taking wood shop in high school and we have been trying to think of a project to make for mom for mother’s day (which will be here before we know it). This might just be the project for us. I love the pictures you added, it’s a really nice step-by-step tutorial. This will also give me an excuse to buy a new router! Thanks again for sharing, I will bookmark your site and peruse some more when time allows.
Hi Steve,
These boards do indeed make great gifts. I have made quite a few as gifts myself. In fact, the one in this tutorial was a gift for someone.
Have fun making it if you decide to.
Jean